Sending Stories On Air
Reading time ~10 minutes
Each Story item (video, CG template, prompter block) should be cued to become ready for playout at the scheduled time.
|
Important
|
The rundown start time control depends on mode defined via the Cinegy Studio Configurator. Setting the rundown start in Standalone mode is described in the Standalone Mode article. |
|
Note
|
Please mind that automatic cueing occurs together with the playlist update. |
|
Important
|
Refer to the Timers and Triggers paragraph to get more information on setting items triggers. |
|
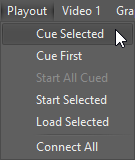
The selected item can also be cued via the "Cue Selected" command in the "Playout" main menu:
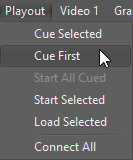
To cue the first item in the playlist, select "Cue First" command from the "Playout" main menu:
|
Note
|
The first script item can only be cued manually. |
|
Tip
|
If you need to cue all items of different types within a Story simultaneously, select the Story caption in the playlist and press the "CUE SEL" button on the clocks control or "CUE" on the Item Editor. |
|
Note
|
The currently broadcast items can also be cued using the "CUE SEL" button on the clocks control or "CUE" on the Item Editor. |
Sending Video
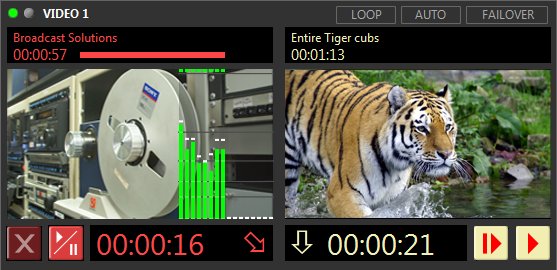
Having cued the video file you are able to send it on air.
|
Press the "Play" button to send it on air. It will be displayed on the "On-Air" monitor. The next item of this type will be automatically cued; its first frame will be displayed on the "Preview" monitor. |
|
To load the first frame of the cued item to the device output, press the "Load" button. It will be displayed on the "On-Air" monitor. The next item will be automatically cued. |
The "Load" button is disabled for Live Input items and the next item is cued automatically.
|
The "Play/Pause" button starts broadcasting of the loaded item. It is played on the "On-Air" monitor. Pressing this button for the second time pauses the playout. |
|
Note
|
The "Play/Pause" button is disabled for Live items. |
|
Note
|
If the video playback is paused, its countdown starts blinking. |
|
The "Stop" button interrupts the current loaded, paused or finished item and resets the device to the initial state. This button is inactive during the on-air item playback. |
As an option, use the commands from the respective video device main menu to perform these actions:
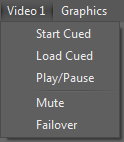
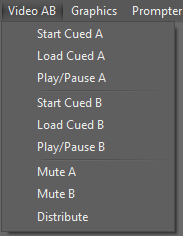
The first group of commands performs the same actions as the "Play", "Load", and "Play/Pause" buttons correspondingly.
The "Mute" command is used for muting the currently played video on the selected device panel.
With the Video AB device enabled on the layout, the following commands are available in the corresponding main menu:
Sending Graphics
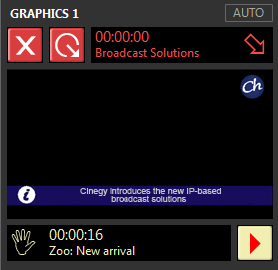
Having cued the Cinegy Title template you are able to send it on air at the specified time.
|
Press the "Play" button to send the Cinegy Title template on air. It will be displayed in the "On-Air" monitor. Next item of this type will be automatically cued, its frame will be displayed in the "Preview" monitor. |
|
The "Hide" button disables the currently broadcasted Cinegy Title template display on playout. |
|
The "Exit loop" button triggers the Cinegy Title scene to leave the loop, if any. |
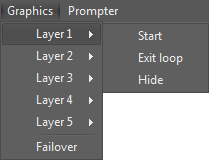
As an option, use the commands from the respective graphics device main menu to perform these actions:
|
Note
|
The commands are available only for the graphics layers activated via the Cinegy Studio configuration tool. |
Sending Text to Prompter
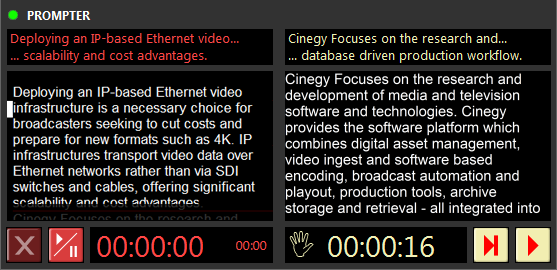
When the text block has been cued, it is ready to be sent to the Prompter device at the specified time.
|
Press the "Play" button to send the text from the preview screen to Cinegy Prompter and start the text scrolling. It will be displayed on the "On-Air" monitor. The next item of this type will be automatically cued; its text will be displayed on the "Preview" monitor. |
|
The "Find cued" button sends the cued item to Cinegy Prompter without actually launching it. The same script text will be displayed on both monitors. Having pressed this button you will need to cue the next item manually. |
|
The "Play/Pause" button starts playing the loaded item in Cinegy Prompter and on the "On-Air" monitor. Press this button for the second time to pause the playback. |
|
The "Stop" button interrupts playback of the loaded item in Cinegy Prompter and resets Cinegy Prompter to the initial state. |
Alternatively, you can use the commands from the respective Prompter device main menu:
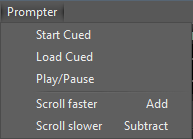
The first group of commands performs the same actions as the "Play", "Find Cued", and "Play/Pause" buttons correspondingly.
Use the "Scroll faster" command to add 10 words to the scrolling speed, and the "Scroll slower" command to subtract 10 words correspondingly.
It is possible to manage the script text scrolling through Cinegy Studio with the mouse or keyboard. All the operations are also displayed in Cinegy Prompter.
Operating in "Play" Mode
| Operation | Resulting action |
|---|---|
Mouse wheel up |
Decrease scrolling speed |
Mouse wheel down |
Increase scrolling speed |
+ |
Add 10 words to the current reading rate |
– |
Subtract 10 words from the current reading rate |
Operating in "Pause" Mode
| Operation | Resulting action |
|---|---|
Mouse wheel up |
Scroll the text down |
Mouse wheel down |
Scroll the text up |
|
Note
|
Operations with the mouse wheel are enabled only when the cursor is placed over the Prompter device monitor. |
On-Air Mode
The "On Air" button enables/disables the counter values display on the clocks control.
|
Initially, the "On Air" sign over the button is displayed in green, meaning that on-air mode is disabled. |
The actual start values in the Rundown panel are not displayed. Once the first item is sent on air, the actual start value(s) will only be calculated for the following item(s) having the automatic start trigger. If the item following the one being on air has the manual start trigger, --:--:-- will be displayed instead of the actual start value and all the next items regardless of their trigger type applied. The clocks controls display zero values for all the counters. This mode can be used for testing and preparatory work, as well as for inconsistent broadcast.
|
When the button is pressed, on-air mode is activated and the sign over the button turns red. The first item of the Rundown becomes cued automatically. |
The system records the actual start of the Story item broadcasting; the clocks and devices controls display all the counters. Initially, the "Actual Start" column displays the scheduled start time values of each item with the automatic start trigger following the one being on air, if any. If an item with manual start trigger follows the on-air item, the actual start value is automatically calculated for this item only according to the on-air item duration. When these items are sent on air, their actual start time values are displayed in blue. This mode is mainly intended for playout of items following one another and having automatic start trigger type applied.
The calculation is performed separately for each device configured and visible on the application layout.
All items above the one being currently on air become highlighted in light gray color in the playlist, and it is not possible to cue them in this mode.
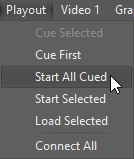
In order to start simultaneously the playout of all cued items assigned to all devices, select the "Start All Cued" command from the "Playout" main menu:
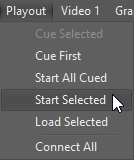
The selected item can be started immediately without being cued via the "Start Selected" command in the "Playout" main menu:
To load the selected item to the device output, select the "Load selected" command from the "Playout" main menu:
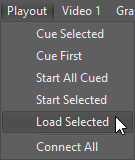
The first frame of the loaded item will appear on the "On-Air" monitor.
|
Note
|
Calculation of the actual start time values differs depending on Cinegy Studio mode defined via the configuration tool. Refer to the relevant articles in this section for details. |
|
Note
|
When Cinegy Studio is configured to work in Cinegy Archive mode, on-air mode can be enabled/disabled directly in the Cinegy Desktop application by using the "ON AIR" button respectively. Enabling/disabling on-air mode in Cinegy Studio turns on/off corresponding mode in Cinegy Desktop. |
|
Important
|
Refer to the News Program article within the Cinegy Desktop manual to learn how to work with Stories. |
Controlling Time
In Playlist
The rundown start time is displayed in the "Sched. Start" column along with individual item duration in the "Duration" column for ready and cued items:
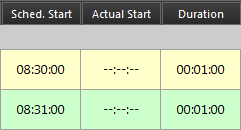
Once an item is sent on air, its actual start is displayed in the respective playlist column, along with actual start of all subsequent items with the autostart trigger,if any. With on-air mode on, the actual start time values are displayed in blue, and the items prior to the one being currently played are locked for cueing.

|
Important
|
The source of the "Sched. Start" column values depends on mode defined via the Cinegy Studio Configurator. Setting scheduled start in Standalone mode is described in the Standalone Mode article. |
|
Note
|
Please note, if an item within a Story is sent on air with a deviation from the schedule, the actual start time values for all the following items in the Story having autostart trigger will be recalculated. |
On Video Device Monitors
Each item should be started manually by default. The device monitors help you control the on-air and cued items timing.

During the item broadcast, the field below the "On-Air" monitor shows the countdown of the item being on air. The field below the "Preview" monitor displays the timer depending on the type specified in the "Preferences" dialog.
If the cued item has been sent on air later than the scheduled time, the "Cued" time of the next item will be recalculated.
On Clocks Panel

The "Rundown countdown" field of the clocks control panel displays the time left until the Rundown end. The Rundown end time is calculated according to the actual broadcast start time and displayed in the "Rundown end time" field. The "Rundown variance" field shows the calculated variance between the scheduled and actual time of the Rundown start.
When the calculated time of the Rundown broadcast expires, the "Rundown countdown" and "Rundown end time" fields become grayed out. The "Rundown countdown" timer starts the countup of the time past the calculated Rundown end.

Playlist Coloring and Statuses
All items in the playlist have a background color. The color changes according to the status of the item.
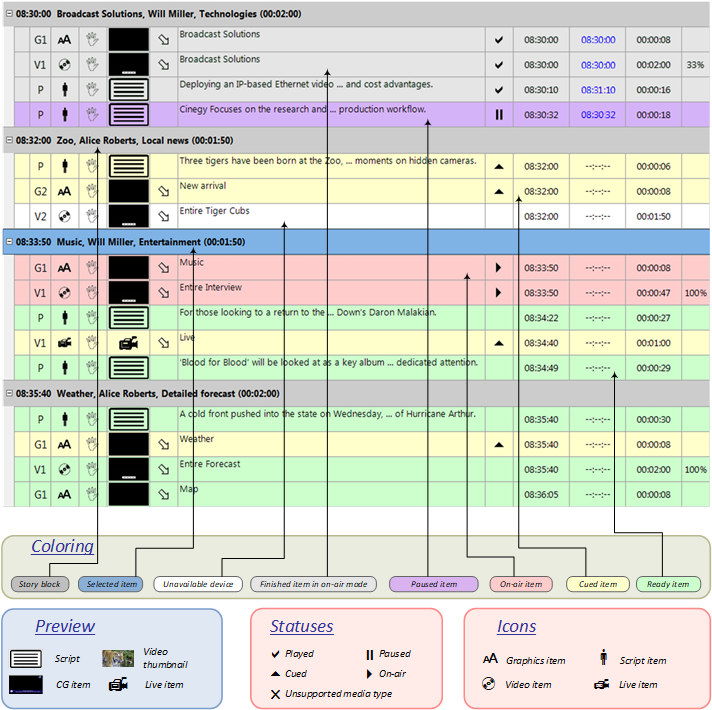
|
Note
|
The scheme above represents a Rundown of Cinegy Studio configured to work in Cinegy Archive mode. |
Proxied Items
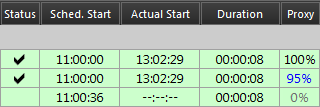
With the item proxying feature configured in Cinegy Playout, every item will be proxied in the background process. The items proxy status is shown in % in the "Proxy" playlist column:
|
Note
|
The proxy value for the on-air item only shows a rate of proxying for the material yet to be played back without regard to the part that has already been played back. |
Proxy Status Coloring
Different stages of proxying are shown with different colors:
|
The proxy status of the item currently being proxied is shown in blue. |
|
The proxy status of the item not being proxied at the moment is shown in black. |
|
The proxy status of the item currently being loaded to the proxy server is shown in gray. |
|
The red background of the proxy status indicates the item source unavailability or failure when reading the item. When this occurs with the on-air item, the progress of proxying is counted backwards and proxied media is played back directly from the proxy folder. |
|
The yellow background indicates that the whole item or some part of the item was proxied with autodegradation (in lower quality). |
Items proxying is performed in a defined order: the active playlist items are proxied first, then proxying starts for the items of all other opened playlists from left to right.
|
Tip
|
For optimal item proxying, it is recommended to use the playlists to be sent on air opened in their playout order only. |
Drop Proxy
The "Drop proxy" option allows you to rerun proxying of the defined item in the playlist. This command is available from the item context menu or via the "Drop proxy" command from the "Item" main menu:
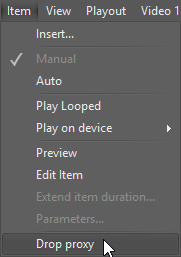
This function can be used for items proxied with autodegradation while the high quality proxy files are needed; or when a problem during item proxying has occurred. All created proxy chunks are deleted and new item proxying starts.


