Cinegy Workspace Logon
Reading time ~2 minutes
Cinegy Workspace 21 consists of pure static content and can be therefore deployed easily on any Web server. For this download the archive from the partner portal and extract its content into a folder that can be served by a Web server of your choice. If you are using IIS, the dedicated folder is: C:\inetpub\wwwroot\workspace_root
|
Note
|
Please note that subfolder name doesn’t have to be workspace_root, it can be any arbitrary name.
|
As a next step, Cinegy Workspace has to be configured. Navigate to C:\inetpub\wwwroot\workspace_root\assets\configuration and open config.json file.
The two important sections are mams and domains.
The mams section contains a configuration list for connecting one or several Cinegy Archive databases, while domains is a list of one or several Windows Domains (or local Windows Workgroups) which will be used to authenticate Cinegy Workspace users.
For example, you have the Cinegy Archive Service, the Cinegy Media Asset Management Service, and the Cinegy Image Service installed locally on your computer. You have two Cinegy Archive Databases: "Cinegy_db_main" and "Cinegy_db_slave" located on "SQL_Server" within "MyDomain". The configuration file will be as follows:
{
		"domains": ["MyDomain"],
		"itemsPerPage": 10,
		"mams": [
	{
		"casEndpoint": "http://localhost:8082/ICinegyDataAccessService",
		"dbName": "Cinegy_db_main",
		"dbServer": "SQL_Server",
		"mamEndpoint": "http://localhost:7601/mams/1.0/api/mam/",
		"name": "Cinegy Main Database",
		"thumbnailServer": "http://localhost:8001/image_service/1.0/api/thumbnail/",
		"uploadStores": [
			{
				"name": "Video Upload",
				"type":"Simple",
				"url":"http://localhost/upload/"
			},
			{
			"name": "Store 1",
			"region": "eu-central-1",
			"roleArn": "arn:aws:iam::12345:role/workspace_user_s3_upload_access",
			"type": "AWS",
			"url": "some-bucket-name-here/subfolder-name-here"
			}
		]
	},
		{
		"casEndpoint": "http://localhost:8082/ICinegyDataAccessService",
		"dbName": "Cinegy_db_slave",
		"dbServer": "SQL_Server",
		"mamEndpoint": "http://localhost:7601/mams/1.0/api/mam/",
		"name": "Cinegy Slave Database",
		"thumbnailServer": "http://localhost:8001/image_service/1.0/api/thumbnail/",
		"uploadStores": [
			{
				"name": "Video Upload",
				"type":"Simple",
				"url":"http://localhost/upload/"
			},
			{
			"name": "Store 1",
			"region": "eu-central-1",
			"roleArn": "arn:aws:iam::12345:role/workspace_user_s3_upload_access",
			"type": "AWS",
			"url": "some-bucket-name-here/subfolder-name-here"
			}
		]
	}
],
	"remoteConfigHost":"https://cblzme81s2.execute-api.eu-west-1.amazonaws.com/prod/v1/config",
	"useRemoteConfig": false
}
Having configured all required services and components, in the address bar of your web browser enter the address in the following format: http://host_name/workspace_root
For example, if you are using IIS and have installed Cinegy Workspace locally in the C:\inetpub\wwwroot\workspace folder, the address will be:
The following "Login" page opens:
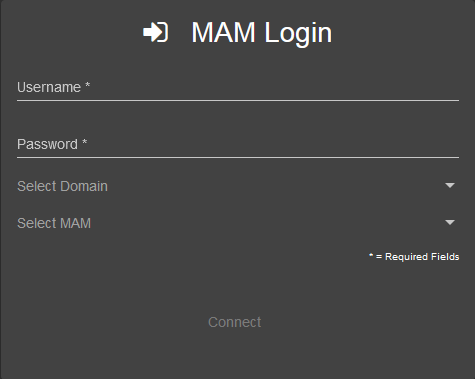
On the login page, define the following parameters, all fields are mandatory:
Username – enter the name of the Cinegy Archive database user.
Password – enter the password of the Cinegy Archive database user.
Domain – select your working domain.
Database – select the Cinegy Archive database.
|
Having specified all required parameters, press "Connect" to establish the connection. |
