NVIDIA Drivers installation
Reading time ~5 minutes
Cinegy products can leverage the capabilities of NVIDIA GPUs in your system to optimize performance by distributing certain processing tasks to the GPU. To ensure reliability and efficiency, it is essential to have the correct NVIDIA drivers installed on your system.
This article covers the various aspects of selecting, installing, or updating NVIDIA drivers and provides a detailed guide to help with the process.
Before You Start
Before downloading any driver, identify your NVIDIA GPU device (type, model, etc.) and operating system. Please also review the release notes for your NVIDIA driver for any known issues and a compatible operating system for example.
To ensure compatibility and optimal performance, read the system recommendations and release notes specific to the Cinegy product you intend to use. This will provide you with accurate information on any required driver version as well as known NVIDIA-related issues, ensuring seamless integration with your hardware and software components.
To install NVIDIA drivers on a public cloud platform, ensure you follow the instructions provided by the respective platform provider for the cloud instance being utilized. Below are the links for the AWS and Azure platforms respectively:
|
Note
|
If you are logged in as a guest or standard user, Windows will not allow you to install the driver. Some organizations do not allow users to control what they install and how they can manipulate system and application settings. You may need to contact your system administrator for help installing the driver in this situation. |
|
Note
|
Typically, the Windows operating system updates the GPU device driver version through Windows Update. During the driver update process, the GPU device instance is suspended. This may lead to a failure in the operation of Cinegy software using this GPU device. The application must be restarted to reinitialize the video board after updating the driver. We recommend disabling automatic driver updates on Windows to make the process more controllable. |
Choosing a Suitable Driver Model
NVIDIA GPUs can generally operate in one of two modes: Tesla Compute Cluster (TCC) and Windows Display Driver Model (WDDM). TCC mode disables Windows graphics and is used in headless configurations, whereas WDDM mode is required for Windows graphics.
|
Caution
|
Cinegy software requires WDDM mode of NVIDIA GPUs. |
NVIDIA GPUs also come in three classes:
-
GeForce — generally only supports WDDM mode.
-
Quadro — usually defaults to WDDM mode but can be used as TCC compute devices as well.
-
Tesla — usually defaults to TCC mode. NVIDIA GRID drivers provide the capability to switch the GPU from TCC to WDDM.
NoteAn NVIDIA license may be required for Tesla GPUs for specific usage scenarios. Please see this NVIDIA page for more details. NoteWindows Server 2016 is not supported in NVIDIA GRID driver release 14.2 or later, while Windows Server 2019 is not supported in NVIDIA GRID driver release 17.0 or later.
NVIDIA Drivers Installation
During the NVIDIA driver installation process, the following steps will need to be completed:
Step 1. First close all Cinegy applications that are currently running on your machine.
Step 2. Go to the NVIDIA drivers download page.
Step 3. Here select the Product Type, Product Series, and Product that matches your GPU.
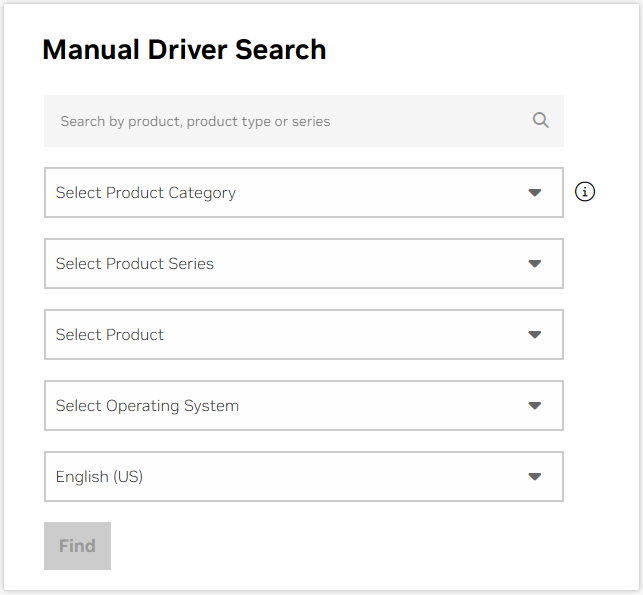
In the "Operating System" field select the OS from the list.
In the "Download Type" field select the option that best matches the product type you selected:
-
For NVIDIA RTX / Quadro GPUs, select "Production Branch/Studio".
-
For GeForce or TITAN processors, select "Studio Driver" (SD).
|
Note
|
Please note that the public drivers currently available for Tesla only support TCC mode. For drivers compatible with WDDM mode, please contact NVIDIA directly. |
Then select the appropriate language.
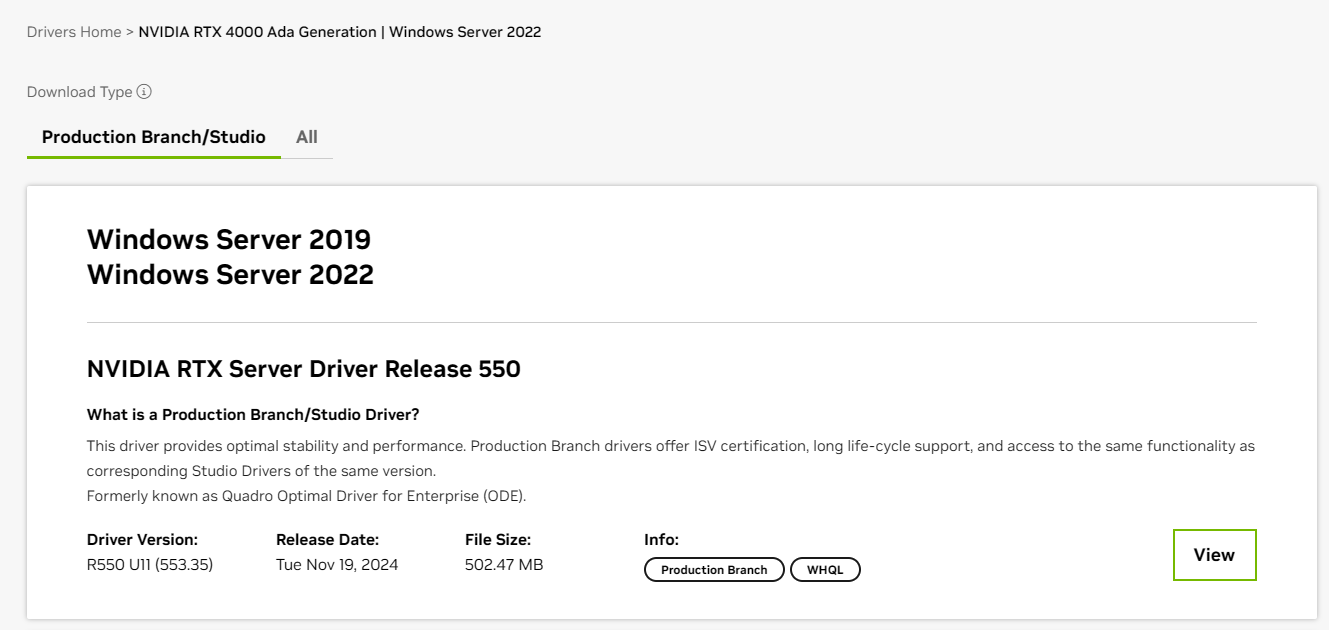
Step 4. Click the  button to be taken to the appropriate page, where you can click
  to get the driver installer.
Step 5. Once the driver installer is downloaded, double-click the executable file of the installer to start the installation.
Step 6. If the "Manage User Accounts" dialog box appears, click "Yes" to give the NVIDIA launcher access to your hard drive.
Step 7. Accept the default extraction path for the temporary driver files (preferred) or choose the desired one instead.
Step 8. If prompted, you can install the driver with or without GeForce experience and click the "AGREE AND CONTINUE" button to proceed to the installation options.
Step 9. In this step, you can choose the "Custom (Advanced)" option which is suitable for clean installation or allows you to select the components you want to install, or use the "Express (Recommended)" installation to upgrade existing drivers.
Step 10. When the installation is complete, click "CLOSE" to abandon the installer.
Step 11. Restart the system, even if you are not prompted to do so.
After installation is complete, verify driver installation by going to Windows Device Manager > Display Adapters and checking that the Driver Version and Driver Date fields are correct in the "Driver" tab of the properties for your NVIDIA GPU device.
Check that after installing a dedicated graphics card, the onboard graphics card (e.g. Matrox) is disabled using the Windows Device Manager > Display Adapters and selecting the "Disable device" option for that card.
|
Note
|
To optimize the performance of your NVIDIA graphics board, it is recommended to use the "Prefer maximum performance" value for the "Power management mode" parameter in the NVIDIA Control Panel. |
|
Important
|
If you encounter any issues or require assistance during the driver installation, please visit the NVIDIA customer support website for troubleshooting help. The knowledge base on the website provides answers to common queries, and you can also seek personalized support from NVIDIA experts. Their guidance and assistance aim to ensure a smooth and successful installation process for your NVIDIA drivers. |