Cinegy Stream Switcher Service
Reading time ~3 minutes
The Cinegy Stream Switcher service manages incoming RTP and UDP streams; therefore, it should be installed on a computer with access to the IP network.
Configuration
|
First of all, Cinegy Stream Switcher should be configured using the Cinegy Stream Switcher Configurator. To launch it, go to Start > Cinegy > Stream Switcher Configuration Tool or use the corresponding shortcut on your desktop. |
The following configuration window will open:
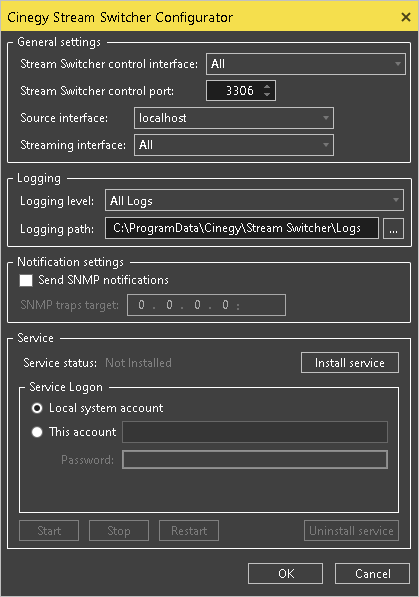
General Settings
In the "General settings" group, define the following settings of the controlled interfaces:
-
Stream Switcher control interface – use the drop-down list to define the IP address of the network adapter listening to the Cinegy Stream Switcher server. Select the "All" option to listen to all available network adapters.
-
Stream Switcher control port – define the Cinegy Stream Switcher server port.
NoteThe IP address and port are used by the Cinegy Stream Switcher Control application to manage the Cinegy Stream Switcher service. -
Source interface – use the drop-down list to select the IP address of the network adapter receiving the RTP/UDP stream (e.g., Cinegy Playout server).
-
Streaming interface – select the IP address of the network adapter performing streaming of the outgoing signal from the drop-down list. Selecting the "All" option allows streaming to all available network adapters.
Logging Settings
The Cinegy Stream Switcher logging parameters are defined in the "Logging" group of the configurator. Define the following logging parameters:
-
Logging level – use the drop-down list to select one of the following available log levels, depending on the desired logging details:
-
Disabled – no logging.
-
Errors – only unexpected events in the application flow, like errors, exceptions, or conditions that do not cause the application to crash.
-
Warnings, Errors – critical information, errors, warnings.
-
Notifications, Warnings, Errors – notifications of troubles such as license loss or unexpected shutdown.
-
All Logs – the entire range of events in the general application flow.
-
-
Logging path – define the destination folder for storing log files. You can enter a path via the keyboard or use the
 button to select the required folder.
Notification Settings
Along with logs, Cinegy Stream Switcher can send SNMP traps. For this activate the "Send SNMP notifications" option in the "Notification settings" group and define the SNMP traps target IP and port.
Service
The Cinegy Stream Switcher service performs incoming analysis of streams.
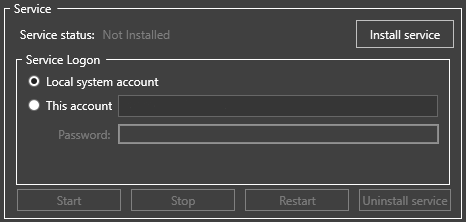
In the "Service Logon" settings section you can specify the account under which the service logs on. You can use the local system account or a specific account with sufficient permissions (including the "log on as a service" privilege). Using an account without sufficient permissions or rights will cause outright failure or faults, which will be tracked in the diagnostic logs. You need to enter the login name and password for this specific account in the corresponding fields.
|
Important
|
The service logon changes will be applied only after the service restart. |
The "Service Status" field indicates whether the Cinegy Stream Switcher service is installed, running, or stopped.

|
Press the "Install" button to install the Cinegy Stream Switcher service as a Windows service. |
|
Once the service is installed, it should be started manually by pressing the "Start" button. |
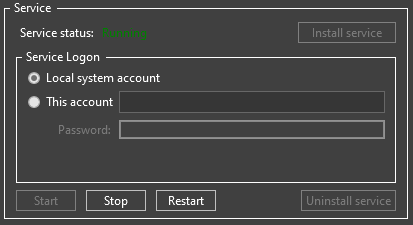
The service can be stopped, restarted, or uninstalled by pressing the corresponding buttons.
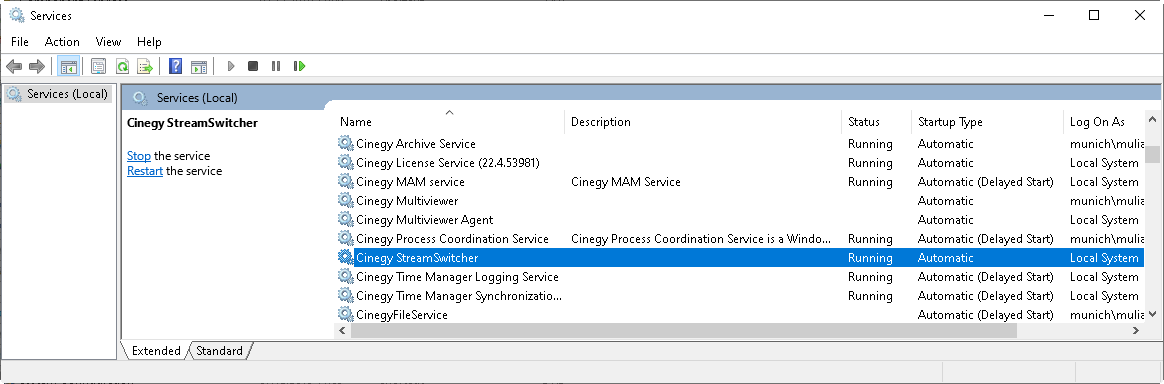
The service can also be managed as a standard Windows service:
Having configured all the necessary settings and started the Cinegy Stream Switcher service, you can proceed to configure monitored channels using the Cinegy Stream Switcher Control application.