Using Cinegy Playout Engine with Wowza Streaming Engine on AWS
Reading time ~8 minutes
This post is intended to provide general guidance on how to set up the Wowza Streaming Engine AWS instance with the Cinegy Playout engine-generated input stream.
Environment Configuration
Deploy Cinegy Air on AWS EC2 by using either the prebuilt AMI available on AWS Marketplace or by installing it onto an instance you have deployed.
To get Wowza Streaming Engine deployed on Amazon, navigate to the Wowza Streaming Engine web page.
The instance type to choose depends on the Wowza features you wish to use. For example, the transcoding feature can generate a larger workload, thereby a larger instance type is required.
Once the Wowza instance is deployed, the Cinegy Playout engine should be configured to send a unicast stream to the internal IP address of the new instance.
|
Important
|
Please refer to the Cinegy Playout Manual for assistance on setting up the Cinegy Playout engine. |
Additionally, the security group that is created as a part of the Wowza instance deployment needs to have an extra inbound rule added to it as follows:
-
Type – custom UDP rule;
-
Protocol – UDP;
-
Port Range – depends on the port you wish to use for your unicast traffic and the number of streams you are sending to the Wowza instance (e.g., 1234 or 1234 – 1245);
-
Source – this can be the subnet of your VPC or just the IP of the Cinegy Playout engine instance (e.g., 172.31.0.0/16 or 172.31.10.18/32).
If you want to keep this allowance separate from the default Wowza rules, you can create an additional security group for this traffic and apply it to the instance.
Once you have your Cinegy Playout engine sending a unicast stream to the Wowza instance, and the traffic can reach the instance, you should configure the Wowza Streaming Engine for the video feed to be available.
Initial Application Configuration
Log in to the Wowza management interface using the instance public IP and the supplied user details. Navigate to the "Applications" tab in the menu bar:
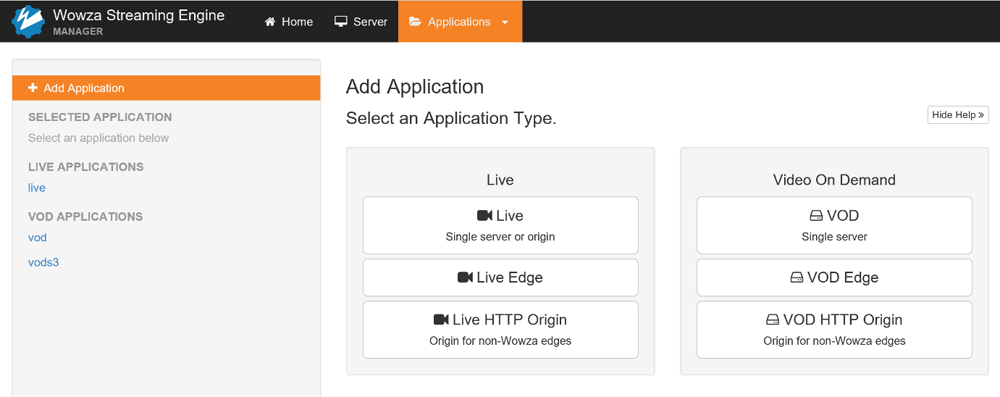
Select the "live" option from the "Applications" contents panel:
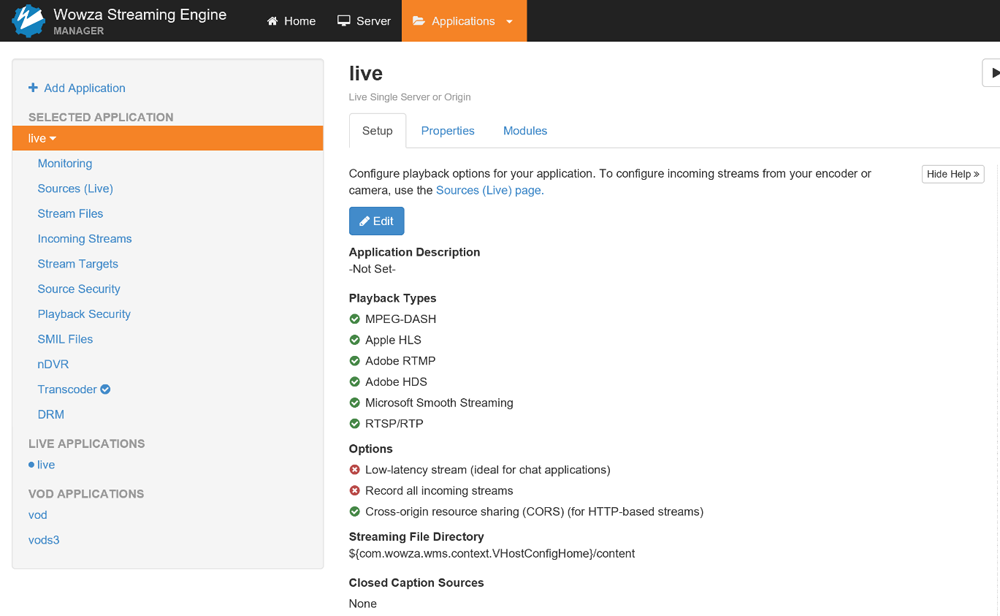
Press the "Edit" button in the main pane and ensure that the relevant playback types are selected for your solution. The default directory for storing the created stream file(s) is displayed in the "Streaming File Directory" section and can be changed if required.
Once you have configured the live application, press "Save" to apply the changes.
The next step implies creating a stream file for the incoming Cinegy Playout engine unicast stream.
Stream File Creation
Navigate to the "Server" tab in the menu bar and select "Stream Files":
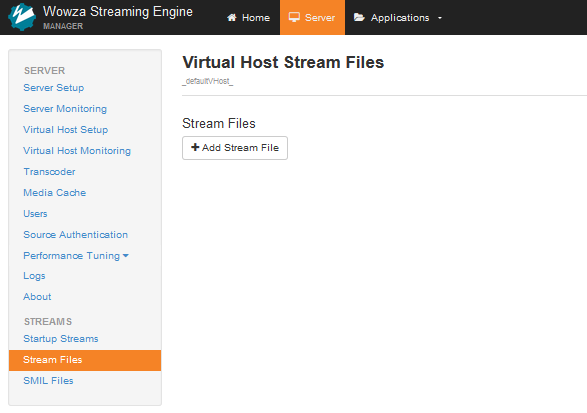
Press the "Add Stream File" button; the following dialog box appears:
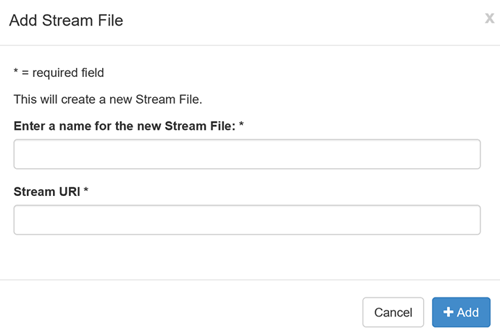
Fill in the top field with a name suitable for your new stream file. In the "Stream URI" field, enter udp://0.0.0.0:XXXX
With the required information specified, the configuration window looks as follows:
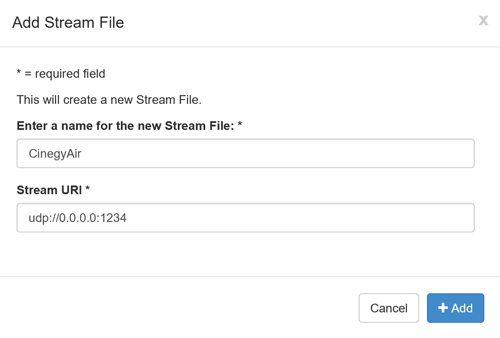
Press the "Add" button and then select the "Return to Stream Files" link to return to the main "Stream Files" pane.
Stream File Connection
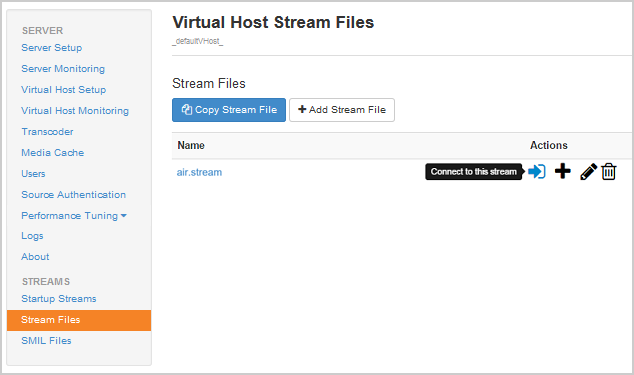
In the "Virtual Host Stream Files" window, you will see the entry with a new stream file. Click the "Connect to this stream" button:
In the "Connect a Stream File" dialog box, check the options to enable a live application to connect to the stream. The given configuration is presented in the dialog box below:
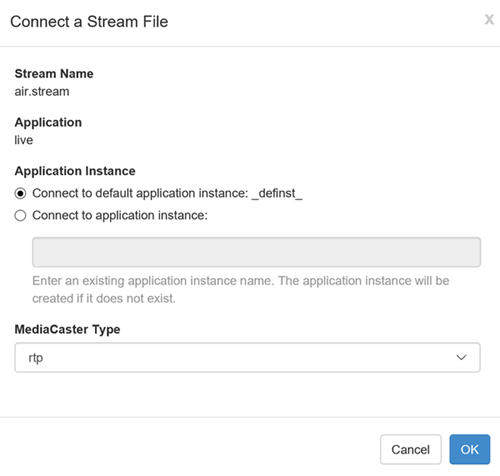
As a result, Wowza will use the default application instance and the RTP type for the stream.
Proceed by pressing the "OK" button to establish the stream file connection. A spinning Wowza logo and then a green banner at the top of the screen will appear.
Once the connection is successfully established, you will be informed with the "Connection successful" note followed by the name of your stream file.
To ensure everything is configured properly, select the "Incoming Streams" option from the "live" drop-down list of the "Applications" contents panel. The following window will appear:
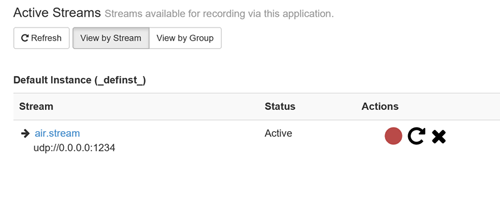
Refer to the "Status" column. If the status is displayed as "Active", you can proceed to the next step. Otherwise, go back and check your security groups and related settings to make sure the unicast stream is reaching the Wowza instance.
View Stream Output in Wowza Player
You can test your stream output using the built-in Wowza player. This will initially help to play back the configured stream output and prevent possible problems that might occur in the next steps.
Go to the following link to test your stream: https://www.wowza.com/testplayers. The following window will be opened with the Adobe RTMP player to be used:
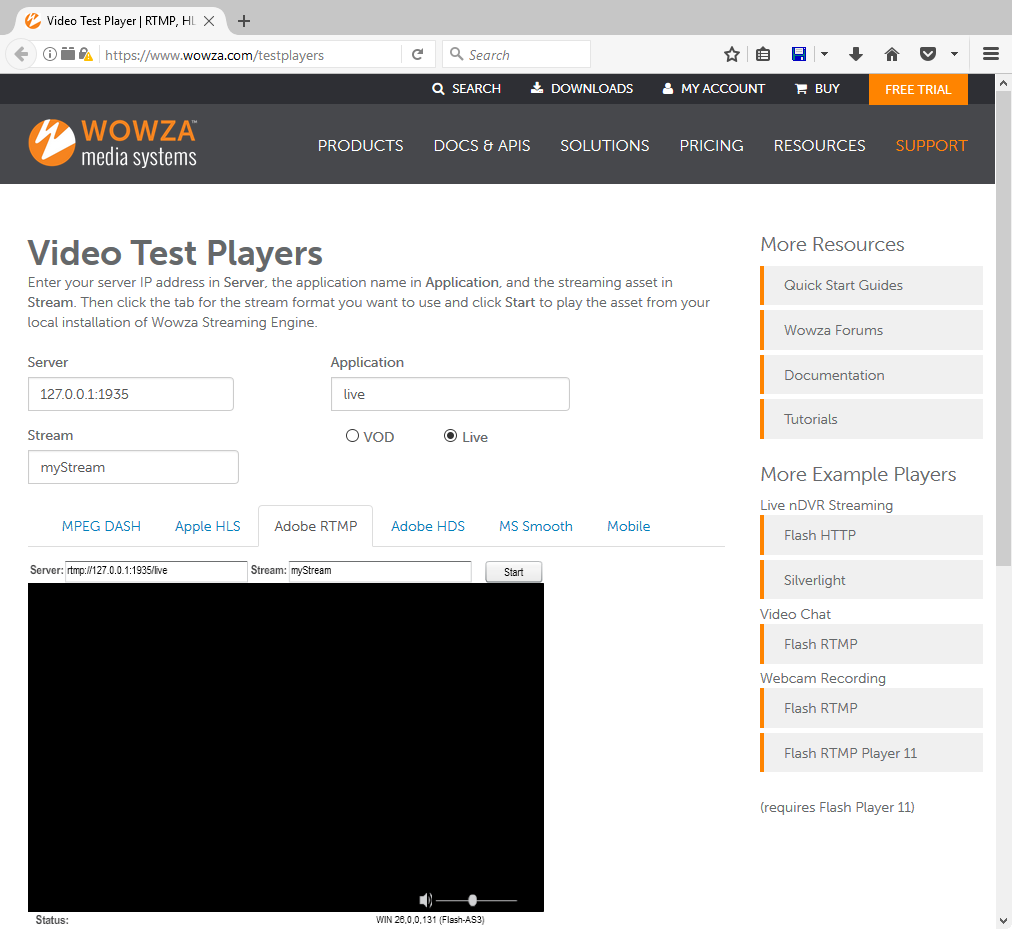
In the "Stream" field, define the name of your stream file, including the .stream extension. Other parameters can be left without changes.
Then press the "Start" button. The status indicator below the main window will now display "Playing", and after a short pause, the stream output will be playing in the main window.
Wowza Streaming Engine supports all common third-party HTTP and Flash players that can be used for test purposes. For example, to use the VLC video player, just copy the contents of the "Server" field from the "Test Players" window and append a forward slash to the end with the name of the stream file, as it is shown in the following example: rtmp://1.2.3.4:1935/live/CinegyAir.stream
Depending on the bitrate of the stream being produced by the Cinegy Playout engine, you may need to use the Wowza transcoding feature to create one or more additional streams of lower bitrates and resolutions.
|
Note
|
Before using transcoding, ensure that the Wowza EC2 instance has enough CPU, memory, and I/O available. To test it quickly, simply turn the transcoding option on and view resource consumption for the instance using the AWS management console. |
Using Wowza Transcoding
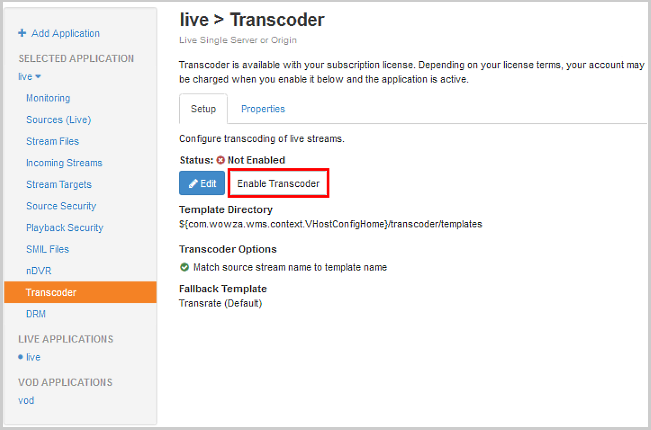
The first step in using the transcoding feature with a Cinegy Playout engine incoming stream is to activate the capability.
To do this, navigate to the "Applications" contents panel and select the "Transcoder" option from the "live" drop-down list. In the main pane, click the "Enable Transcoder" option:
|
Note
|
Application restart is required for this action to take effect. |
Once the application is restarted, click the "Transcode (Default)" link in the "Transcoder Templates" section of the "Setup" tab:

You will now see a list of transcode presets that can be enabled "as is", edited, or deleted. A new one can be added here as well if required.
The simplest way to check the transcoding is to enable any three presets to have the range of output streams. To do so, click the link under the "Preset" column and press the "Enable Preset" button. The enabled presets are properly marked with the ticks in the "Enabled" column:
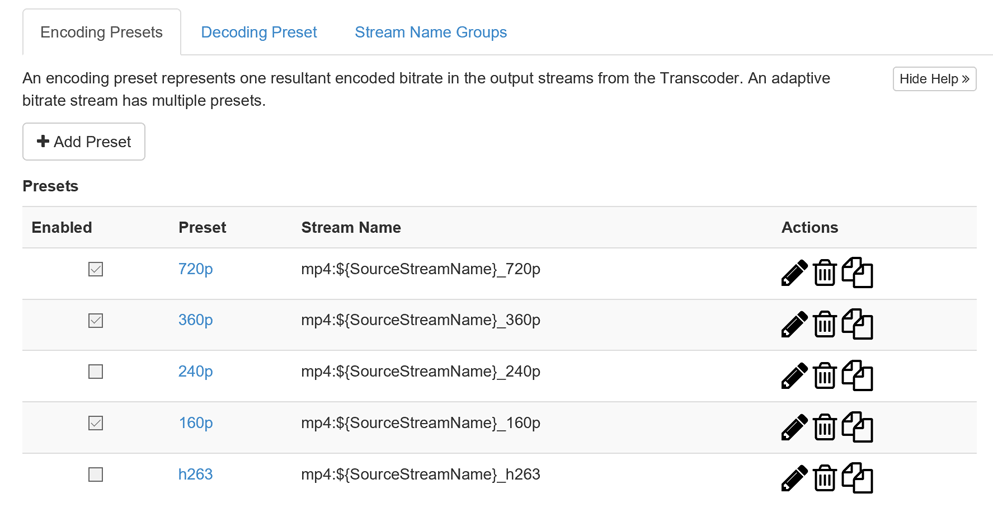
Once the required presets are enabled, ensure that all transcoding sessions can use the same transcoder template.
To do this, return to the "live > Transcoder" pane and press the "Edit" button. In the "Transcoder Options" section, deselect the "Match source stream name to template name" checkbox, and then click "Save".
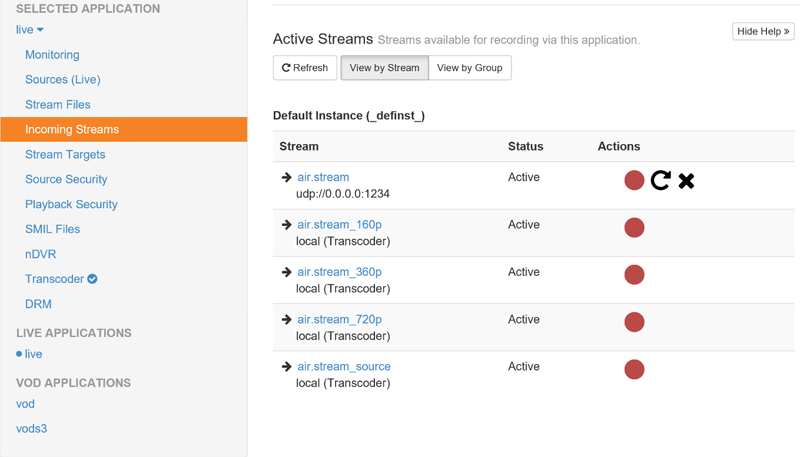
Navigate to the "Applications" contents panel and select the "Incoming Streams" option from the "live" drop-down list to see the list of active streams, including the transcoded ones:
Creating a SMIL File
The last step is setting up adaptive bitrate delivery using Synchronized Multimedia Integration Language (SMIL) files.
Once the transcoded streams are set up, they should be added to an SMIL file for further use.
Before creating a SMIL stream file, make a note of the stream names specified through the "Transcoder" option, as you will need them for the next configuration step. You should also know the video and audio bitrate of your streams, along with the video width and height.
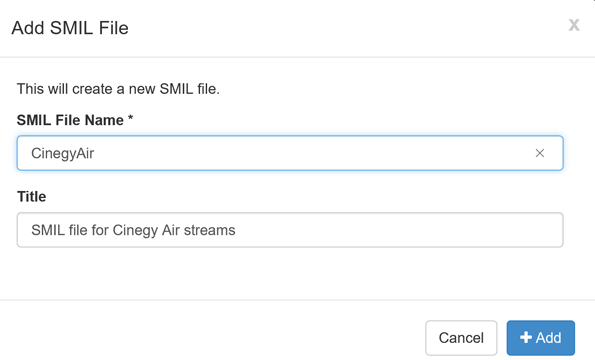
To get started, click "SMIL Files" in the "live" drop-down list and press the "Add SMIL File" button:
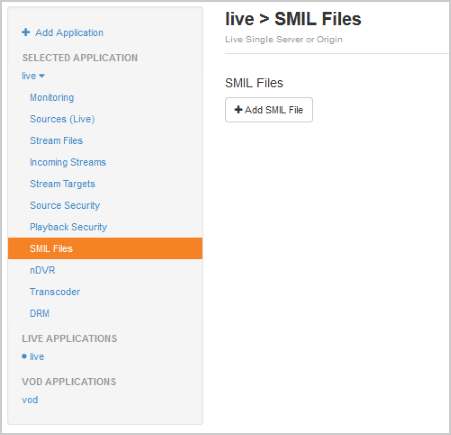
Fill in the following fields with the corresponding data and then press the "Add" button:
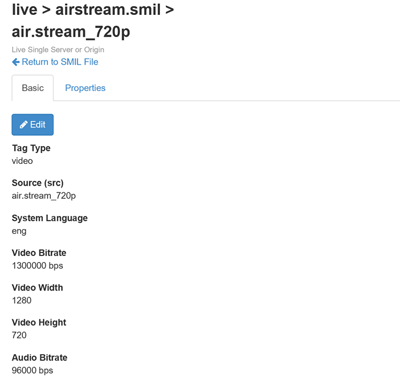
In the "Add SMIL Stream" dialog box, select the video stream type, and then click "Add". The new SMIL stream page appears. Enter the stream data you have noted beforehand. The "System Language" option should be left without changes, indicating the video stream language.
The image below shows a completed entry for the 720p transcoded stream:
You can proceed with adding additional streams to the SMIL file. Once completed, it will look as follows:
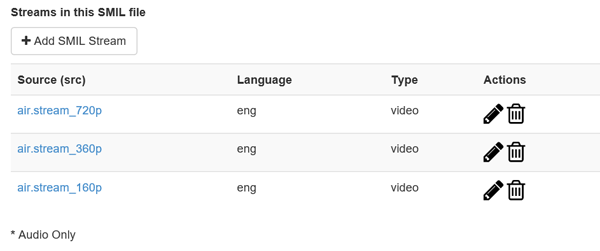
Click the "Return to SMIL Files" link to exit the current dialog box. You will now see your SMIL file in the "SMIL Files" pane. It can be edited if you need to change the priority order of the streams. You can also test the SMIL file using the "Test Players" option.
Now you have a configured Wowza Streaming Engine, which will deliver a video stream to a device suitable for the available network bandwidth.
The last option that you may wish to configure is "Startup Stream Settings". This allows you to have your stream automatically available when the server starts.
This can be done using the "Startup Streams" option under the "Server" contents panel or through the "SMIL Files" section under the "Actions" column.
|
Important
|
This post covers the basic configuration needed to be done to have access to the Cinegy Playout engine-emitted stream over the Internet. There are even more options available within Wowza software, which may be helpful for your environment. More information can be found on the Wowza website. |