Introducing D2CAM
Reading time ~23 minutes
This post is a slightly amended version of the presentation that Lewis Kirkaldie gave during Cinegy’s Technical Conference 2021, which was live-streamed on March 25th and is now available to view as a recording. It is about D2CAM. You might ask yourself immediately – what is D2CAM?
The story starts in the first days back after the Christmas and New Year holidays, when Lewis called up Jan and Daniella and pitched to them the idea of having some kind of event – similar in spirit to what Cinegy used to do with the physical technical conferences, but with more audience participation and compressed into less time. Something that might also help establish what we’re doing in the short term and medium term, and give a deadline to hit for completing some tasks, one of the things we realized we missed with the absence of the big conference events, which fell victim to the restrictions of the coronavirus.
So we pitched the idea of doing virtual TechCon, and we pitched the idea of making it quite demanding on us as staff to deliver, because fresh back from vacation, everything always looks easier than it turns out to be!
We wanted to make it as interactive as possible because we were already doing webinars and presentations, and we wanted to actually have a live element to all of it that helps bring stuff together in a way that we haven’t been able to do with just a webinar or pre-created clips we could post to YouTube. We wanted to try and build upon the open day that we did in Bristol back in 2019, and try and bring the scale of that up to make it a combination of what we did with the streamed event for the Bristol Open Day and with the physical events we used to run in Munich.
Having decided "what" we’d do, we turned to the "how" – which is somewhat limited by the current global travel and workplace restrictions. We decided that we’d dust off our modest in-office studio in Bristol and apply some upgrades. Calling Jan to discuss our shopping list, we indicated we might need to buy some more cameras… not being someone who restricts himself to convention, Jan’s response was to ask why buy new cameras when we could just buy some new iPads.
iPads have got awesome optics these days, and with the increased optics, we can do so much more, and we could use this as the excuse to finally get around to embedding the Daniel2 codec into Apple devices and Android devices. Indicating how impressive the latest optical specifications were for these devices, particularly the Pro Edition, and given our experience with the iPhone, it seemed possible we could do something.
He also pointed out very correctly that at the end of the event, we would have some iPads in the office, which is much more useful than some Blackmagic Micro Studio Cameras that would then sit there doing almost nothing for a year. It all seemed like a brilliant idea, but we did just have one small problem – nothing was out there that streamed with the quality and stability we wanted. We looked at the NDI application, but it seemed to be again quite a highly compressed format that was also stuck at 30 fps – this was not going to integrate well with our 50-fps studio setup. He also pointed out very correctly that at the end of the event, we would have some iPads in the office, which is much more useful than some Blackmagic Micro Studio Cameras that would then sit there doing almost nothing for a year. It all seemed like a brilliant idea, but we did just have one small problem – nothing was out there that streamed with the quality and stability we wanted. We looked at the NDI application, but it seemed to be again quite a highly compressed format that was also stuck at 30 fps – this was not going to integrate well with our 50-fps studio setup.
We looked around, but everything forced us into a highly compressed stream, and we wanted to see if we could actually get as high a quality as possible. We wanted to see if we could produce a stream that could potentially be chroma-keyed or post color corrected in a way that is difficult to do on top of the highly compressed format with reduced color space.
This meant we turned to the old trope of say, "well, if you want something done right, you’ve got to do it yourself".
The stage was set: we had a business goal – Virtual TechCon. We had a location – multiple, in fact, since people would be working in our office studio, connecting on from home working locations, or viewing from their own offices or homes. We had some dreams of technology, and we also had the idea that we could create a presentation about what we made and how we made it. This meant we should work to see if we can use our own technology mixed in with the kind of technology our customers might also use out in the world. So, we knew we wanted to try and demonstrate interoperability. And finally, we wanted to try and end the process with some apps we could get feedback on from some customers, and see if they think it is worth our continued investment in building.
Lewis and Jason had agreed to check out how they look in the studio and think about building something. So D2CAM was born – the Daniel2 codec-based camera for iOS devices. We had to try and actually make it work. We had to work out how we would transport this stuff over the network. We had to figure out a lot of different moving parts, and this is the story of what we did do and how we did do that, and where we might go from here with that.
Why Build an App in the First Place?
First of all, we looked around at the state of the art, at what was available. We looked at the NDI apps, we looked at various other streaming apps, and none of them quite did what we wanted. None of them targeted broadcasters specifically. None of them had features that broadcasters might hope for, such as 4:2:2 color spaces, i-frame codecs that would be easier to edit, and more resistant to errors.
Having looked at these apps and then having looked at the physical hardware, we realized that with the newest iPad Pro and the iPad Air, we can plug in USB-C and USB-C Ethernet. The fact that they now have USB-C connectors that could accept 5Gbps network adapters, we could avoid the plague of Wi-Fi, and then transfer a really high data rates to maximize the quality of what was normally available streamed out from this hardware.
What Are We Filming With?
Let’s see what we’ve got set up. It’s quite a modest setup:
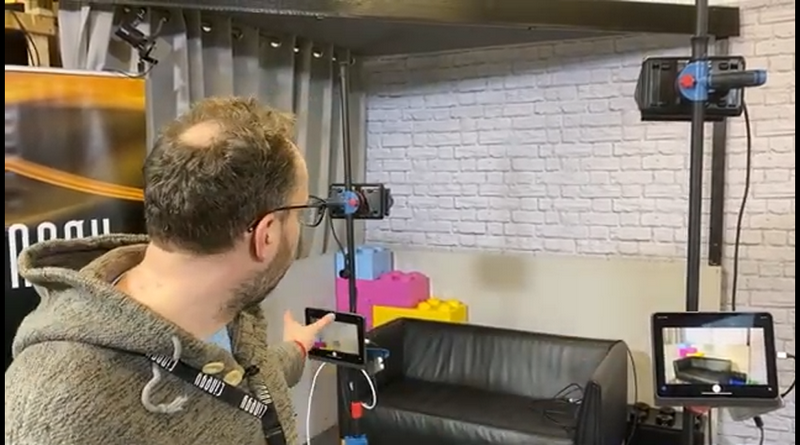
Running on here is the D2CAM app. We’ve got a tighter and a wider shot from two iPads, and they’re running our app on here.
Now we don’t want to trust Wi-Fi, and fortunately, modern iPads have USB-C connectors. We have just a few USB-C connectors, which take us to a hub, and then we can power that hub as well, and then connect.
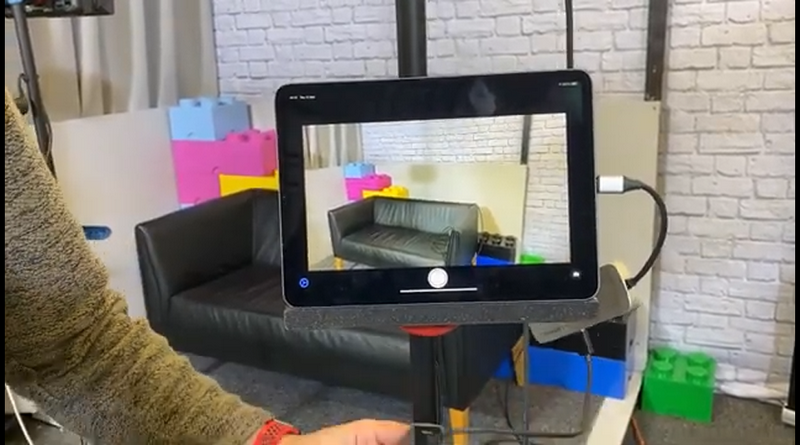
In this case, we’ve actually gone to the trouble of putting 5Gbit USB-C Ethernet adapters on there. We actually have enough headroom to do some testing with 4K moving forward. We’ve built these little setups. This is just a mount to act as our little stand.
We’re really happy we’ve got our IP cameras that we’ve built and put in place here. The app just sits and runs and runs for days and days and days, outputting in the Daniel2 codec our output stream, which we can then pick up on our servers and use in our input. We’ve been really happy with the results we’ve got from these, and the great thing is it’s a really simple setup. We can just pop these iPads off and use them as iPads for the rest of the time. We might want to give them a second life, and then we can just drop them into the studio and plug in the USB-C hub, and they’re ready to go and be our cameras again.
We’ve been very pleased with the way that the lenses on the iPad Pro and the iPad Air have given a great deal of quality, but also a decent light pickup. While we’ve got quite a lot of lights in here, the quality we’re getting from the sensors is really beautiful, and as we then feed that into our Cinegy Air engine, it looks as good as any of the broadcast cameras we’ve had before.
With this setup, this is how we’ve actually filmed and are live-streaming the event.
What Happens With The Output?
Now you’ve seen the way we set up the studio, let’s take a look at how this stuff is connected up more closely.
So, to have a look behind the scenes, when we decided to do the stream from our studio, we had the usual issues to solve, like how we’re going to get our remote contributors in, what are we going to use to cut between the cameras in the studio and the packages, as well as all the audio and talkback to resolve.
Audio was simply dealt with by using the RODECaster. All the local microphones can come in there, which can also deal with the mixed minus and clean feeds. To go back for talk-backing for people’s earpieces, as far as cutting the streams is concerned, we could have used Cinegy Live, but because we wanted to show interoperability with third parties, we decided to go with OBS – a very popular streaming software, that is available and downloadable free of charge. We thought, we would show you and use the OBS, but what about interconnecting between the different sites? How do we get our remote people in?
Well, they have Cinegy Encode at their homes, which sends SRT across the Internet, that’s landing here and then again, to show interoperability. We’re flipping that to NDI and then bringing the NDI into OBS, so we can compile it all together before finally sending out to our distribution.
What D2CAM Actually Is And How That Is Built?
To make any of this work, we needed to extend our skillset into development on platforms that we at Cinegy don’t usually target – Android and iOS. We were able to build our application using the latest Apple Swift UI components, which gave us a cross iOS/Mac platform to work on for the front-end elements. In parallel, our developers have been working to mirror the work we have in iOS on Android – it was important to us to try to get platform independence and parity. But we are running today using an iPad because it’s what we got working first!
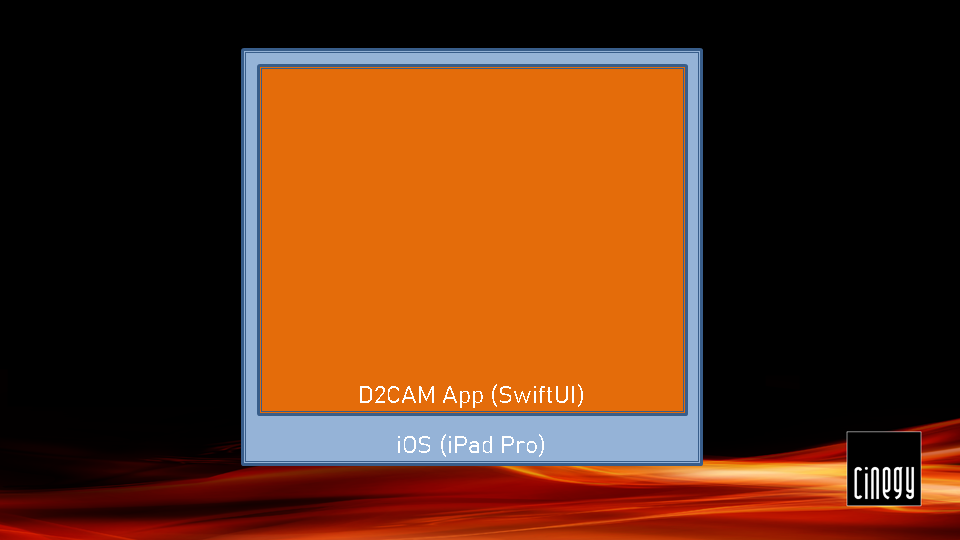
At the core of the D2CAM app is the Daniel2 codec.

It’s our incredibly powerful, fast, optimized codec, that’s designed for multi-threaded cores, parallel compression on GPU and in CPU.
If we look around, what this app is built from, you will see that at the center, we have the codec.
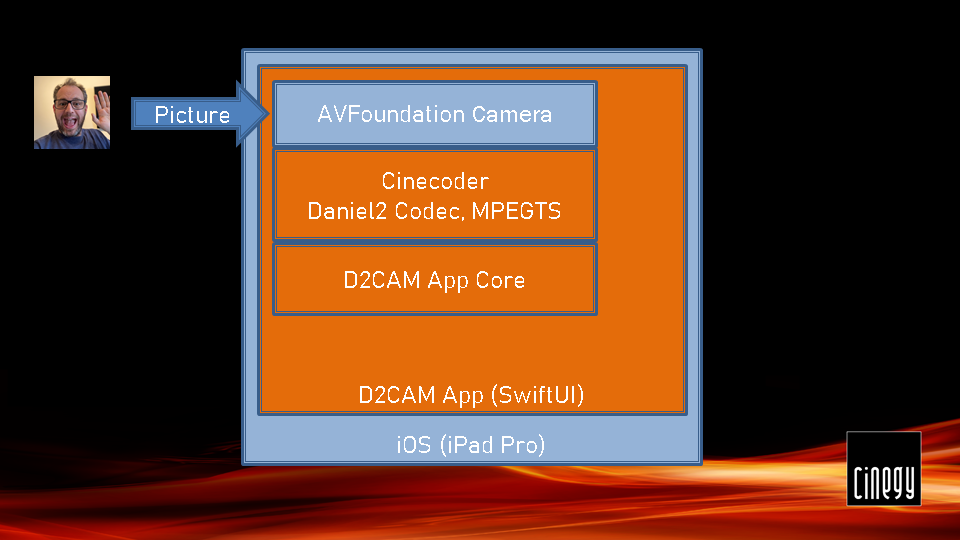
It is connected up to the AVFoundation framework, which is available in iOS, so we can access the brilliant optics on iPhones and on iPads to access frames and compress them instead of going to the onboard hardware to our software-based Daniel2 encoder.
Now the bitrates shoot right up with Daniel2. You really need to remember to compare the Daniel2 codec with other codecs, such as AVC-Intra 100, ProRes, DNxHD. It competes with these kinds of codecs. If you’re recording or streaming with Daniel2, you’ve got to be prepared for a lot more bitrate than you would be getting with H.264 and H.265. On the plus side, the quality can go much higher, and you can keep many features in there that you would lose normally by using the onboard chips.
Surrounding this core app, there is a basic application framework at the moment that lets us live-stream this. And here we bolt on the SRT network library.
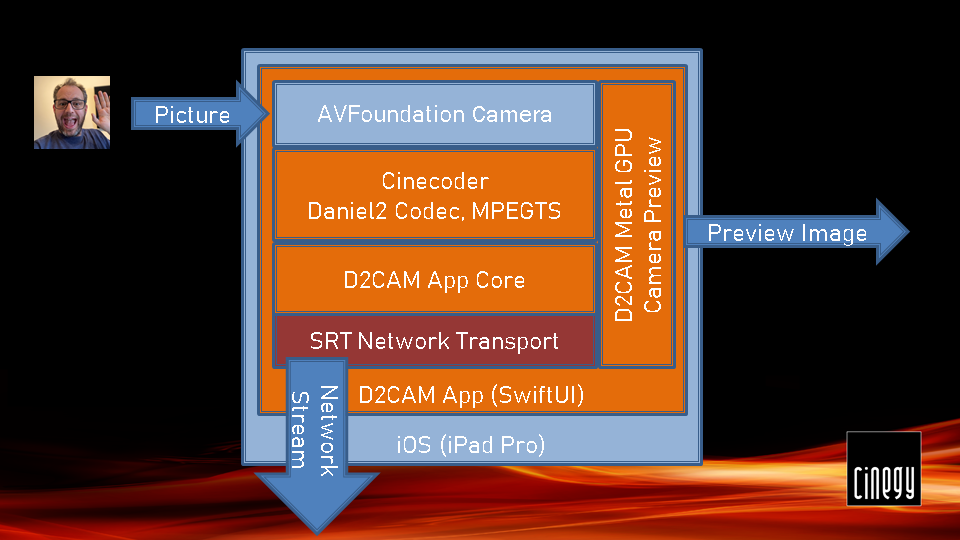
The SRT network library is very helpful, because it gives a load of features that aren’t available if we just go straight to the native network. One of the benefits of using the SRT library is not only do we get error recovery.
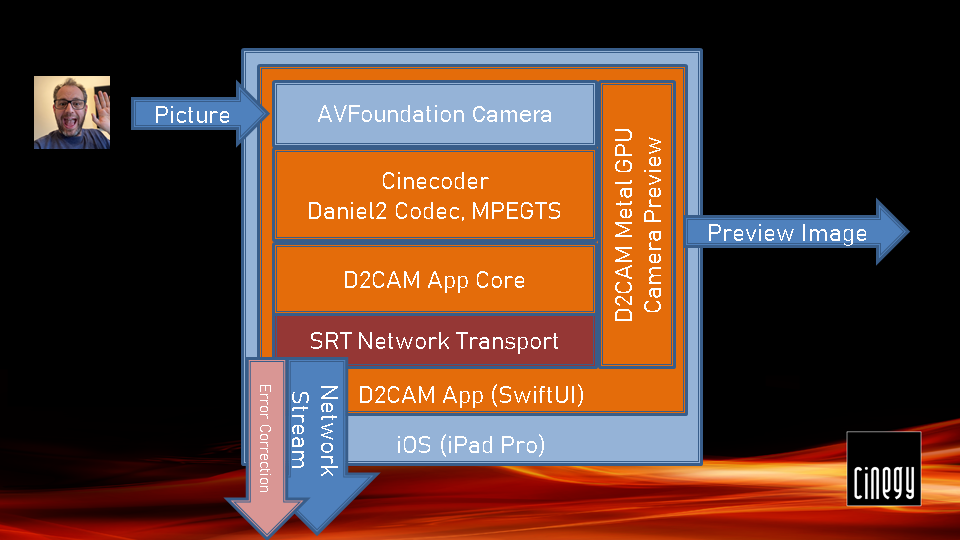
If we have network problems, we can also retransmit the packets that go missing.
On top of that, we have a great deal of visibility into what the link quality is like.
Technical Conference Bristol Studio Setup
Now we’ve finished capturing the video, recording it into a codec and we’ve gone into those USB-C hubs now with using the SRT network stack.
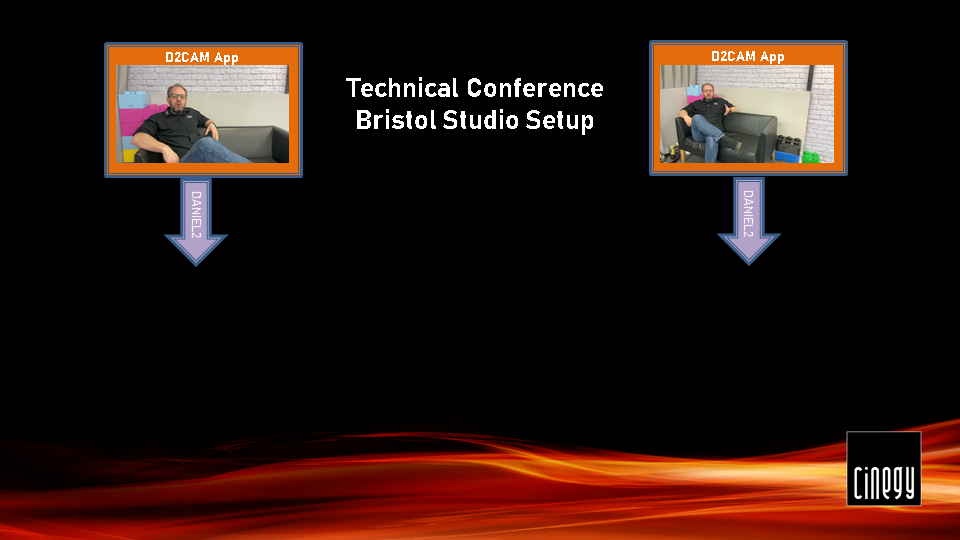
In the studio we’ve got a Cinegy Air engine ready to catch the output from these iPads, and then we can use that Cinegy Air engine to restream it back out as multicast, compress it to H.264 or flip it in real time to NDI.
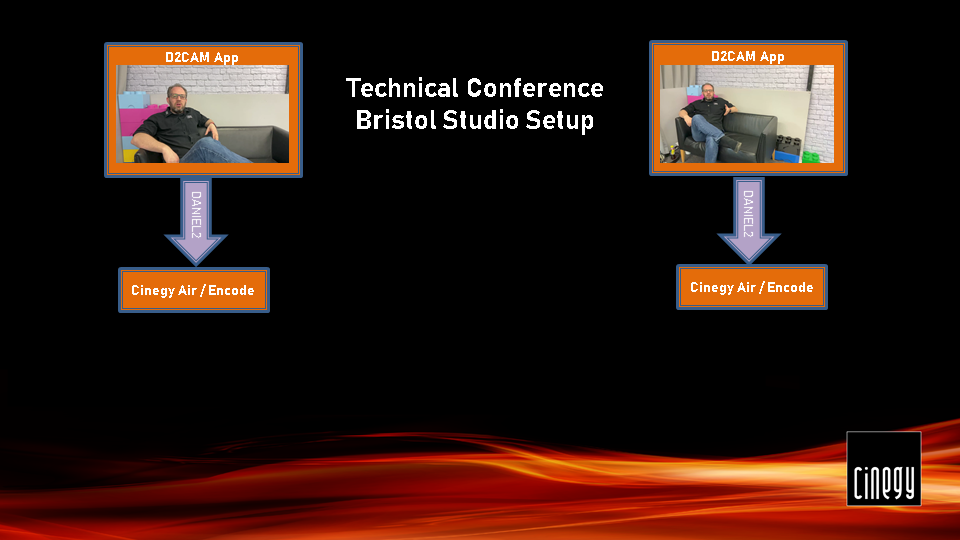
That allows the OBS system to pick up the output of these cameras and record that and manipulate that, and work with that.
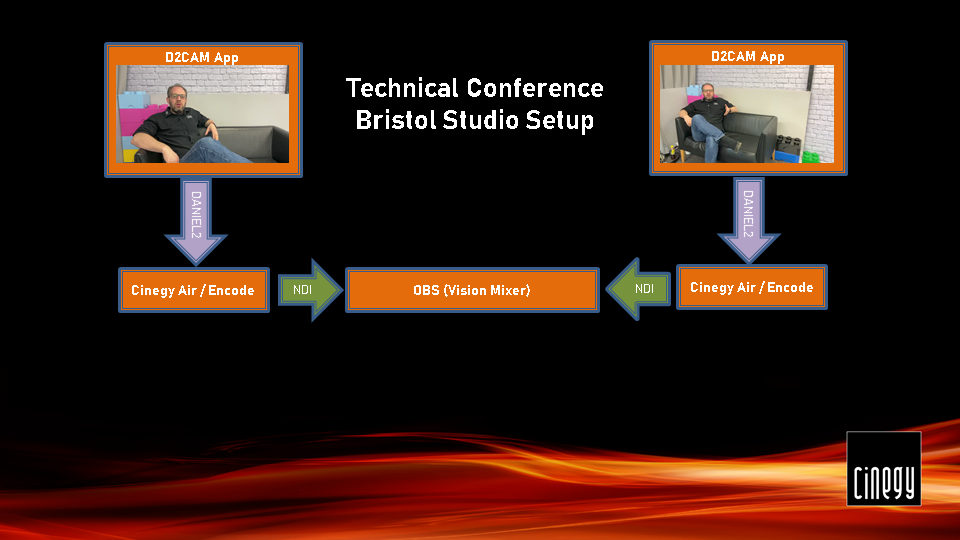
NDI in this case was a great choice for a low latency network-optimized codec, that we could then interoperate with. We’re able to show SRT interoperation and also show OBS operation or anything that can work with NDI.
We can then take the NDI and mirror that out to anything else.
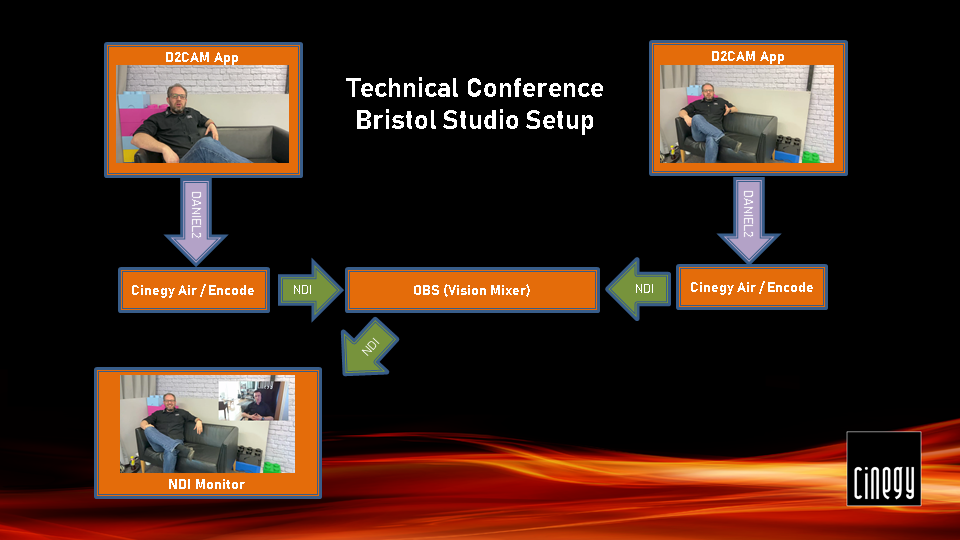
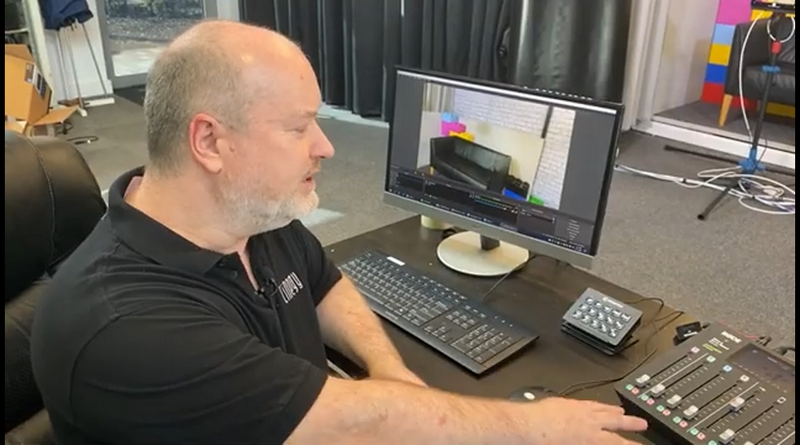
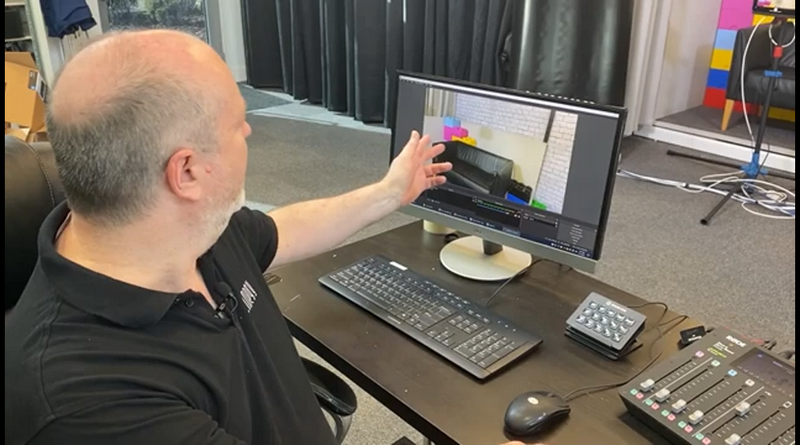
As Lewis sits on the sofa inside the studio talking to viewers, he is able to actually see feedback on the monitor in NDI. He can check that everything’s going out as it is expected, and that he is really broadcasting.
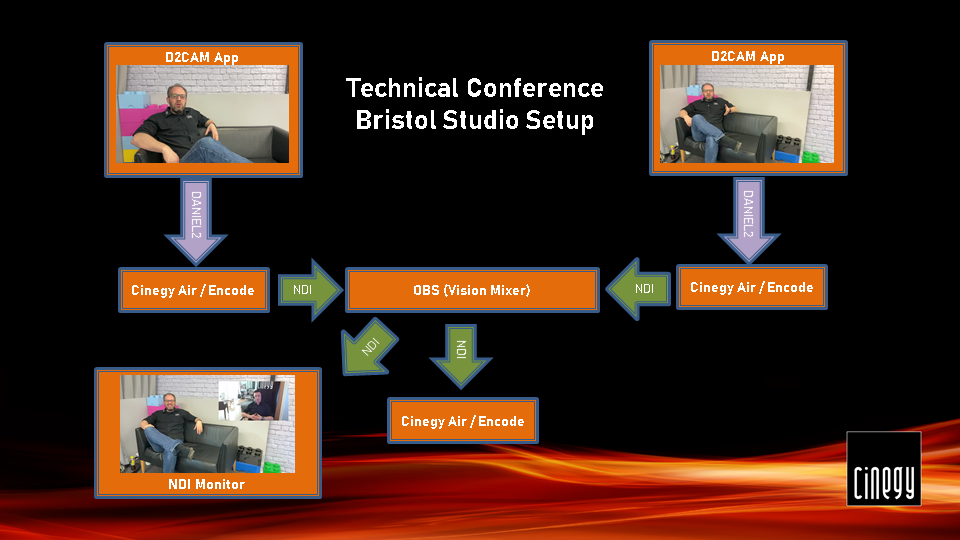
We’re also able to pick that up and re-transmit that to the cloud. It’s exactly that same technology now running in reverse, taking the output of the OBS station.
And again, we use a Cinegy Air engine to record that, compress it to H.265, beam that up to our German data center, and distribute that, so that you can actually see what you’re watching in the studio.
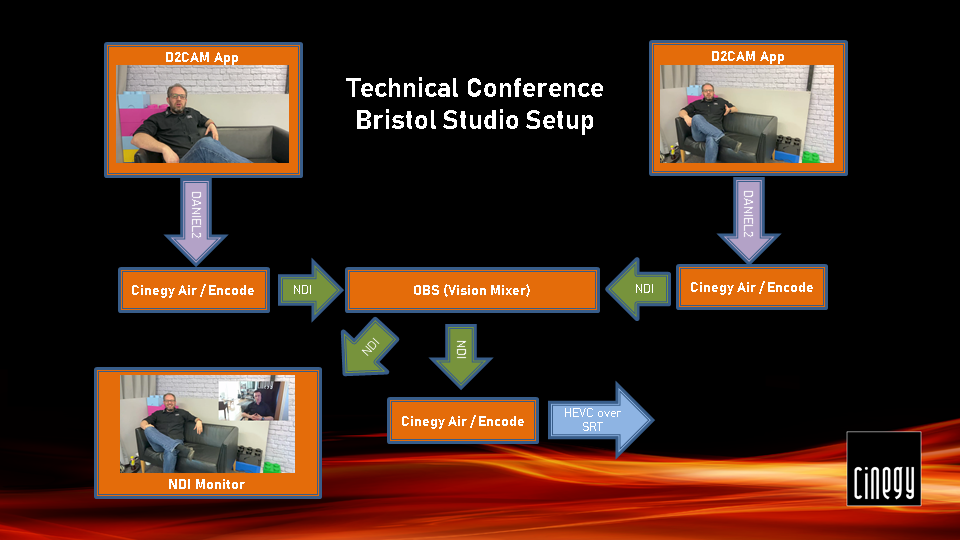
We’ve demonstrated interoperability with NDI, the great open source product OBS, we’re using Wowza cloud to actually transcode the material, and then we’re using our own tools to catch things, record things, play things out.
Of course, D2CAM is right at the center of all of this, and that’s the heart of what we’re talking about in here.
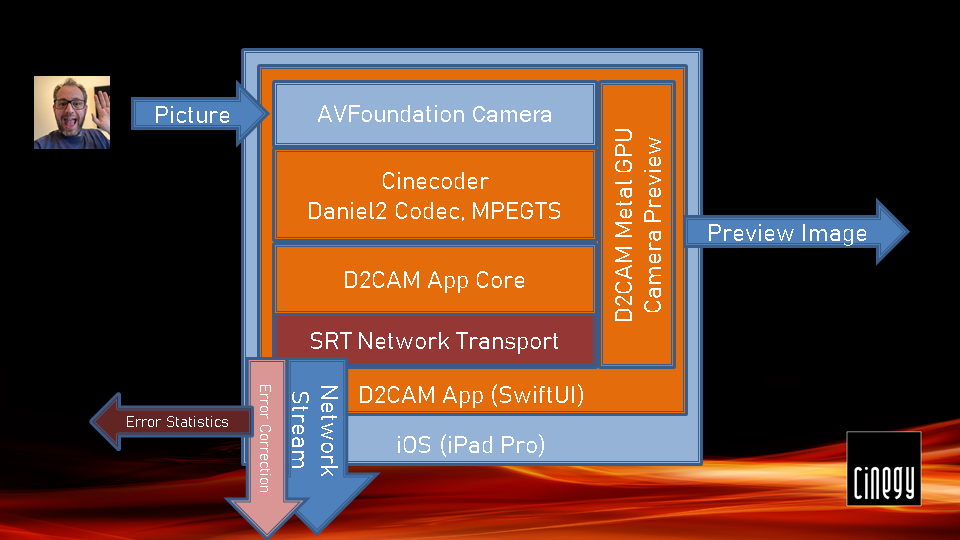
You know already why we like SRT and how it exposes a lot of metrics, so that one can really drill into the details of what’s happening on the network link.
One of the dashboards that we’ve designed picks up the output from the changes made in the latest version of Cinegy Air, allowing us to record and store in ElasticSearch all the details about SRT transmissions and all the different client connections that have taken place in that engine.
A key part we included in this work has been SRT – our favorite network library for adding error correction. This library not only helps overcome any momentary packet loss that might happen to try and glitch the stream, but it also gives us some great insight into what is happening within the network stack in real time. We’ve recently added SRT metrics output to the latest internal builds of Cinegy Air.
Here is what the real-time dashboards look like, showing output from the studio iPads into the Cinegy Air engines:
If you look at this graph, you can see that it is possible to drill right into the details of how that link is operating, and how the ping time and round-trip time are altering, and what’s happening to that link.
Don’t be intimidated by the complexity here; we’ve turned on quite a bit of detail, but you can see some high-level "single stat" panels in the Grafana dashboard, which provide critical numbers – such as packets being retransmitted and packets that were dropped or lost. Without SRT, any retransmission would corrupt that frame; however, thanks to SRT, you can recover the missing data before you need it.
And these are the things that can call out to you: how hard the SRT engine is working, how many frames have been lost that have been recovered and therefore nobody sees any problems, and how many frames have actually been dropped, how many packets have been dropped, which would genuinely affect quality.
Ideally, you’d tune up SRT to have enough time in that round-trip time to repair any holes that have appeared in the network, and fill that in. But, of course, you don’t know what’s happening inside there, without being able to drill into the metrics. This is a great enhancement to the latest Cinegy Air engine and one of the benefits of using SRT underneath D2CAM to transfer things, because you can see how healthy that network link is from the iPad to the receiver.
We’re not limiting ourselves to live streaming video with D2CAM – we’ve been using the app to experiment to bring capabilities of the Daniel2 codec running on ARM to enable features that don’t exist within the hardware codecs normally available when shooting on these devices. In fact, the earliest versions of D2CAM didn’t stream at all; they recorded straight into the iPad and into the iPhone.
It gives us the opportunity to really try and push hardware in this great equipment to the limits. We can then try and build some broadcast-centric modes that aren’t available in the hardware codecs baked into these products, and extend using our software Daniel2 codec to add these things back in.
We’ve actually got modes in D2CAM that let you capture in 4:4:4 color space in HD, which lets you then do better chroma keying and bring that in, to really do stuff that’s not possible with the built-in equipment on these devices.
It means one can actually generate a true 4:2:2 10-bit 1080i50 signal from the camera output, which, of course, should snap into broadcast-centric workflows – the majority of which are still targeting HD and interlace – much more easily than the floating framerates normally produced at 4:2:0 and 8-bit. Having this software option has let us experiment with a lot of these things and produce these different modes that aren’t possible normally on these devices, and give us a lot more flexibility.
Our developers are finishing off porting our MXF library to iOS and Android, so we can light up store-and-forward on-device recording options with these features. Remember, this does come at a cost – Daniel2 files are often ten or twenty times bigger than the standard MOV files you might record on your iPhone, so you need to be thinking more in terms of dealing with AVCi100, ProRes, or DNxHD media bitrates rather than comparing to H.264 movies!
It also means that we can start to look at using recordings on these devices, which can be stored and forwarded into broadcast workflows more easily. Perhaps, you could be recording as a journalist in the field, and it might take you longer to upload a D2-encoded piece of content, but you could actually be recording in a beautiful, smooth, interlaced 4:2:2 encoded package that is going to be much easier for editors at the far end to download and work with, and integrate into. It looks like you’ve got a full broadcast camera, perhaps, where you really just had a phone in your pocket.
These are areas we’re experimenting with at the moment, and, of course, this is all very young and experimental, but we don’t intend to stop there.
Quality Comparisons
Let’s take a closer look at some of the quality comparisons we made when shooting video with an early version of D2CAM into files. We’ll need to zoom in to highlight the differences, since, unfortunately, the inability to watch this video in the original will make it difficult to compare otherwise, so we only provide screenshots here.
iPhone 11 Pro, High Quality (built-in app)
You should be able to see the difference even through this compressed stream.
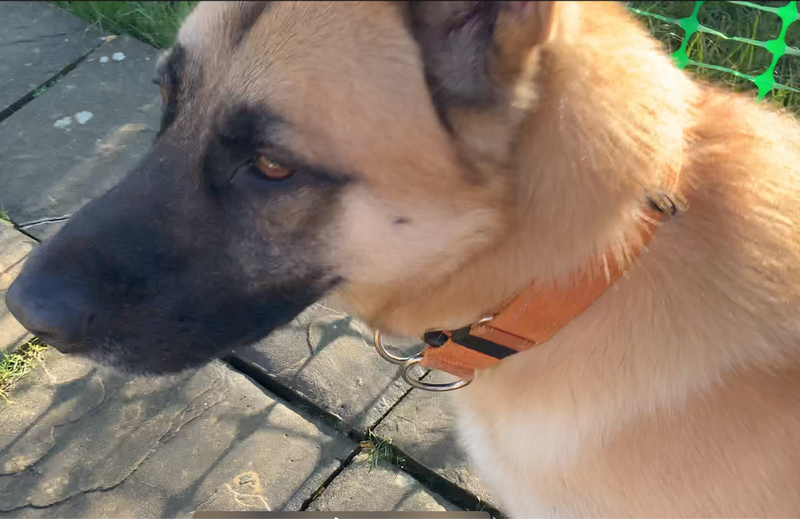
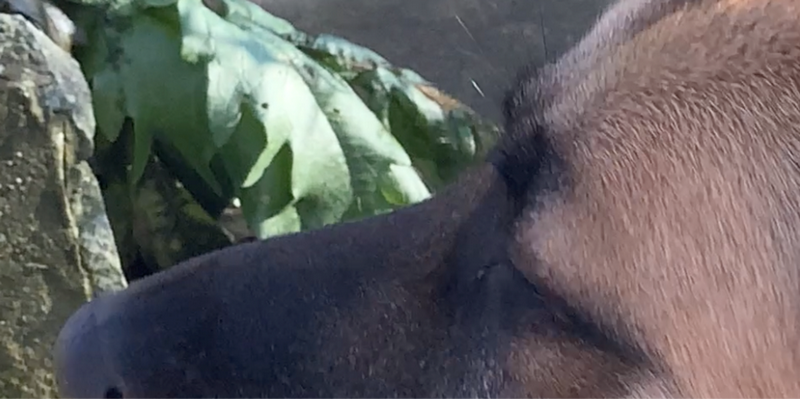
We just used the camera app on the iPhone 11 and set it to high quality, and recorded in UHD, just some shots in the back garden, and you can see here a shot of Lewis’s dog:
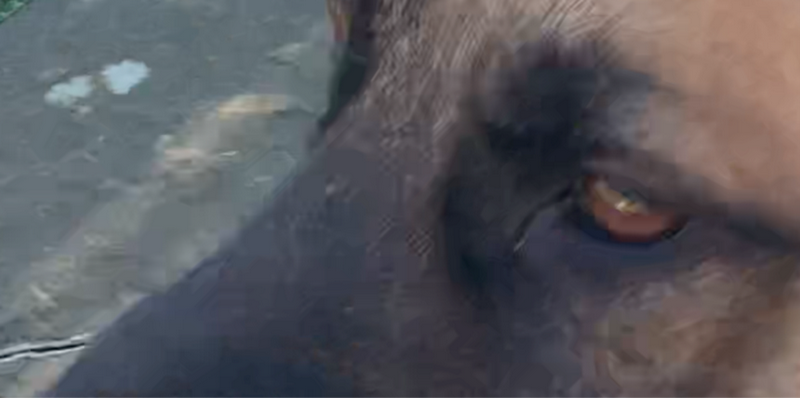
If we zoom right in here, then we very quickly start to see that there are very obvious compression problems, even with the high settings in this built-in app.
Let’s now look at a much more sensible comparison. We recorded this with the FiLMiC Pro app in extreme mode:
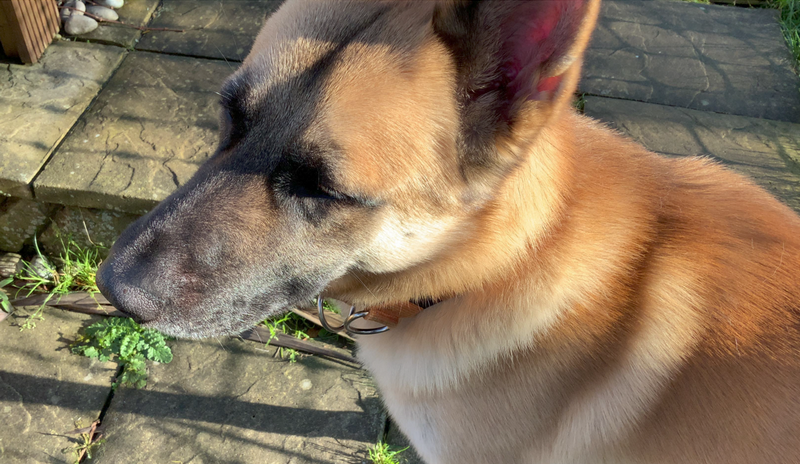
iPhone 11 Pro, Extreme Quality (FiLMiC Pro)
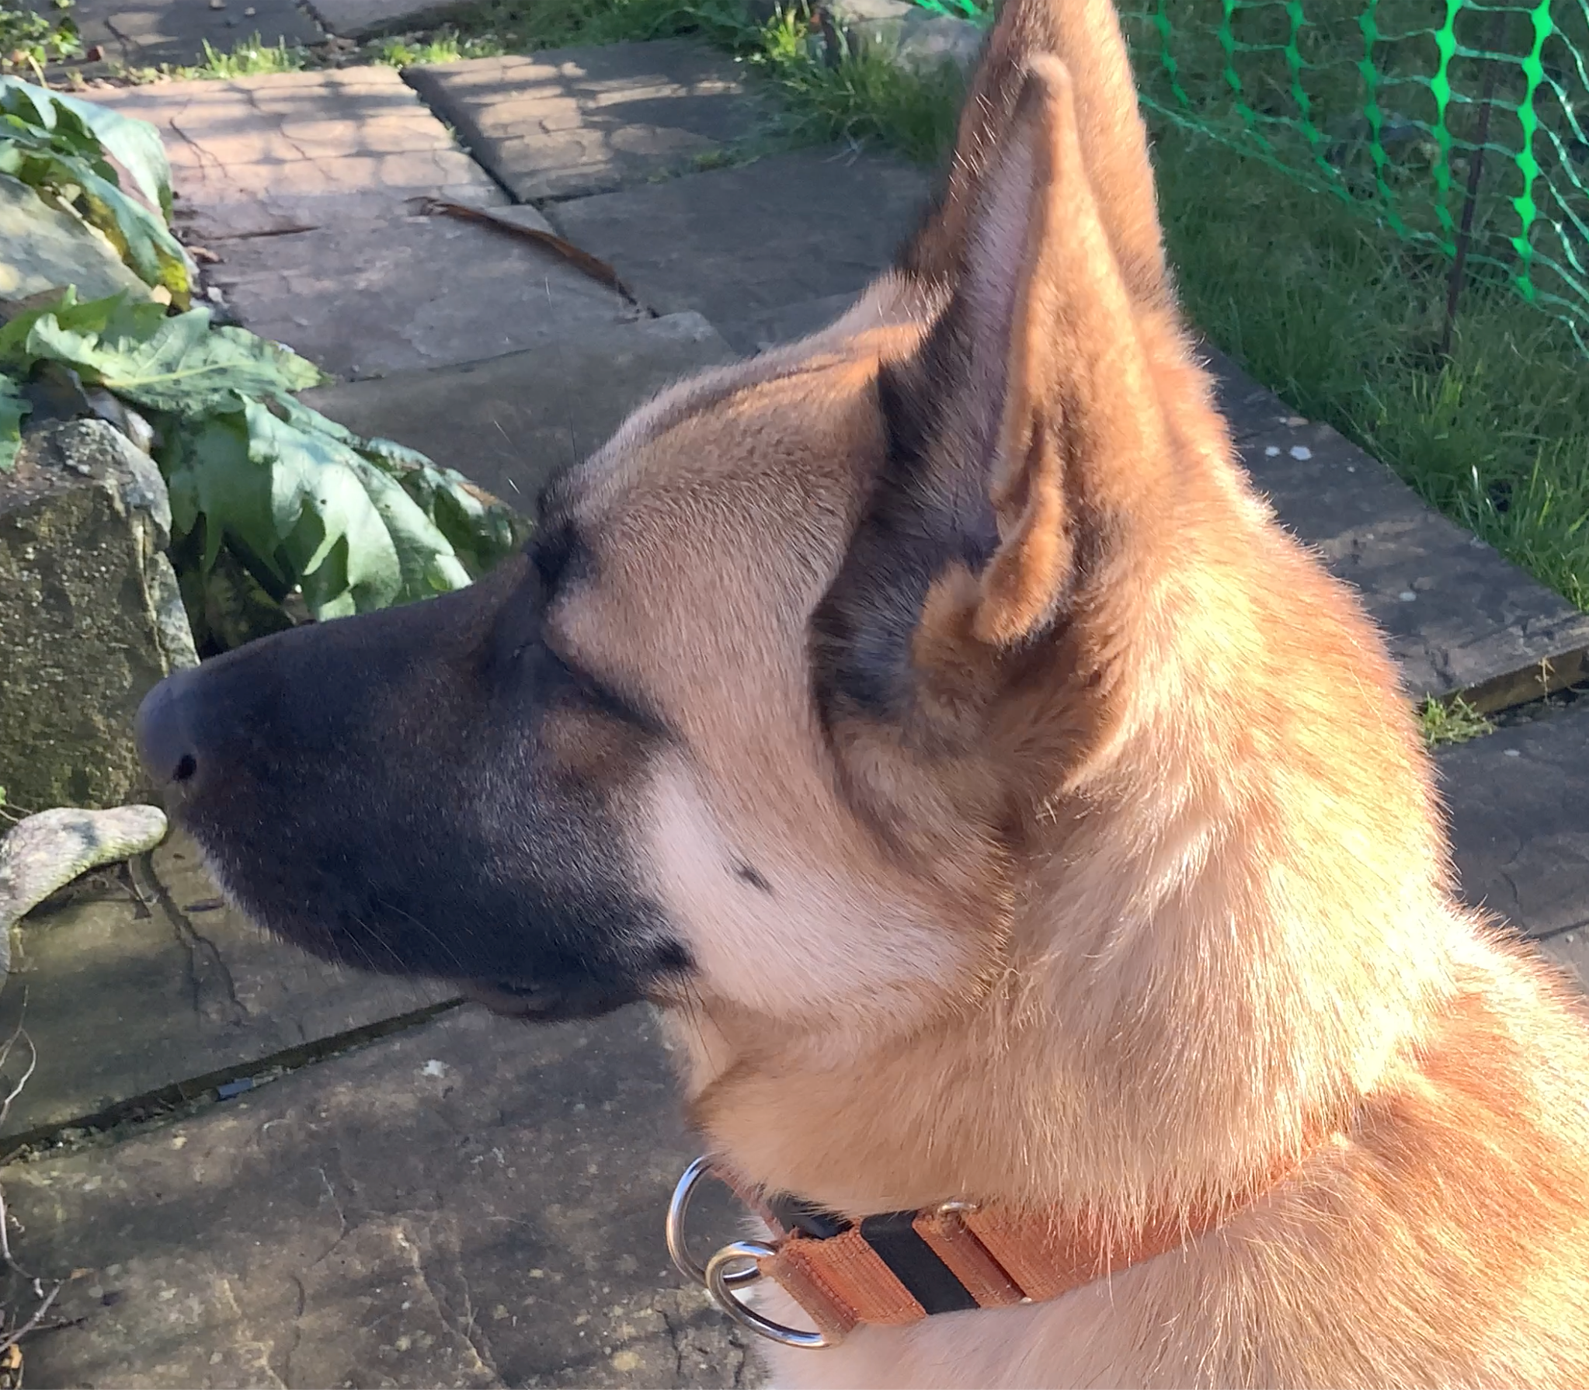
This is as high as we can set the really great FiLMiC app on the phone to do recordings. We can see the dog now looks much clearer. If we zoom in, it’s much harder to spot differences, and you might not be able to see the difference.
But what you can see here – it’s a little bit soft, and there are some artifacts, and what’s not visible in a still is that because we’re compressing with a Long GOP, you do see some kind of temporal differences as time goes by, and we’re looking at high detail that’s changing.
Of course, one of the really difficult things we found when working with this clip is – it’s a real pain to edit and scrub through. It’s still a lot smaller than a Daniel2 file, but it was much more difficult to actually move around and edit with.
Let’s now look at a clip we filmed with the D2CAM in high-quality mode here.
iPhone 11 Pro, High Quality (D2CAM)
But what you can see here – it’s a little bit soft, and there are some artifacts, and what’s not visible in a still is that because we’re compressing with a Long GOP, you do see some kind of temporal differences as time goes by, and we’re looking at high detail that’s changing.
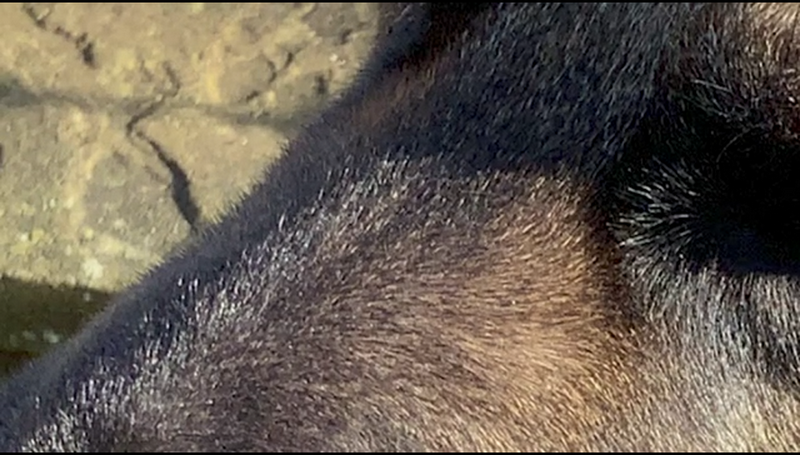
If we zoom in, we can see that actually we retain quite a lot of quality, and there’s still an amount of noise visible in the picture. That comes from the sensor that looks more natural.
The detail that you can see here is much finer and because every frame is an i-frame is very consistent between each frame. When we wanted to edit these, even though the clip is much bigger than an H.264 compressed version from the iPad, and when we tried to scrub around, it was very-very easy to move around and edit. Once we loaded up the Adobe plug-in to support Daniel2 encoded files in Adobe Premiere, we were able to edit and work with this material much more quickly and easily than we could with the H.264 extreme compressed version from FiLMiC.
We pulled a still again from a complex scene, a day later it snowed in Bristol:
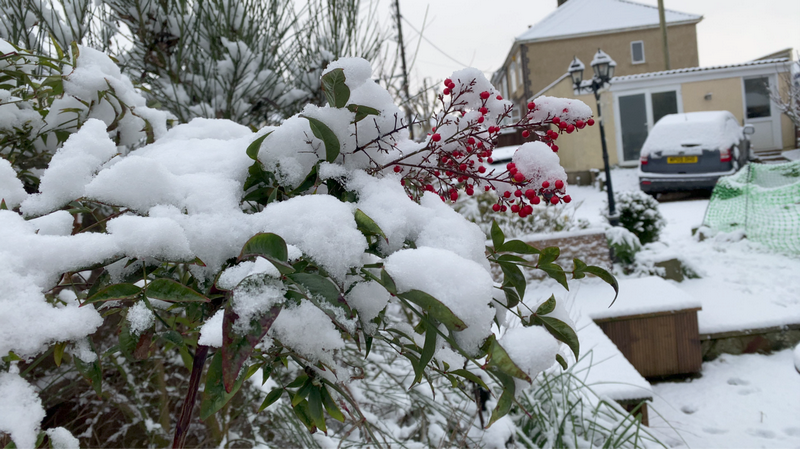
iPhone 11 Pro, High Quality (D2CAM)
This is just a still we picked from a running video, and it gives you a real idea of how much detail is in the picture still when using this codec:

iPhone 11 Pro, High Quality (D2CAM) – 300% Zoom
If we zoom right in on these berries, we can see that there’s actually a great deal of detail in this still. You’d never believe it was pulled from a video; it’s as if we snapped it still.
So, don’t just take our word for it, do actually take a look at some of the files we recorded on iPhone 11 Pro, which really do look quite stunning and tremendous. We have added that to the package of files that you can download from here, which would let you download some UHD samples and the stills you just saw – remember, you’ll need to use a Cinegy product or the free Cinegy Player app to view the video files!
Doesn’t This Add Loads of Delay?
We are network streaming from the iPad. How long does it take for this picture to get picked up from the iPad and delivered into downstream elements?
The biggest problem we ever have with anyone who says to us, "How much delay does it add?" is that it really depends on where you’re measuring things from. We could be looking at the results of this at the end of a chain that has done two more compressions, and that would add quite a lot more delay. We could be adding error correction, because maybe we are feeling a little paranoid, but we’d like to make sure that if we have any problems on our network, we give the SRT library 100-200 milliseconds to actually cover over that problem.
If we have a spanning tree event on our network, maybe we’d like to have the time required for the network to recover and backfill that data. So, we can add a delay there, but we should add it for a good reason. Maybe we trust our network, or maybe we’ve got some high-quality switches that we don’t let anyone plug things into, while we are broadcasting, and we can turn that off and set that to zero. Our delay could come down more.
Similarly, the clocks inside the iPad aren’t synced to any station genlock. You have to be respectful of the fact that you do have some frame drift potentially between receiving devices and transmitting devices. But that’s OK, because you don’t have to set up a really complicated PTP timing domain, which would be able to correct that. Actually, for a lot of use cases, it isn’t going to add much benefit.
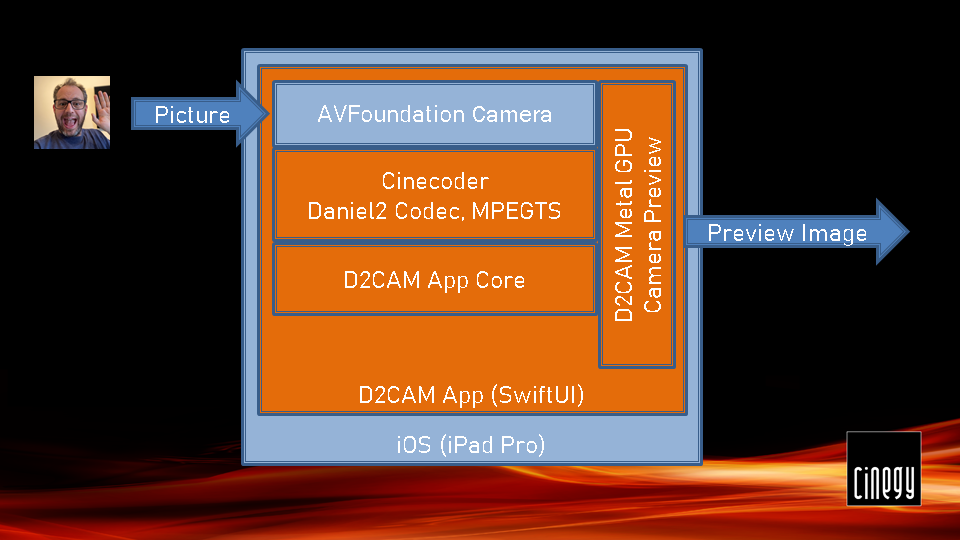
What is the fastest time you can get with the output of the D2CAM app onto the screen? We built some experimental apps to try and work out what the very lowest level of latency we could get if we took all of the safety handles off. We found that we were able to get 80 milliseconds "glass-to-glass".
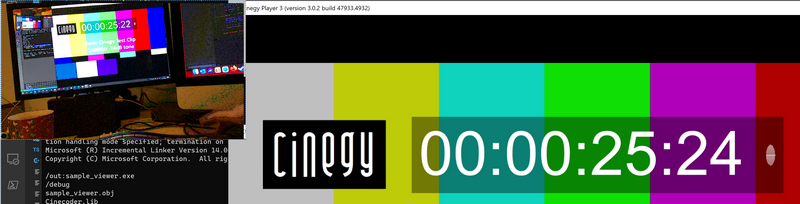
In this picture, you can see where we were experimenting, and it shows just two PAL frames of difference between what we were taking on the iPad and what we were then rendering back on the screen. We knew that we could get some really quite responsive times from this, but then we put it back in, because we let the Cinegy Air engine eat the stream. We put back in some more delay, because that gives us buffering and stabilization and error correction time, which keeps everything ticking smoothly.
So, the delay you might see is going to be something you can choose. You’ll be able to set parameters on the receiver to say how much time you want to make sure the signal is stabilized on the receiver, how much you trust the receiving device, and how well your network card is configured. And also, you’ll be able to control the delay on the D2CAM app, indicating how much time you’d like to be added to the SRT protection stream.
What Now?
So – where do we go from here?
This is where you, dear readers, really come in, because we built this prototype and we’ve used it, and we’ve had a lot of fun with it.
We’d like to hear from you about where we should take this next. Are you more interested in the studio streaming aspects of this, where you can use an iPad or potentially an iPhone, although the problem with the iPhone is that it doesn’t have USB-C to transfer really high, nice bitrates.
You could use these devices inside studios and inside remote locations, where you just can’t quite get a full-studio camera, for example, and bring that in as an alternative to a kind of full-fledged NDI camera, perhaps. Maybe that’s something, that’s really interesting to you.
Maybe you’re more interested in being able to do the on-board recording workflows, where, perhaps, you’re interested in using it to generate broadcast-oriented outputs with interlaced signals ready to snap into broadcast workflows, and you’d like us to put some effort into making store-and-forward workflows that allow journalists to upload videos really simply.
Or maybe you’re interested in the higher end of recording straight onto the iPad.
You’re interested in working in UHD, and you’d like to try and push the 10-bit boundaries and see what we can do with higher color depth, and to get the really high quality that we can do, which already exceeds what you’re able to get from FiLMiC Pro with its extreme modes, but that’s limited by hardware on board.
What would happen if we took that further forward to get a better-quality recording and maybe focused on that side? What we’d like to do is to invite you to tell us more.
We already have an internal beta of this app running up in the Apple Store. We can distribute this internally, but we’d like to know where we should go next and who might be interested in looking at this.
Please do drop us a note. Your feedback is really crucial!