Microsoft Indexing Service
Reading time ~5 minutes
Cinegy Desktop supports searching for the documents by a word or phrase from the text in them. The text search requires Microsoft Indexing Service properly installed and set up.
Installation and Configuration
For different versions of Windows OS service installation steps are different. Instructions for Windows 7 and Windows Server 2008 are given below.
Windows 7
-
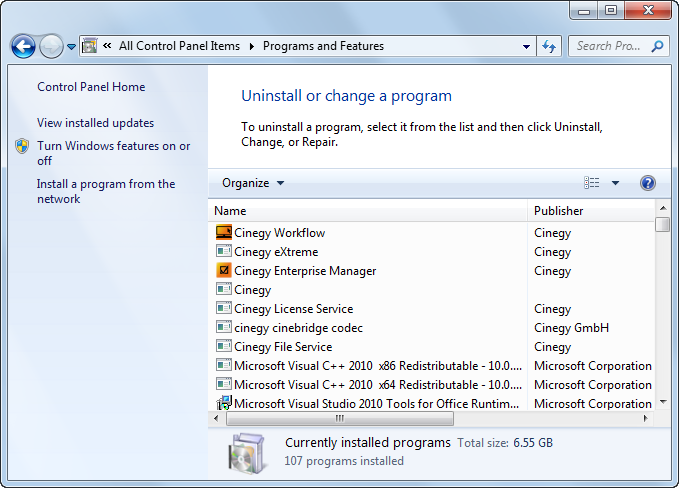
Open "Start" > "Control Panel" > "Programs and Features":
-
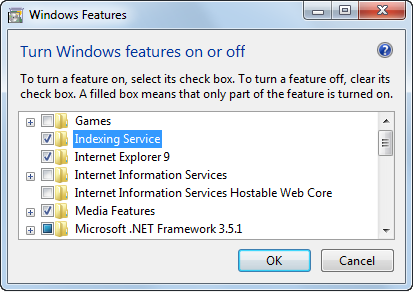
Select "Turn Windows features on or off" from the left panel. The following dialog will appear:
-
Select the "Indexing Service" option and press the "OK" button:
You have turned Indexing Service on now.
|
Note
|
Indexing Service should be set up on the same PC where the SQL Server is running. |
Configuration
Then you need to configure Indexing Service and create a new catalog. For this follow the steps:
-
Go to "Start" > "Control Panel".
-
Double-click "Administrative Tools", and then double-click "Computer Management".
-
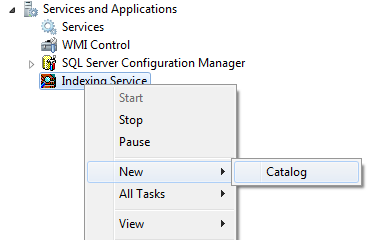
In the console tree, open "Services and Applications" > "Indexing Service".
-
Right-click "Indexing Service" > "New" > "Catalog":
-
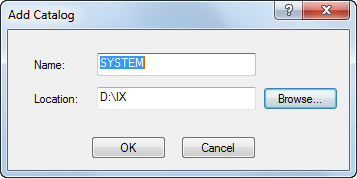
In the "Name" box, enter a name for your new catalog.
-
Click "Browse", select the folder in which you want your new catalog to be located or enter the path via the keyboard, and then press "OK".
-
When you receive the "Catalog will remain off-line until Indexing Service is restarted" message, press "OK".
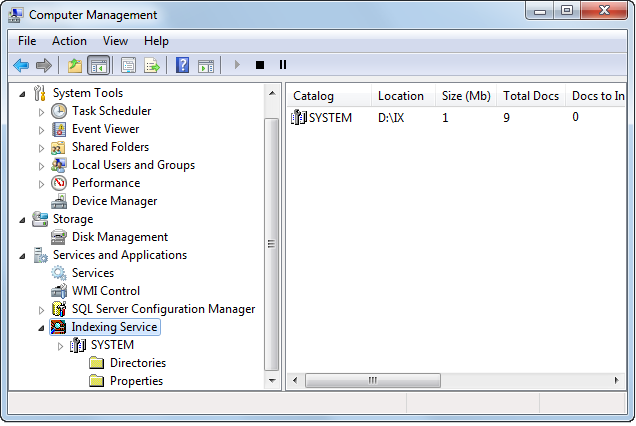
The added catalog will be displayed in the console tree of the "Computer Management" dialog:
Having created the new catalog, you need to add folders that you want to be included in the catalog’s scope, i.e. a set of folders that is included in and excluded from the catalog defining the content to be included or excluded from the index.
To define the catalog’s scope, follow the steps:
-
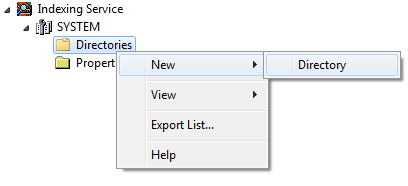
In the console tree, double-click the catalog to expand the container.
-
Right-click "Directories" > "New" > "Directory":
-
The following dialog appears:
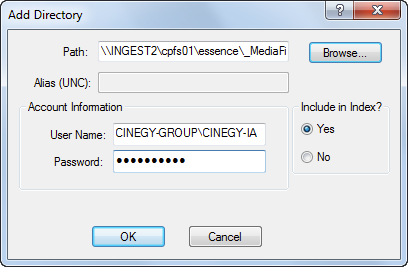
Add the path to the folder where the documents are stored by pressing the "Browse" button or via the keyboard. This path will be monitored by Indexing Service.
NoteIndexing Service should be set up on the same PC where the SQL Server is running. In the example provided, it is the "ingest2" PC. If the folder you are adding is located on a different computer, follow these steps:
-
In the "User Name" box under Account Information, enter the domain and user name of a user account that has permission to access that computer, for example, domain\username.
-
In the "Password" box, enter the password that is associated with the user account.
-
In the "Alias (UNC)" box, enter the Uniform Naming Convention (UNC) path to the folder, for example, \computername\sharename.
-
-
Under "Include in Index" select "Yes" if you want to include the folder in the catalog or "No" if you want to exclude it from the catalog.
-
Press "OK" to apply the settings.
-
Repeat steps 2 through 5 to add more folders to your catalog.
-
You need to restart Indexing Service; right-click "Indexing Service" in the console tree, press "Stop", then "Start".
Windows Server 2008
-
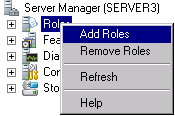
Open "Start" > "All Programs" > "Administrative Tools" > "Server Manager".
-
In the console tree of Server Manager, right-click "Roles" > "Add Roles":
-
In the "Add Roles" wizard, press "Next".
-
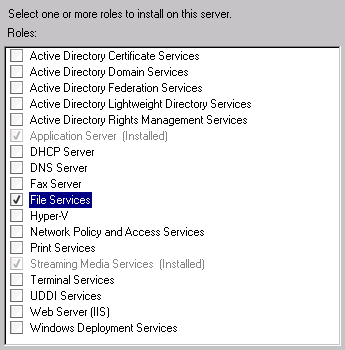
On the "Select Server Roles" page, select the "File Services" option, and then press "Next".
-
On the "File Services" page, press "Next".
-
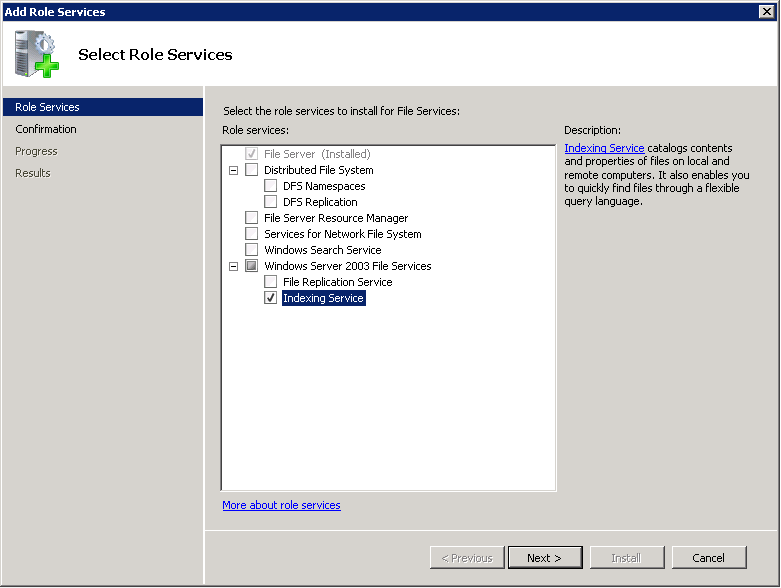
On the Select Roles Services page, click to select the "Indexing Service" option under Windows Server 2003 File Services, and then click "Next":
-
On the Confirm Installation Selections page, click "Install".
-
Follow the instructions in the "Add Roles" wizard to complete the installation.
|
Note
|
Indexing Service should be set up on the same PC the SQL Server is running. |
The Indexing Service configuration procedure for Windows Server 2008 is the same as for Windows 7.
SQL Server Linked Servers Configuration
A manual way of creating and configuring SQL Server linked servers is described below.
"PHANTOM" Server Creation
|
Note
|
The "PHANTOM" server configuration procedure is similar for other SQL Server versions. |
-
Open SQL Server Management Studio.
-
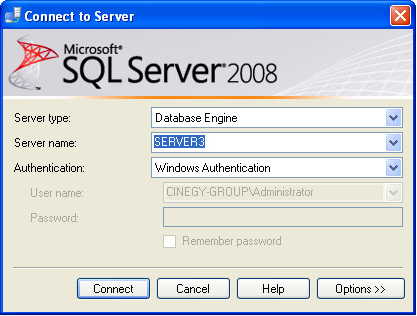
In the "Connect to Server" dialog box, specify the name of the appropriate SQL Server, and then press the "Connect" button.
-
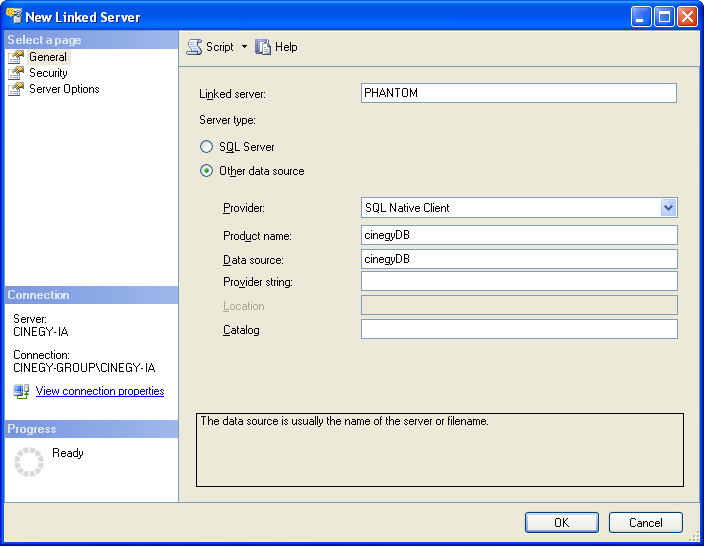
In SQL Server Management Studio double-click "Server Objects", right-click the "Linked Servers" item, and select the "New Linked Server" command from the context menu. The "New Linked Server" dialog will appear:
-
In this dialog, on the "General" page, in the "Linked server" field, enter the linked server name "PHANTOM".
-
Under "Server type", set the "Other data source" radio button.
-
Choose "SQL Native Client" from the "Provider" drop-down list and enter the product name and data source (the name of the local SQL Server) in the corresponding fields.
-
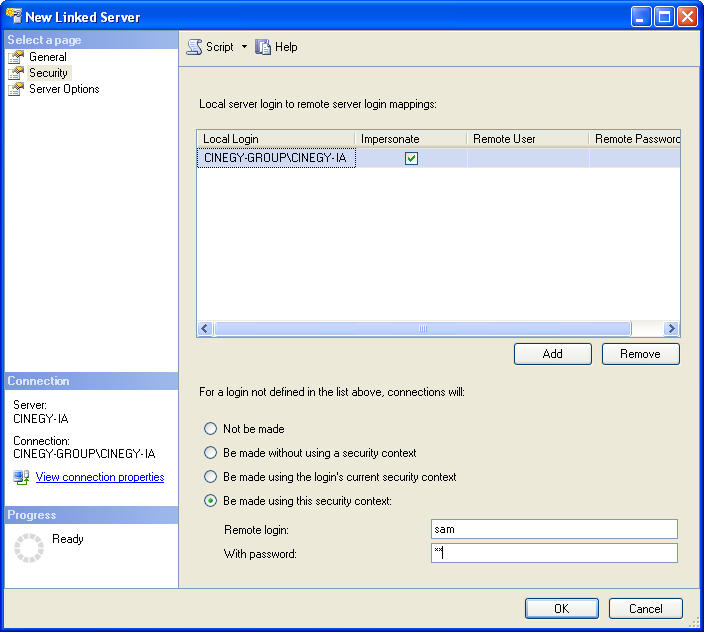
On the left panel of the "New Linked Server" dialog, choose "Security". You need to set the remote login and password to connect to the linked server.
-
Set the "Be made using this security context" radio button and enter the remote user name and his password for the remote server login (for example, the "sa" SQL Server login and password).
"FILESYS" Server Creation
-
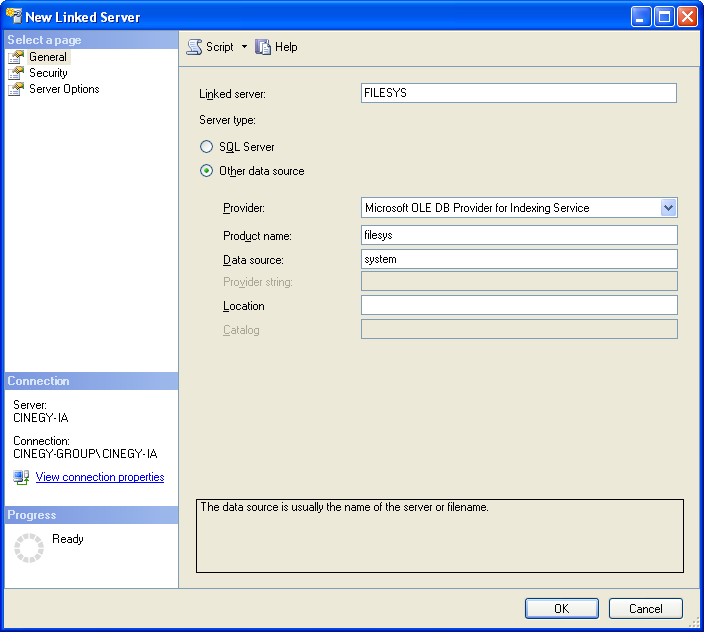
In SQL Server Management Studio double-click "Server Objects", right-click the "Linked Servers" item, and select the "New Linked Server" command from the context menu. The "New Linked Server" dialog will appear:
-
In this dialog, on the "General" page, in the "Linked server" field, enter the linked server name "FILESYS".
-
Under "Server type", set the "Other data source" radio button.
-
Choose "Microsoft OLE DB Provider for Indexing Service" from the "Provider" drop-down list and enter the product name and set "System" for data source in the corresponding fields.
-
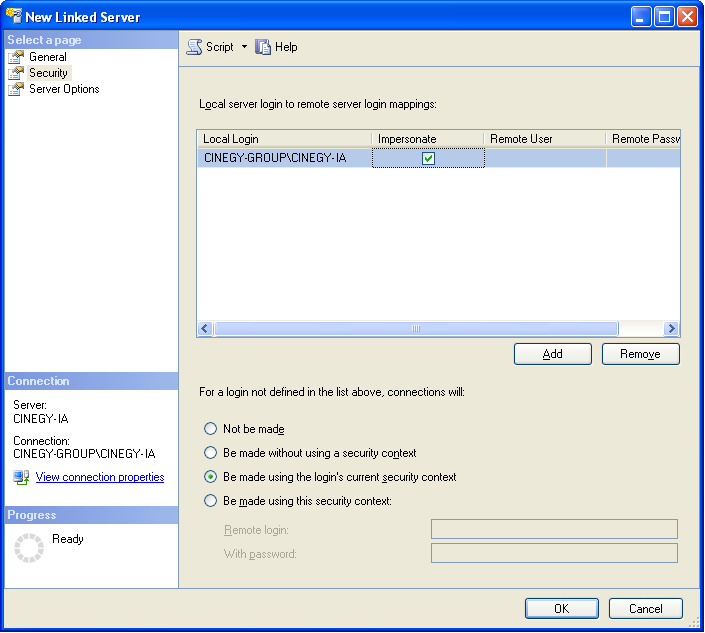
On the left panel of the "New Linked Server" dialog, choose "Security":
-
Set the "Be made using the login’s current security context" radio button.