Quick Start Guide
This quick start guide takes you through the steps to get your Cinegize software up and running.
To become acquainted with Cinegize and explore its key features, you can download the latest version from the official Cinegize website free of charge.
Installation
As Cinegy implies the work with two PCs, you will need to execute the installation procedure twice – for the client machine and the host machine.
|
Caution
|
By default, the installation of Cinegize Display Adapter is skipped. However, a virtual display adapter is essential for use with virtual machines, cloud instances, or VDI scenarios without an attached screen. |
After the installation, the Cinegize icon appears on your Windows desktop. Start Cinegize using the "Run as administrator" command, while administrator rights are required to complete the installation. This ensures that during host sessions, the software can provide full access to application windows that require elevated permissions.

Configuration for a Short Remote Session
Configuring the Client Machine
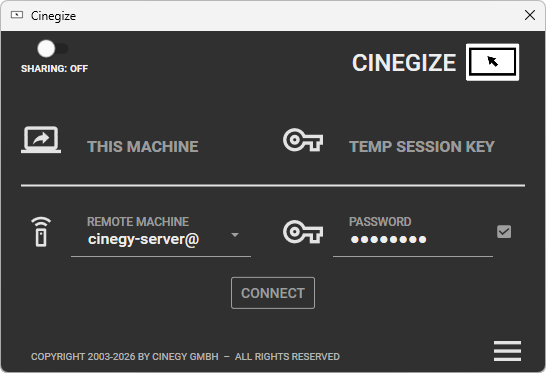
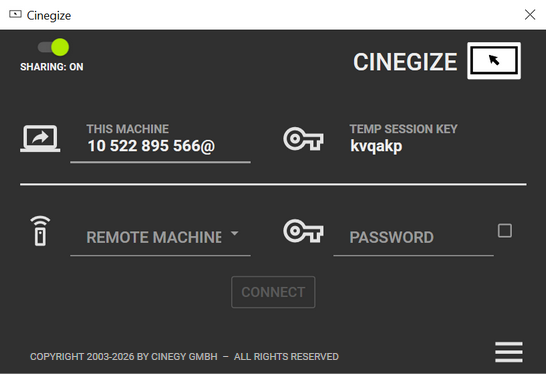
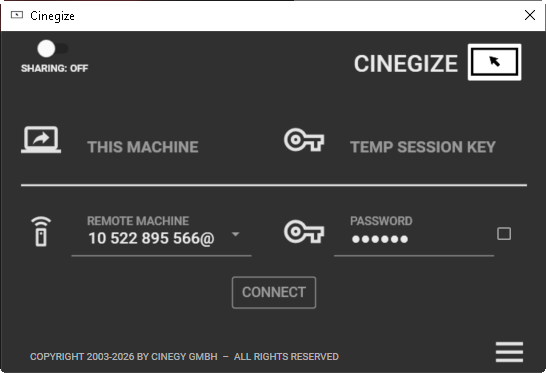
Let’s start with the client machine. Make sure that the "Sharing" switcher is in the "Off" position for work in client mode.
-
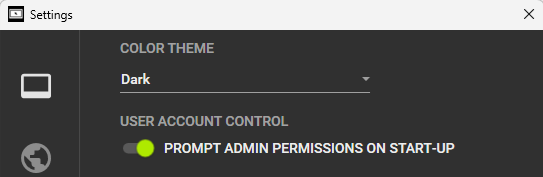
In the "General settings" tab, you can enable the "User Account Control" switcher to prompt for administrator permissions each time Cinegize starts.
-
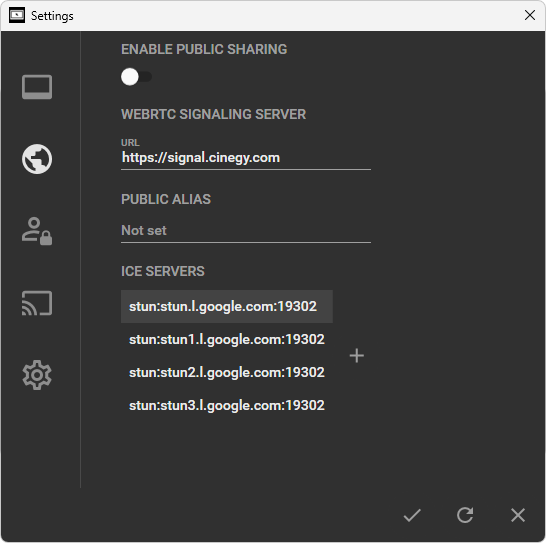
In the "Public sharing setting" tab, there is no need to enable "Public sharing" with the corresponding switcher when configuring Cinegize for working on the client machine.
-
Ensure that the Web RTC signaling server is set to the default
https://signal.cinegy.com. -
It is not necessary to insert any public alias if Cinegize is to be used for a short remote session.
-
Choose one of the default ICE servers. A list of default ICE servers is provided below, directing to the Cinegy signaling servers, which are available for evaluation purposes.
-
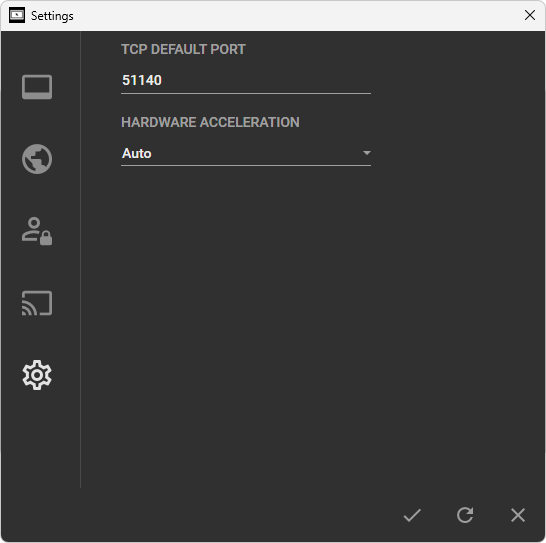
Finally, in the "Advanced" tab, check the TCP default port. By default, the "TCP default port" is set to 51140. Note that the same TCP default port should be set on both the client and host machines.
-
Press the
 button.
Configuring the Host Machine
Next, configure the host machine.
-
After the installation on the host machine, make sure that the "Sharing" switcher is in the "On" position to work in host mode.
-
Check that in the "Public sharing" tab, the "Enable public sharing" switcher is activated.
-
If Cinegize is to be used for a short remote session, there is no need to install Cinegize as a Windows service and insert a public alias.
-
In the "Advanced settings" tab, check that the same TCP default port 51140 is set on the host machine.
-
Press the
button.
Connection for a Short Remote Session
Currently, only one client can connect to the host machine.
If Cinegize is to be used for a short remote session, it is not necessary to install Cinegize as a service.
Start Cinegize as an application on the host machine.
Then start Cinegize on the client machine.
In the corresponding fields of the main window, insert the remote host machine name/IP address and the temporary session key (password) generated on the host machine.
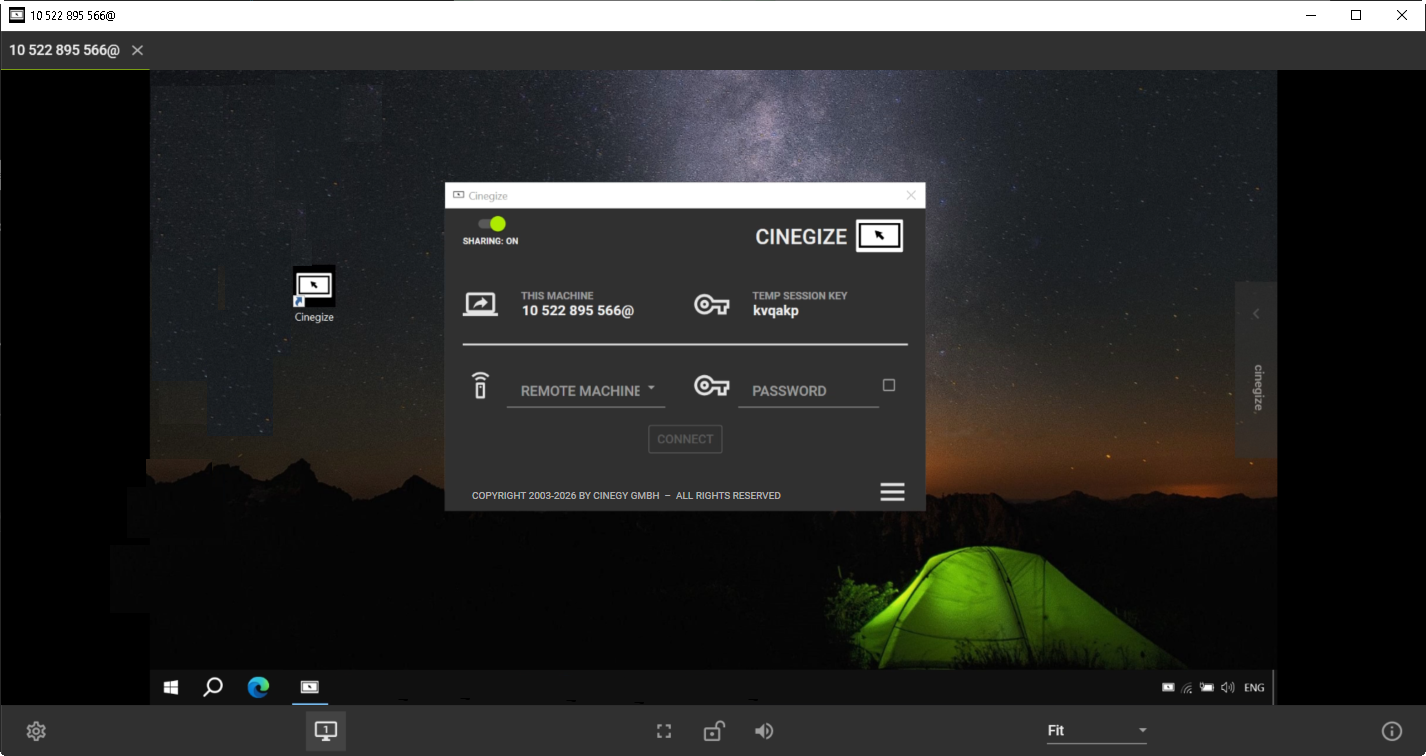
In case of a successful connection, the following screen will be displayed on the monitor of the client machine:
Configuration for Repeated Connections
For routine or systematic connections, Cinegize can operate as a Windows service. This mode provides automatic hosting after the machine starts.
To install and manage the Cinegize service, the user must have administrator rights, and Cinegize must be launched using the Run as administrator command.
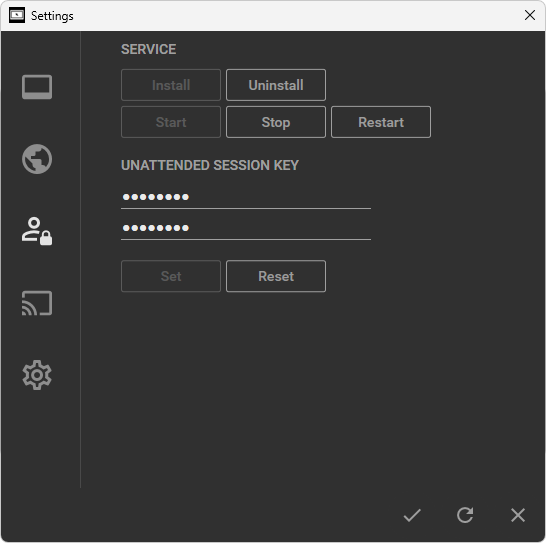
On the host machine, go to the "Service" tab, install the Cinegize service as a Windows service, and enter a personal password twice in the "Unattended session key" field. Click "Set" to apply the password, then click "Start" to launch the service:
If the host and client machines are in different networks, public sharing must be enabled in the settings. In this case, the @ symbol is automatically appended for identification. Additionally, a public alias can be defined to be displayed instead of the machine name or IP address.
On the client machine, specify the unattended session key in the Password field and select the checkbox to save the password: