Image-Based Objects
Reading time ~6 minutes
An image-based object is a plate. It can be used to create a visual design of your Cinegy Title scene.
Plate
|
The plate object allows you to add a media source to your scene, such as pictures or video files. To add this object, select it from the "Insert" main menu; alternatively select it from the "Insert" drop-down list of the tree context menu. |
It has the following parameters:
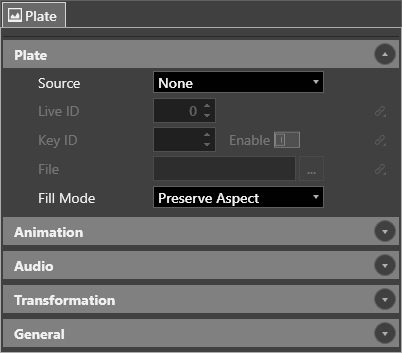
Source
File
Press the "…" button to select the media source file on your local disk or a network location:
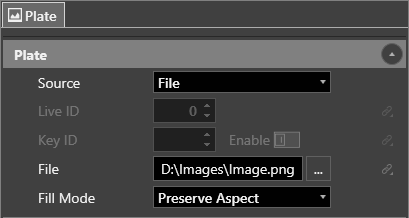
Alternatively, enter the path manually via the keyboard.
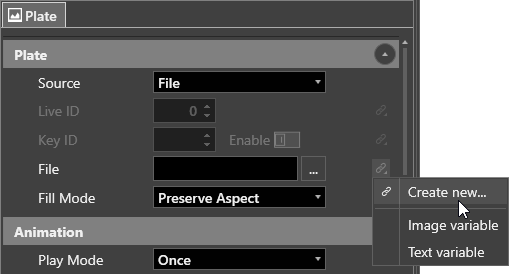
You can also link a plate object with the variable of the "File" type referring to the media file or variable of the "String" type containing the path to the media file. To do this, click the ![]() sign next to the "File" field and select the "Create new…" command to create a new variable of choose a previously created variable from the list below:
sign next to the "File" field and select the "Create new…" command to create a new variable of choose a previously created variable from the list below:
Recommended image formats are png, tga, bmp, jpg, tiff; video formats – avi, mpg, mp4, mxf, mov.
|
Note
|
Animation display in animated image formats is not supported. If the animated gif image is chosen for the plate object, only the first frame will be displayed. |
|
Tip
|
A relative path can be specified to define a media file location. For example, if the Cinegy Title template is saved in the "D:\CG" folder (it is called the root folder) and the media file path is "D:\CG\media\logo.png", the relative path will be ".\media\logo.png". |
|
Tip
|
In the case when the logo is small and is going to be displayed in the corner of the screen, it is recommended to use an image/video file of a small frame size. Use of the full frame sized image/video with a large transparent area will lead to unnecessary computation load. |
On-Air
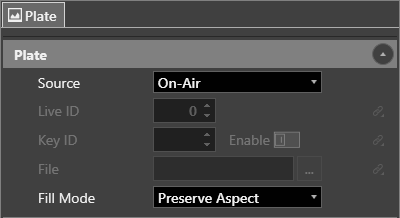
The Cinegy Title application supports displaying the live video content as a background of the image-based object. To enable this feature, select the "On-Air" source:
|
Note
|
By default, during the template preview this object will be displayed as color bars. You can change this in the Live and On-Air Plate Background settings. |
Live Feed
It is possible to link plate objects to live video input supported by the Cinegy Playout engine. To do this, select the "Live" source:
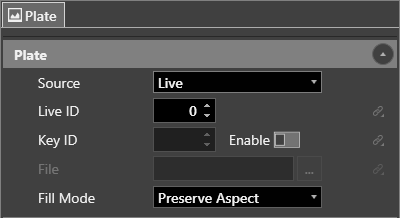
In the "Live ID" field define the source ID, configured in the Cinegy Playout configurator.
|
Important
|
Refer to the Cinegy Title Inputs section in the Cinegy Playout Manual for more information on source setup. |
|
Note
|
By default, during the template preview this object will be displayed as color bars. You can change this in the Live and On-Air Plate Background settings. |
Key&Fill Mode
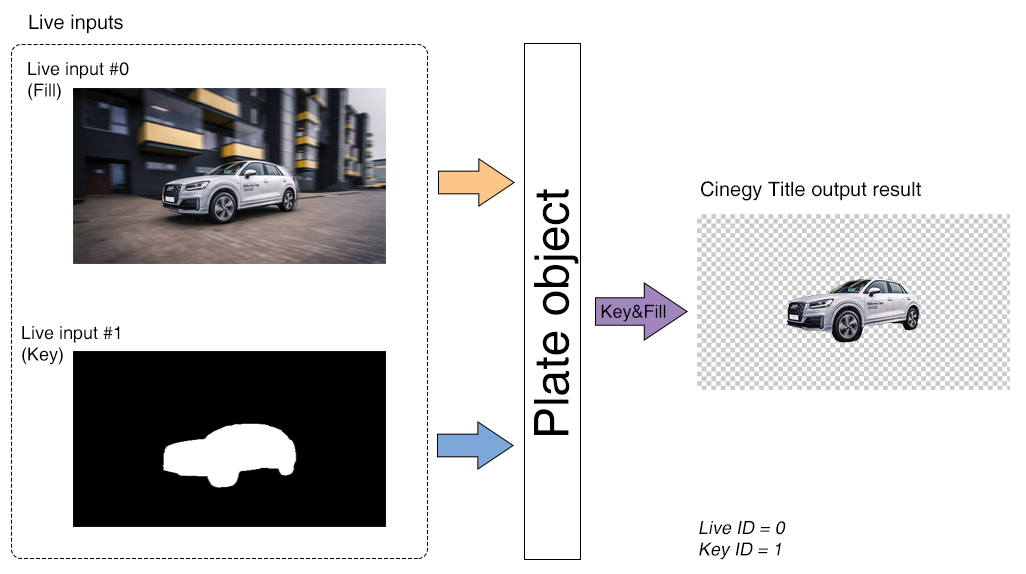
The plate object can be set up to work in Key&Fill input mode.
The following scheme explains the Key&Fill mode principle inside Cinegy Title template:
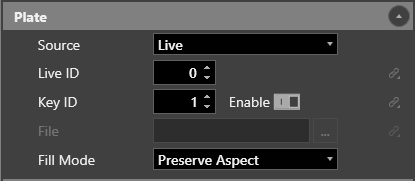
For this select the "Enable" option and define the "Key ID" which corresponds to the instance number of the "Key" signal defined in the Cinegy Playout configurator.
Fill Mode
You can specify fill mode for the object, selecting one of the following modes:
-
Fill – stretches the image or video so that it fills the bounding box entirely.
-
Preserve Aspect – scales the image or video so that it fits in the bounding box, preserving the original aspect ratio.
-
Preserve Aspect Anamorphic – scales the image or video so that it retains the original aspect ratio of the asset, except the original aspect is corrected to the 16:9 format.
-
Unscale – applies no scaling to the image or video.
-
Unscale Anamorphic – the image or video remains of the exact original size in pixels, except a single scaling factor is applied to correct the aspect to 16:9.
-
Tile – the image or video of the original size will create a seamless pattern to fill the plate object area.
Animation
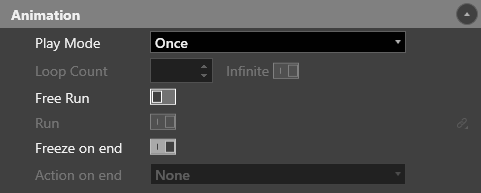
The following additional settings are available for a video file:
-
Play Mode – set video file playback mode. The default option is used to play the video just once. You can also set the loop or ping pong play for video by selecting the corresponding options from the drop-down list.
-
Loop Count – specify the number of repetitions or select the "Infinite" option to play continuously.
-
Free Run – this option allows the video to play continuously until its end irrespective of the timeline progression – always advancing one frame forward each time the scene moves in any direction or position, in the same manner as the marquee and roll objects.
-
Run – this option is available for plates containing video files and is active if the "Free Run" option is active. When this option is enabled, the video in the plate object is played during the template playback.
-
Freeze on end – check this option to display the last frame of the video after the end of its playback. If this option is not set, the video will turn to transparent after its playback ends.
-
Action on end – with free-run mode selected, you can define the behavior at the end of clip used in the plate. Choose one of the following:
-
None - continues running template in the normal way;
-
Leave any loop – leaves the loop when reaches it’s end;
-
Immediately leave any loop – immediate jumps to the end of the loop and then leaves it.
-
Audio
A video file containing audio can be assigned to the plate object. The following settings are available in the "Audio" section:

-
Enable – the option for switching audio on/off inside the plate object.
-
Volume – specifies the audio volume level.
Multichannel audio is supported in plate objects. The corresponding number of audio channels should be specified in the Cinegy Playout configurator in the "Audio" tab for a successful playback of the template with multichannel audio in plate object.
|
Tip
|
If RTP/UDP/SRT output is used, the corresponding number of audio channels should be configured in RTP/UDP/SRT output audio settings. |
Corner Radius
It is possible create rounded rectangle plate objects. For this use the "Corners" group of settings:
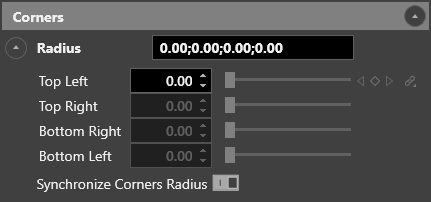
Define the corner radius values in the "Radius" field or specify them in the separate fields for each corner.
When the "Synchronize Corners Radius" option is active, the corner radius value will be the same for all corners. To specify different radius values for each corner, deselect this option and enter the radius values in their dedicated fields. In this case it is possible to create keyframes and add variable links for each corner separately.
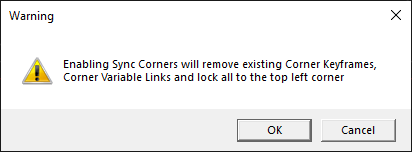
If for each corner separate keyframes and/or variables were created and after that the "Synchronize Corner Radius" option is enabled, the corresponding warning will notify that all keyframes and/or variables will be deleted except the top-left corner ones. Pressing "OK" in the following warning will accept the deletion, while pressing "Cancel" will cancel the corners synchronization.
