Global Settings
Reading time ~16 minutes
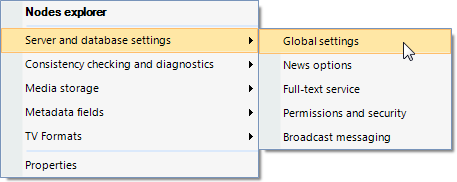
Select the "Global settings" command from the "Server and database settings" submenu of the required database context menu in Object Browser:
The "Cinegy system settings" panel appears:
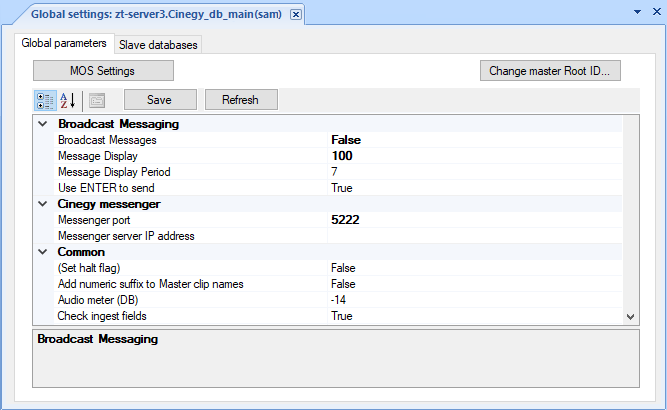
Global Parameters
The "Global parameters" tab provides access to many global system settings.
Broadcast Messaging

-
Broadcast Messages – enables/disables the broadcast message subsystem.
-
Message Display – defines the number of broadcast messages allowed to be displayed at the same time.
-
Message Display Period – defines the time period value in days before the current date, during which the broadcast messages were created. For instance, if you set the "Message Display Period" parameter to "10", all messages created 10 days before the current date will be displayed.
-
Use ENTER to send – enables/disables the broadcast message sending by hitting the Enter key.
Cinegy Messenger

If you use the Cinegy Messenger tool, define the messenger server port (default is 5222) and server IP address.
|
Note
|
To disable Cinegy Messenger for all the clients, leave the fields empty. |
|
Important
|
Cinegy Messenger is described in the Cinegy Messenger article of the Cinegy Desktop Manual. |
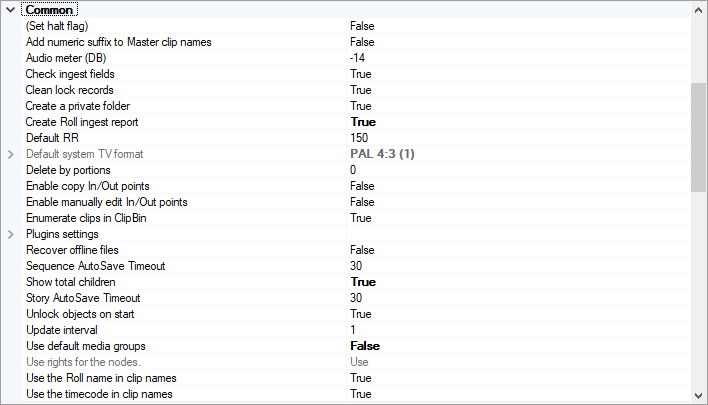
Common Settings
-
Set halt flag – if set to "True", all active database connections will be disrupted and no applications will be able to connect to the database via SQLMAMAccessor, CASAccessor, or directly via the Cinegy Archive Service.
-
Add numeric suffix to Master clip names - if set to "True", a new naming scheme will be enabled, resulting in adding subclip numbers on the icons and suffixes
[1],[2], etc. to the subclips names.NoteEnabling the numeric suffix feature may significantly increase processing time, especially when working with a large number of subclips. It is recommended to activate this option only when such suffixing is required for your workflow. -
Audio meter (DB) – defines the 0 dB audio level for the VU meter for all clients.
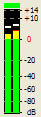
Enter the value between the 0 dB and the digital maximum (0dBFS; FS = full scale) or press the
 button and use the scroll bar to select the audio value. Press the "Apply" button to save changes.
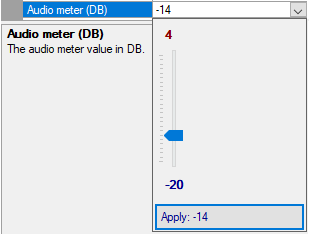 Important
Refer to the Working with Audio section in the Cinegy Desktop Manual for more information about the VU meter. -
Check ingest fields – if set to "True", it is required to fill in all mandatory ingest fields before the user can proceed with the ingest session (out of date).
-
Clean lock records – enables the Cinegy Archive database to delete the lock records after you have unlocked the item. When this option is not set, the lock record remains in the Cinegy Archive database, and this may cause a growth in the table sizes for large databases.
NoteThis feature can be useful when using large databases. -
Create a private folder – if set to "True", a private folder in the database will be created for the user, logged in for the first time. This option is recommended for a more organized Cinegy Archive database.
-
Create Roll ingest report – enables generation of a specific report in PDF format for any imported Roll in Cinegy Desktop.
ImportantRefer to the Ingest Reporting section in the Cinegy Desktop Manual for information about the ingest report feature. -
Default RR – defines the default reading speed value used to calculate the duration of the SOT blocks, PRESENTER blocks with no Presenter specified, and VO blocks with no Author specified. The range of values is from 1 to 999.
ImportantRefer to the News Options article in the Cinegy Archive Manual for more details. -
Default system TV format – defines the preferred TV format (e.g., NTSC 16:9) selected from the drop-down list. The selected TV format will be used by the system as the default TV format for all applications working with the Cinegy Archive database.
-
Delete by portions – defines the batch size for node deletion to optimize performance when handling bulk deletions in a large Cinegy Archive database. Set to "0" to delete all nodes in a single operation.
-
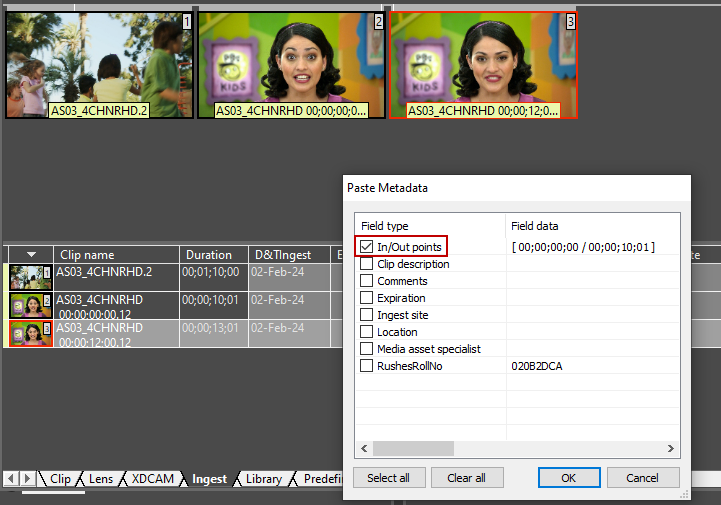
Enable copy In/Out points – if set to "True", the In and Out points defined for Clips in a ClipBin can be copied. When being in a ClipBin, you want to copy a Clip with set In/Out points, and then click on another Clip, the "Paste metadata" window will appear in the context menu. According to this setting, this dialog will (or will not) have the "In/Out points" item.
-
Enable manually edit In/Out points – if set to "True", the user can manually edit In and Out points for Clips in a ClipBin directly from the clip metadata form.
ImportantRefer to the Changing In and Out Points section for more details. -
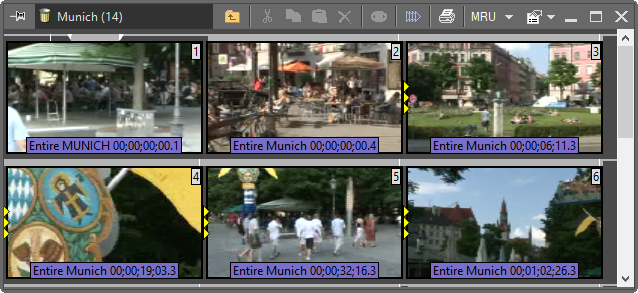
Enumerate clips in ClipBin – if set to "True", enables clip numbering globally in the entire Cinegy Archive database and displays clip numbers in user bins in Cinegy Desktop:
-
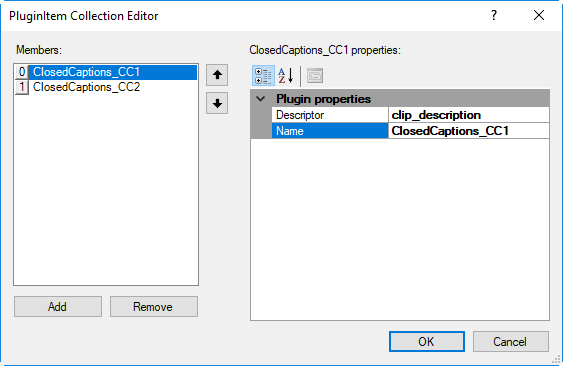
Plugins settings – defines target fields for captured closed captions/subtitles or for speech-to-text recognition (out of date).
Use the "Add" or "Remove" buttons to add or remove closed caption members. You can choose the descriptor for the selected closed caption members from the drop-down list and edit its "Name" in the plug-in properties menu:
-
Recover offline files – if set to "True", enables offline files restoration on the Cinegy media storage.
-
Sequence AutoSave Timeout – defines the timeout in seconds after which the Sequence is saved automatically. Values below 30 sec will be replaced with the minimal value of 30 sec timeout. The negative value means no autosaving.
-
Show Total Children – set this option to "True" to get the information about the total number of child objects located on the node. When the node is hovered over for the first time in the session, its number of children is calculated in the background. Next time the node hovers over the tooltip, it will display the total number of children.
Two variations of the tooltip are shown below: with the "Show total children" function enabled and disabled accordingly.


The "Show total children" option set to TRUE
The "Show total children" option set to FALSE
-
Story AutoSave Timeout – defines the timeout in seconds after which the Story is saved automatically. Values below 30 sec will be replaced with the minimal value of 30 sec timeout. The negative value means no autosaving.
-
Unlock objects on Start – locked objects are available for editing only to the user who locked them. Thus, all other users will have "read-only" access to the locked objects.
This option allows you to unlock all locked objects on the Cinegy Desktop launch. If, for some reason, there are locked objects left when a user session is finished, they will be unlocked when the owner logs in again.
ImportantRefer to the Actions paragraph within the Nodes Explorer article to get additional information about node unlocking. -
Update interval – defines the time interval (in seconds) for SQLMAMAccessor update queries.
-
Use default media groups – this attribute is reserved for future use. Currently does not affect the system functionality.
-
Use rights for the nodes – Cinegy Archive Manager has a rights management read-only parameter for the node access control. It displays the mode in which the Cinegy Archive database is working:
-
Use
Node access is performed according to the permissions settings in the database.
-
Write, but not use
Storing of the actual node permissions is retained, but not used when reading nodes. Newly created child nodes inherit the permissions of the parent nodes as usual.
-
Not use
Recording of the existing node permissions is retained, but not used when reading. Newly created children do not inherit the permissions of the parent nodes.
-
-
Use the Roll name in clip names – if set to "True", Cinegy Desktop names the media files on the Cinegy Archive content server using the actual Roll name at the beginning of the file name.
NoteThis option is obsolete. The "Roll Name" field may be presented as a normal word or macro. In the example below, the following word is used: "Bullfinch". The file name will be written on the Cinegy Archive content server as:
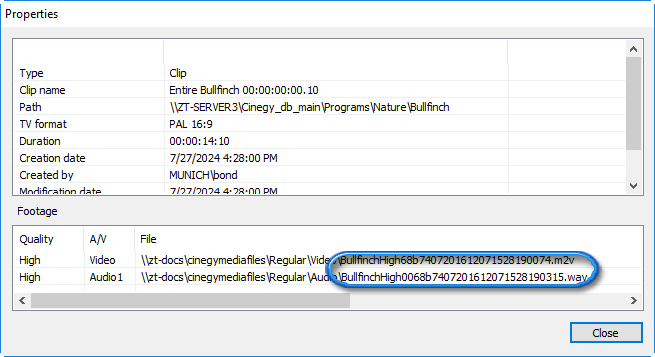
Used Roll name in clip names
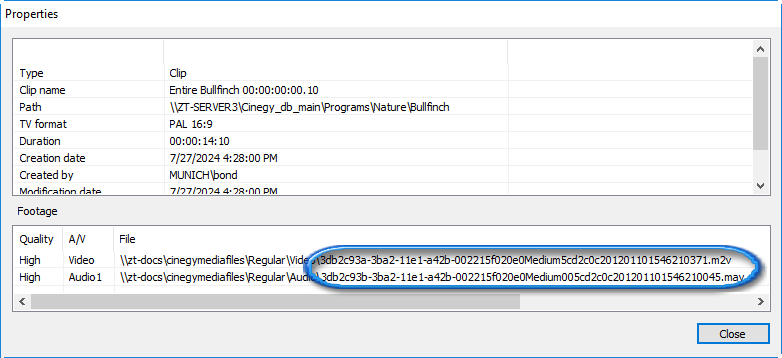
Not used Roll name in clip names
-
Use the timecode in Clip names – if set to "True", the system is forced to add the start timecode to every master clip name on capture.

Autotimecode off

Autotimecode on
ImportantRefer to the Working with Timecodes article in the Cinegy Desktop Manual to learn more about timecodes.
Database

-
Alias – defines a user-defined name of the current database to be displayed in the Cinegy Desktop Explorer tree. Leave this field empty to keep the default Cinegy Archive database name.
-
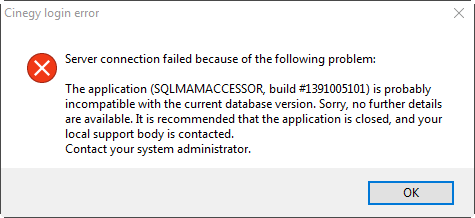
Compatibility checking – if set to "True", the compatibility control of currently installed Cinegy applications on your machine is enabled, with the Cinegy Archive database(s) to which you are connecting.
NoteThe compatibility checking is performed on the Cinegy Desktop startup. In case the database is incompatible with the release version, the error message appears. CautionIt is not recommended to disable this option. This may lead to unexpected behavior. The compatibility checking is performed on the Cinegy Desktop startup. In case the database is not compatible with the release version, the corresponding error message will appear:
-
Current Build – the current Cinegy Archive database build is displayed here in the following format: xxxyymmddv,
where:
-
xxx – the Cinegy Archive database version;
-
yymmdd – the database creation date in the YearMonthDay format;
-
v – the Cinegy Archive Database Wizard version used for the database creation/upgrade.
-
-
Current Version – current database version.
NoteThe current version number is set automatically depending on the specified database. -
DB Wizard action – the date and time of the latest database action performed via Cinegy Archive Database Wizard.
-
DB Wizard version – the version and build number of Cinegy Archive Database Wizard used for database manipulations.
Default Folders, Bins

-
Default Cinegy folder – Cinegy eXtreme is a post-production application that can be integrated with Cinegy products. Here you can define the location for the Cinegy eXtreme export Rolls. To do this, press the "Browse" button to select a different folder instead of the "Default master clip folder".
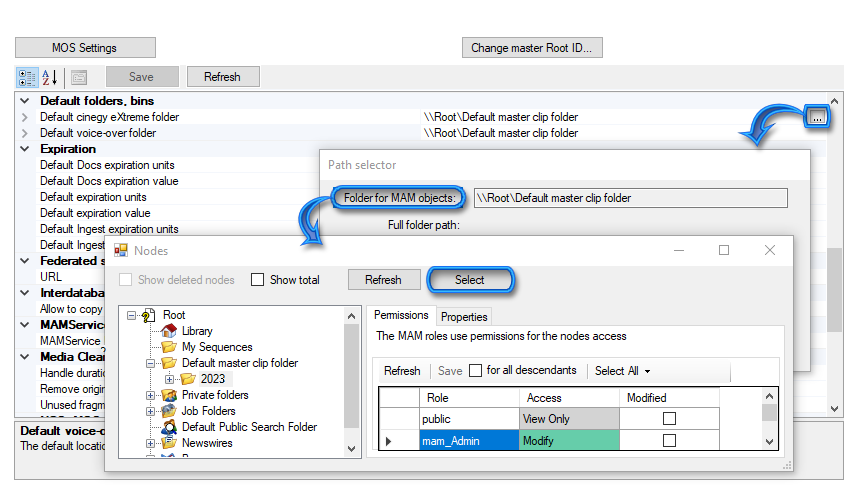
Select the new folder to be used for the Cinegy eXtreme Rolls in the "Nodes" window and "Select" it.
-
Default voice-over folder – defines the path to the voice-over bin in the same way as to the Cinegy eXtreme folder.
Expiration

-
Default Docs expiration units – the time units to define the default expiration date of documents: days, months, or years. To disable the expiration monitoring of the documents, set this option to "None".
NoteThis option is obsolete and is used only for Cinegy Convert Legacy. -
Default Docs expiration value – the default expiration value of the documents, measured in the specified expiration units.
The default expiration date of the documents defined here can be used during the document import if the expiration period is set to "Database default" in the watch folder settings configurator.
NoteThis option is obsolete and is used only for Cinegy Convert Legacy. -
Default expiration units – the time units to define the default expiration date: days, months, or years, that can be used in the operations with expired objects by Cinegy Desktop plug-ins.
The default expiration date may be set in the following units: days, months, or years. To disable the expiration monitoring, set this option to "None".
-
Default expiration value – the default expiration value, measured in the specified expiration units.
-
Default Ingest expiration units – the time units to define the default capture expiration date: days, months, or years, used as the "Roll info" default expiration date.
-
Default Ingest expiration value – the default capture expiration value, measured in the specified units.
NoteYou can change this expiration date for the selected Roll manually from the "Roll info" dialog in Cinegy Desktop. 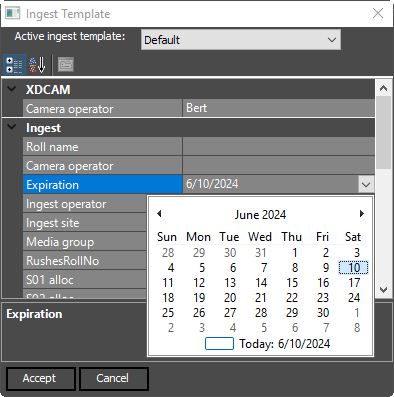
Federated Search
|
Note
|
This functionality is obsolete and is no longer in use. |

Federated search can be used to divert the search request to a specified web search engine. For example, if you want to use the Google search engine, enter http://www.google.com/search?q= in the "URL" text field.
|
Note
|
To disable the Federated search feature, leave the field empty. |
Interdatabase Operations

The "Allow to copy Rolls without footages" option is used when performing interdatabase operations. Set this option to "True" to enable copying Rolls between databases without their footages. The Rolls will share the same footages in Cinegy Archive.
|
Important
|
This option should be used with caution as it may cause issues with media cleaning when used incorrectly. Refer to the Coping Rolls without Footages section in the Cinegy Desktop Manual for more details. |
MAM Service
In the "MAMService URL" field, define the URL where the Cinegy Media Asset Management Service is installed.

Media Cleaner

-
Handle Duration – defines the amount of extra material preserved at every boundary of the referenced material during media cleaning. Using handles allows you to avoid the occurrence of compression artifacts and enables proper de-trimming of the clips.
NoteThe duration cannot be less than 1 second. -
Remove original files – if set to "True", enables the removal of the original file after media cleaning.
-
Unused fragment threshold – the threshold value for unused fragments that will be removed during media cleaning. If the unused fragment is less than the defined value, there will be no cuts in the new footage at this point, and the unused fragment will be included in the cleaned footage.
NoteThe default value of the unused fragment threshold is 10 seconds. ImportantRefer to the Media Cleaner section in the Cinegy Desktop Manual to learn more about Cinegy Media Cleaner.
NCS, MOS

For proper connection to a supported newsroom system (e.g., Octopus), define the correct settings for the Newsroom Control System (NCS) and Media Object Server (MOS server):
-
Default MOS version – version number of the supported MOS protocol.
-
Disconnect on deactivation – if set to "True", enables disconnection of the ActiveX component when closing its window.
-
Media group ID – the media group identifier for the MOS ActiveX component.
-
MOS identifier – the name of the MOS identifier.
-
NCS identifier – the name of the NCS identifier.
Newswires

-
Breaking news count – defines the number of the latest breaking news to be displayed in the Newswire browser.
-
Breaking news only from master - if set to "True", the breaking news is shown only for the master database.
Reconnection

This option performs automatic reconnection to the server when Cinegy Desktop loses the connection.
-
Attempts – defines the number of attempts to reconnect to the server. A value of "-1" indicates that the number of reconnection attempts is unlimited (the client runtime attempts to connect to the server until it succeeds).
-
Timeout – defines the time delay in seconds between reconnection attempts.
Search

-
Search Cache – enables caching the search requests to accelerate the return of repeated search results.
TipThis feature is especially useful for large databases. -
Search in containers – enables/disables the object metadata search inside the containers.
-
Use predefined fields – enables/disables the usage of the predefined descriptor fields during the full-text indexing and search operations. This can be useful for faster search and copying operations in large databases.
When this option is set to "False", these fields will not be included in full-text indexing. The predefined fields, created or modified when the option is disabled, cannot be found in some cases (for example, during the simple search). However, they can be found with an advanced search or via direct search (with *).
It is possible to rebuild the indexes and make these fields searchable. To do this, set the "Use predefined fields" option to "True" and run Cinegy Archive Database Wizard one more time or upgrade/patch the database.
CautionFor large databases, this operation may take a long time. -
Words minimal length – specifies the minimal length of a searchable word in a search query.
Search Cache
Press the ![]() button in the dedicated field to launch the "Search Cache Options" dialog:
button in the dedicated field to launch the "Search Cache Options" dialog:
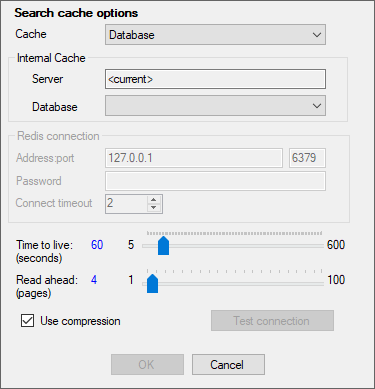
Use the "Cache" drop-down list and select the corresponding option to cache the search within the database or externally:
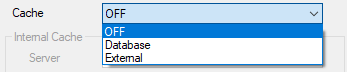
-
OFF – to cache search results within the current database;
-
Database – if selected, the cache search within the defined database is enabled. Use the "Internal Cache" section to define the following parameters:
-
Server – defines the server address. Leave the default value to use the current one;
-
Database – the drop-down list to select the database.
-
-
External – if selected, the cache search within the external server is enabled.
General Settings
For both database and external search caching, you can define the following settings:
-
Time to Live – the time interval in seconds for the cache to be saved upon the first search request processing.
-
Read ahead – the number of pages with the search request results to be cached.
-
Use compression – select the checkbox to enable the search request results compression for faster repeated request processing.
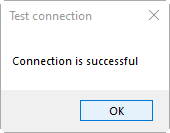
|
Press the "Test connection" button to verify the defined connection settings. A corresponding message will appear to inform whether the connection is successful: |
|

Change Master Root ID
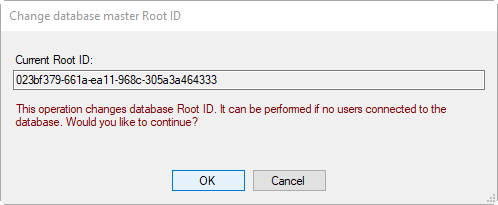
Each root node in the database on the SQL Server is labeled with a Globally Unique Identifier (GUID) for its recognition.
Nevertheless, the situation can arise when root nodes in databases are labeled with identical GUIDs (e.g., when both databases are restored from the same backup). In this case, make the GUIDs different for simultaneous work with these databases.
|
Press the "Change master Root ID" button to change the root ID for the current database. The following dialog box appears: |

|
Caution
|
If there are any users connected to the current database, you ought to disconnect them before changing the root ID. |
Slave Databases
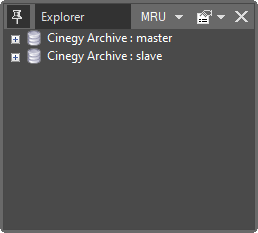
This functionality enables you to work with multiple databases simultaneously.
An example of the slave database usage is shown in the figure below:
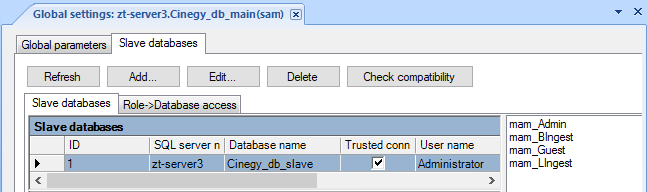
The "Slave databases" tab in the "Cinegy system settings" window is used for the setup and Cinegy Archive roles management of slave databases.
Configuration
|
The "Refresh" button updates the parameters of the slave databases that are listed in the table. |
|
To add a new slave database, press the "Add…" button. The following dialog box appears: |


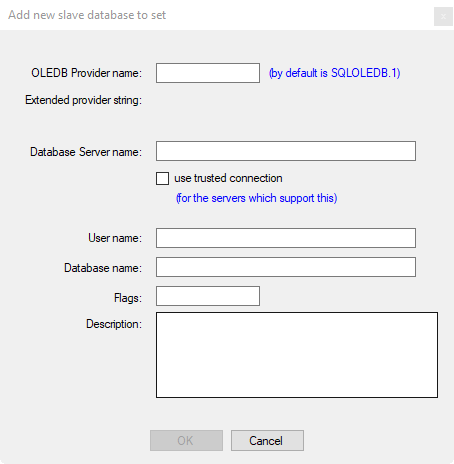
The following parameters should be set:
-
OLEDB Provider name – defines the OLEDB provider name.
NoteUse the SQLOLEDB.1 provider name by default. NoteTo use the SQL Server Native Client OLE DB provider, set the "OLEDBProvider" parameter to "SQLNCLI.1". -
Extended provider string – defines the provider-specific connection parameters.
-
Database Server name – defines the server where the Cinegy Archive database is located.
Note"Use trusted connection" means that a Windows user account is used for authentication on the SQL Server. Corresponding user accounts should have at least read-only permissions assigned. If you deselect "Use trusted connection", you will need a dedicated username and password on the SQL Server. -
User name – defines the SQL Server login.
-
Database name – defines the name of the slave database being used.
-
Flags – defines the database flag.
-
Description – allows you to add the description for the slave database being used.
Having specified all parameters, press the "OK" button. The new slave database will be added to the list.
|
The "Edit" button is used to edit the parameters of a selected slave database. |
|
The "Delete" button is used to remove a selected slave database from the list. |


|
This option allows you to compare the metadata model of the master database with the defined slave database(s). Press the "Check compatibility" button to open the "Compatibility checking" dialog: |

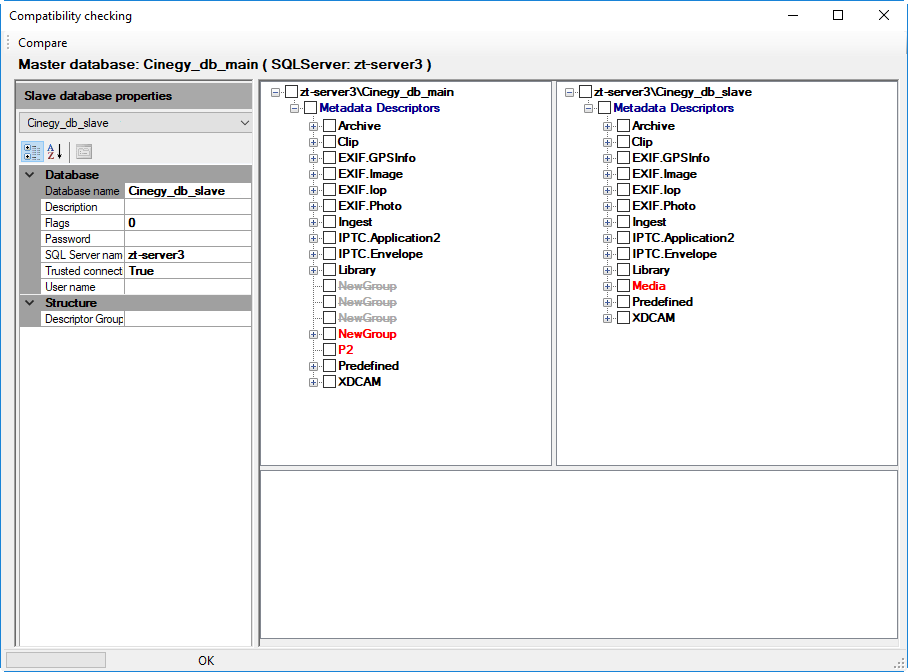
Select the slave database from the drop-down list and press the "Compare" button located in the top left corner of the dialog box. Differences in metadata descriptors are colored in red.
Database Access
The "Role→ Database access" tab allows the user to perform role access management for slave databases.
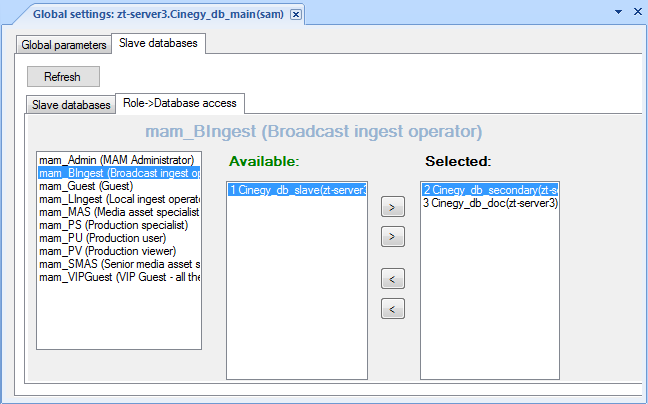
You can permit access to selected databases to any Cinegy Archive role. To do this, select the Cinegy Archive role; then select the required database from the list and press the  button. Users will only have access to the slave databases specifically selected for their role.