News Options
Reading time ~3 minutes
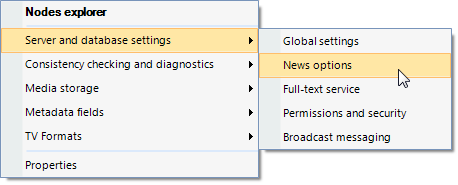
The "News options" panel is used for creating the list of authors, presenters, workflow steps, and Story types for the Story objects. To open this panel, use the "News options" command from the "Server and database settings" submenu launched by right-clicking the required database:
Authors
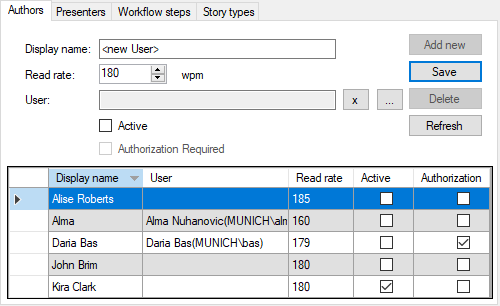
The "Authors" tab contains a detailed list of authors - people narrating the Story.
|
Press the "Add new" button, then specify the author’s name and reading speed in words per minute. |

|
Note
|
If reading speed is not specified, the default value is set according to the Default RR parameter value defined in the "Global parameters" tab. |
In the "User" field, press  and choose a certain user or the whole user group that will be used for the authentication. Press
  to remove the user account used for authentication.
|
Note
|
Defining the user account for authentication is optional. If a user account is specified, you can select the "Authorization Required" option so that all the Stories assigned to that particular author require authentication to be edited (i.e., they will only be editable by the author or users with the News director role). |
Select the "Active" option to enable the author to appear in the "Author" list of the Story.
|
Press the "Save" button to submit the creation of a new author and add the record to the table below. |
|
To delete the specified author, select it in the table and press the "Delete" button. |
|
To refresh the list of authors, use the "Refresh" button. |


Presenters
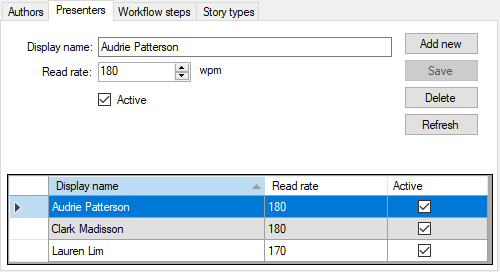
The "Presenters" tab contains a detailed list of presenters – people who introduce a show, link items, and interview guests.
|
Press the "Add new" button, then specify the presenter’s display name and reading speed in words per minute. |
Select the "Active" option to enable the presenter to appear in the "Presenter" list of the Story.
Workflow Steps
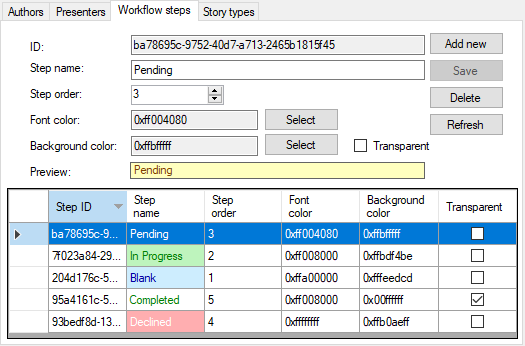
The "Workflow steps" tab allows the user to manage the workflow steps lists for the Story objects:
|
To add a new workflow step, press the "Add new" button. Then enter the desired step name via the keyboard and specify its order value by pressing the |
|
Note
|
In case the same order value is assigned for several workflow steps, they are arranged in the list in alphabetical order. |
|
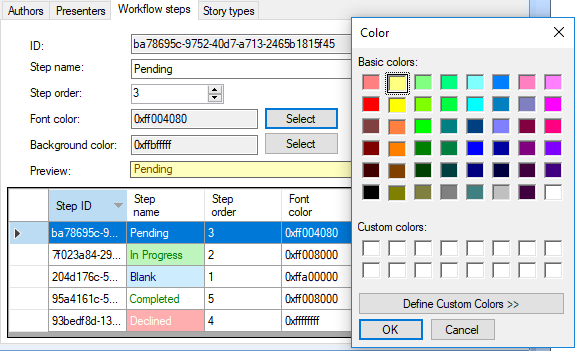
By pressing the corresponding "Select" button user can assign a font and background color that will be displayed in the "Step name" column below: |

|
Note
|
To enable the background color selecting function, deselect the checkbox in the "Transparent" column next to the desired workflow step. |
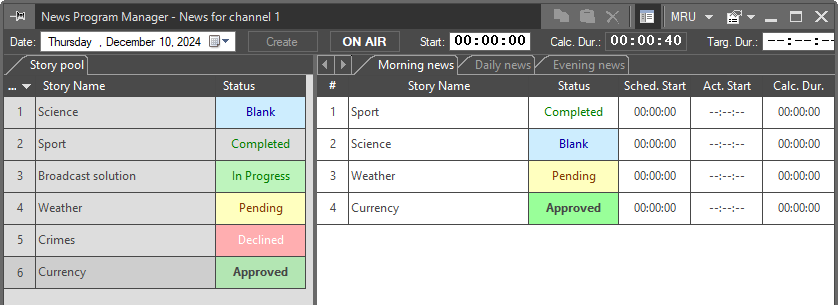
The font and background color settings will also be applied for the "Status" column in the News Program Manager dialog in Cinegy Desktop:
|
Important
|
To learn more about News Program Manager, refer to the News Program Manager section in the Cinegy Desktop Manual. |
Story Types
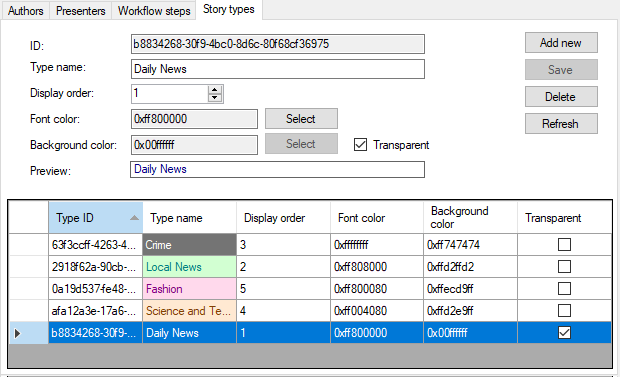
The "Story types" tab allows the user to create different Story types for the Story objects and individually specify a font and background colors for each type:
To add a new Story type, press the "Add new" button. Then enter the desired type name via the keyboard and specify its order value by pressing the  buttons or via the keyboard.
|
Note
|
In case the same order value is assigned for several Story types, they are arranged in the workflow steps list in alphabetical order. |
|
Note
|
To enable the background color selection function, remove the selection of the "Transparent" checkbox. |
Changing the font and background color settings will be applied in both Story Editor and News Program Manager:
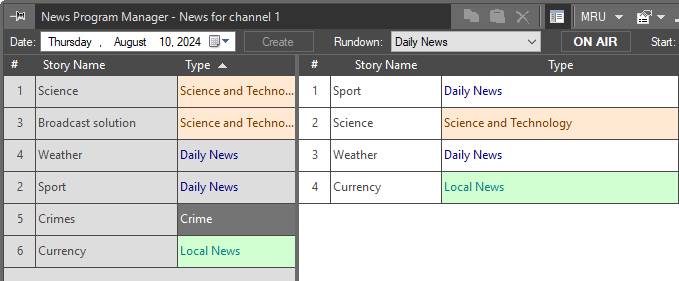
The "Type" column within News Program Manager

The "Type" drop-down list in Story Editor