Processing Tasks
Reading time ~7 minutes
Task Submission
Cinegy Convert supports automatic submission of tasks, when tasks are taken for processing by the Cinegy Watch Service via previously configured watch folders, as well as manual submission of tasks when tasks are individually configured and submitted directly via Cinegy Convert Monitor or Cinegy Convert Client.
Automatic
The Cinegy Convert Watch Service is used to perform repetitive tasks automation. Several watch folders can be configured to monitor Windows OS network shares and Cinegy Archive job drop targets. These watch folders automatically submit transcoding tasks according to the pre-defined settings when new media are detected.
|
Important
|
Please refer to the Cinegy Convert Watch Service Manual for details. |
Manual
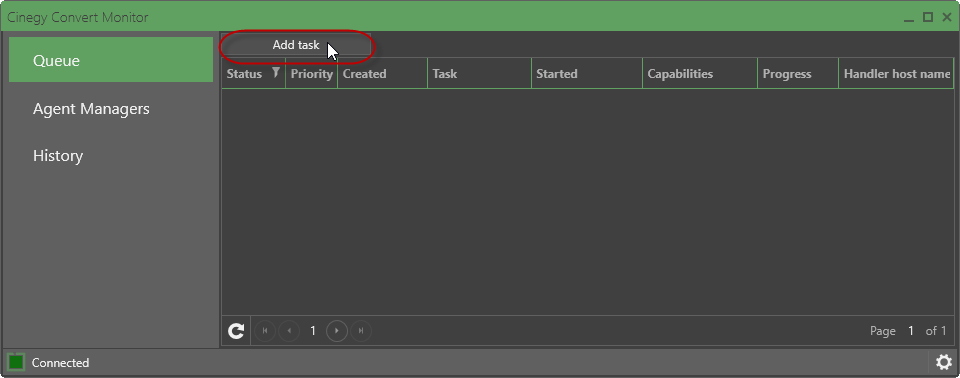
To add a transcoding task manually, press the "Add task" button on the "Queue" tab:
The following "Task designer" window appears:
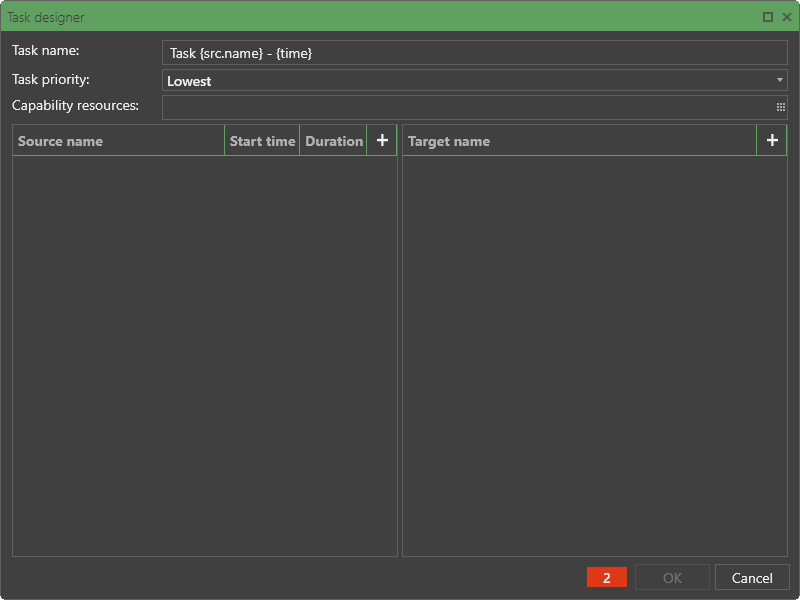
Define the required Cinegy Convert task properties that are described in detail below.
Task Name
In the "Task name" field, specify the name for a task to be displayed in the Cinegy Convert Monitor interface.
Task Priority
Set the task priority (high, medium, low, or lowest).
Tasks with higher priority will be taken first by Cinegy Convert Agent.
Capability Resources
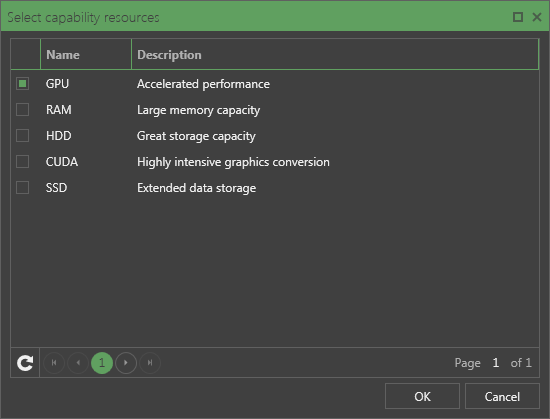
Press the  button to open the window for capability resources selection:
|
Important
|
The capability resources should be previously created via the Cinegy Process Coordination Explorer. Refer to this article for detailed information about the creation of capability resources. |
Here select the name of the resource that is needed for the conversion job being created and press "OK". It is possible to select multiple capability resources.
Alternatively, you can start typing in the name of the capability resource directly in the "Capability resources" field; while you are typing, the auto-complete feature provides suggestions starting from the letters you have already typed in:

The task with the defined capability resource(s) will be taken by Cinegy Convert Agent Manager.
Sources
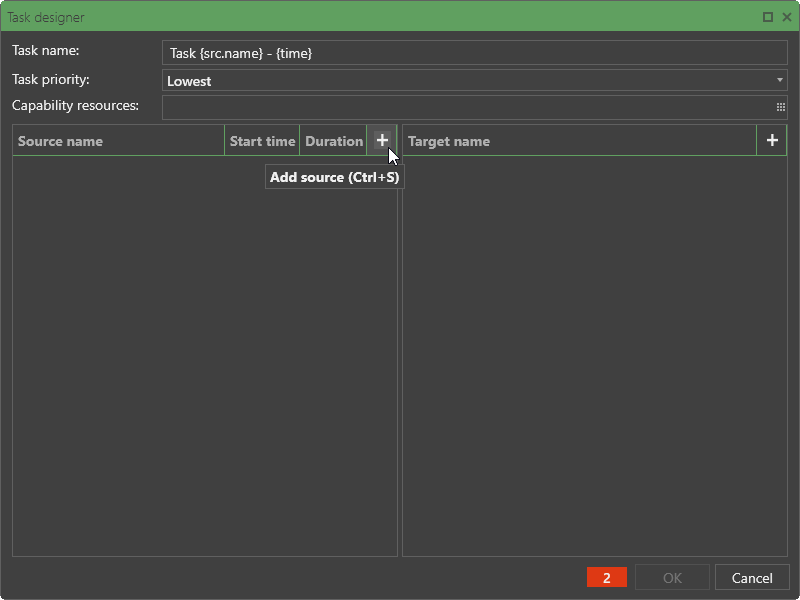
Define the source materials to be converted by clicking the "+" button within the source panel:
|
Tip
|
You can also use the Ctrl+S keyboard shortcut for this action. |
The "Source edit form" dialog appears:
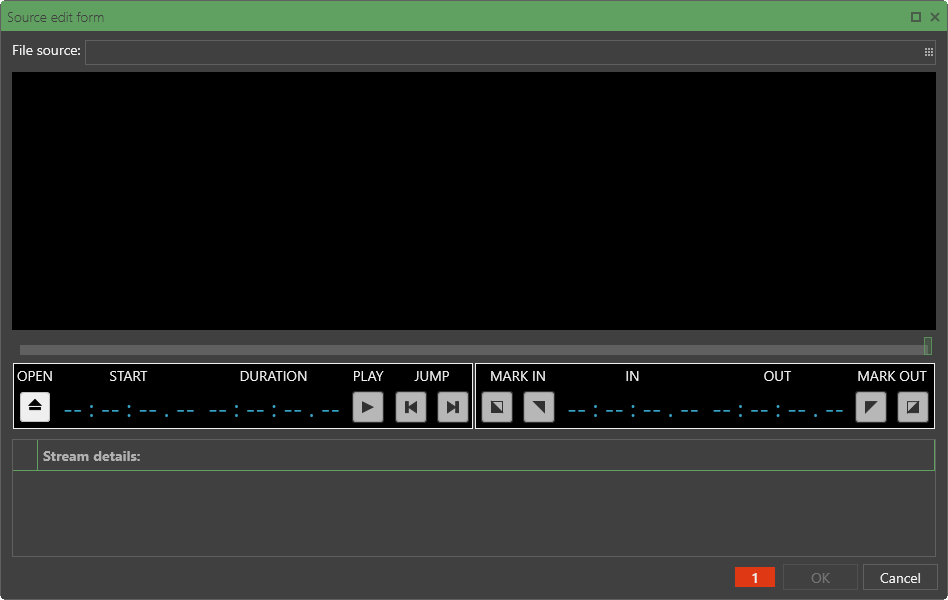
A source can be loaded by pressing  in the "File source" field over the preview monitor.
|
Alternatively, press the "Open" button in the controls panel to load a media file. |
The loaded source preview is shown on the preview monitor:
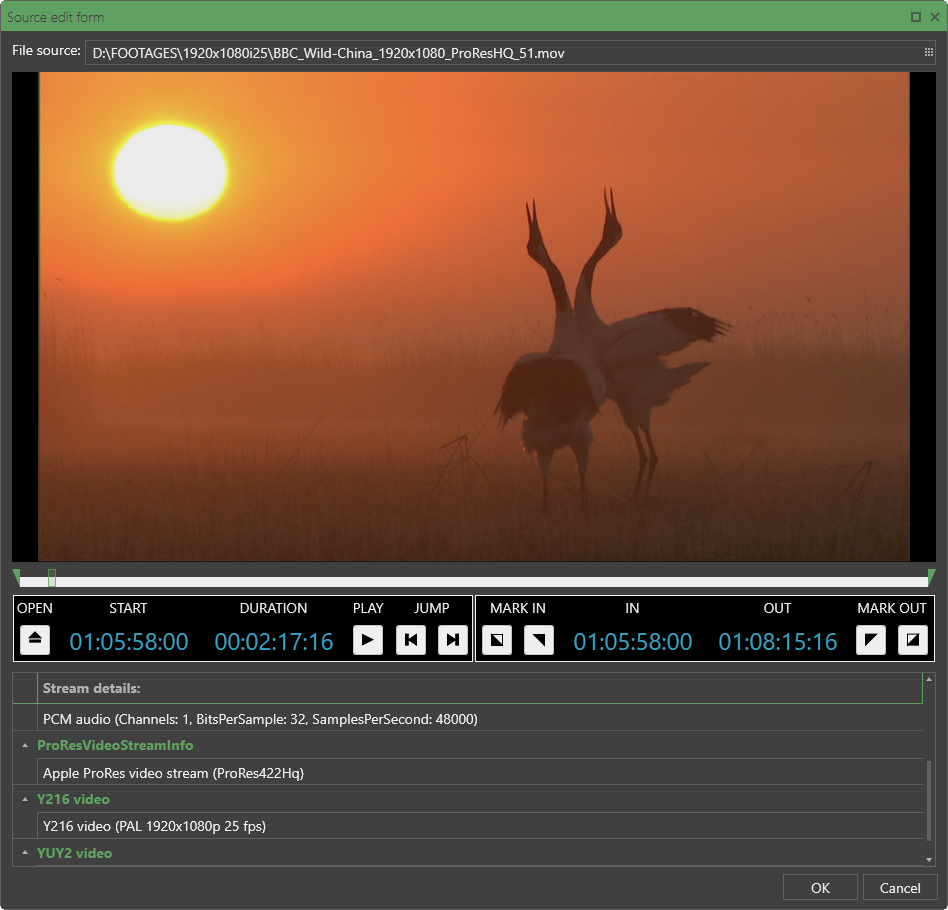
Below the monitor, there are controls for setting In and Out points. This enables processing only the defined part of video material.
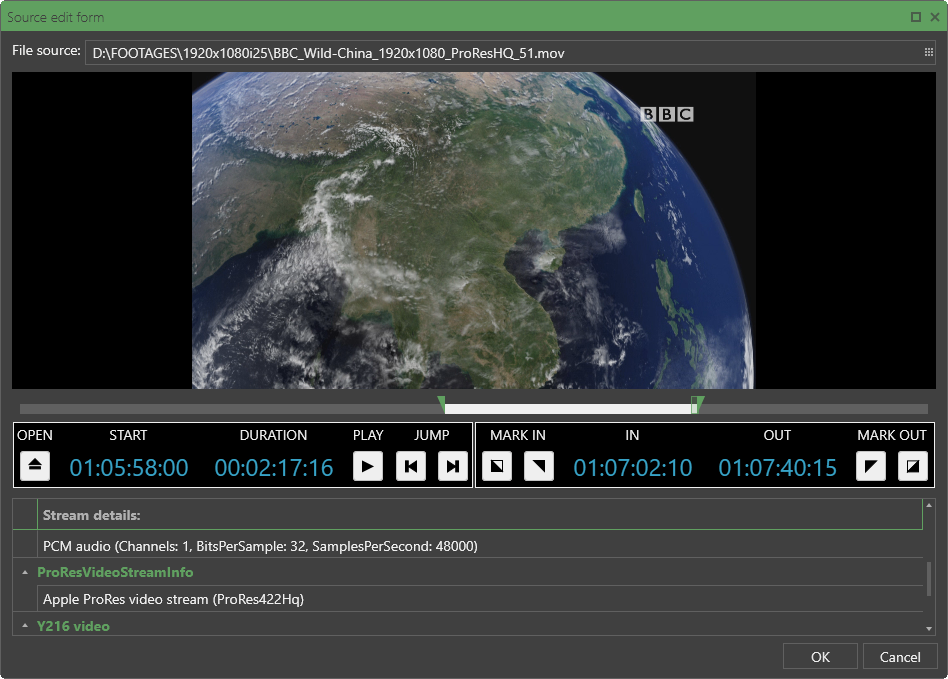
To define the part of the video for transcoding, go to the desired starting point of the video either by pressing the "Play" button and stopping at the desired position or by entering the desired time value in the "IN" field:

|
Press the "Set mark In position" button. The appropriate timecode will be shown in the "IN" field. |
Then go to the desired end of the video fragment by pressing the "Play" button again and stopping at the desired position or by entering the desired timecode in the "OUT" field.
|
Press the "Set mark Out position" button. The appropriate timecode will be shown. |
The duration is calculated automatically.
|
Use the "Clear mark In position" and/or "Clear mark Out position" buttons to remove In and/or Out points respectively. |
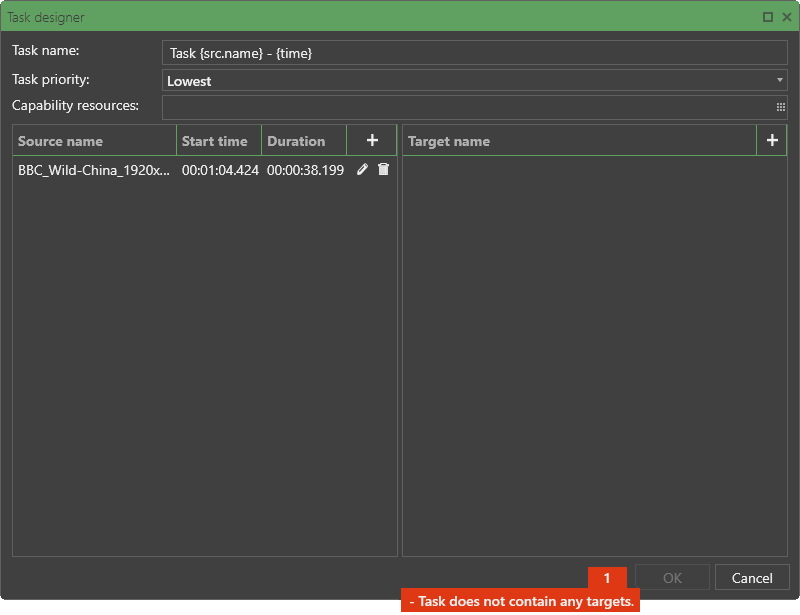
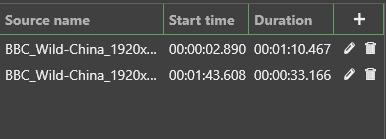
Press "OK" to finish defining source media material; the source will be added to the list:
|
Tip
|
In case of error detection, e.g., unspecified target, a red indicator appears specifying their number. Hovering the mouse pointer over the indicator displays a tooltip describing the problem(s). |
Several sources can be glued together during the transcoding task and can be added by clicking the "+" button and adding a source file in the same manner.
Target Profiles
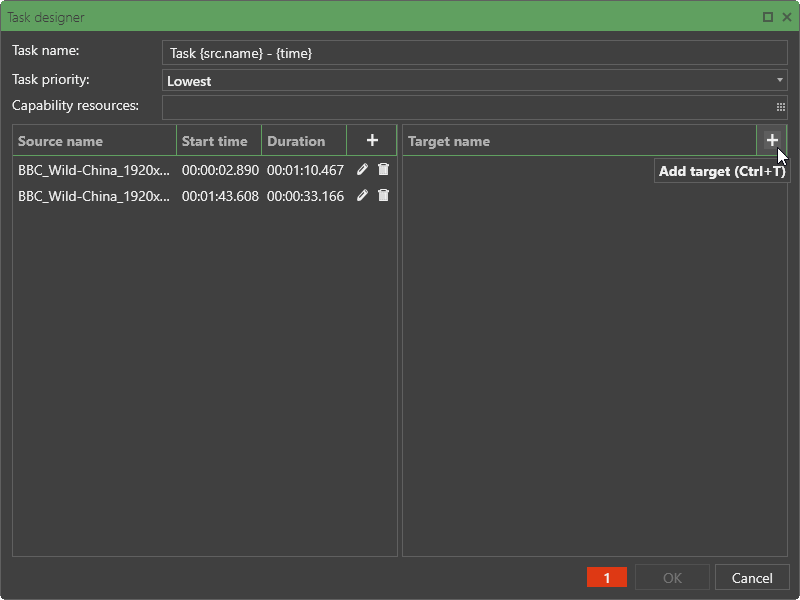
Set the targets defining the task output by clicking the "+" button within the target panel:
|
Tip
|
You can also use the Ctrl+T keyboard shortcut for this action. |
The "Add transcoding target" dialog appears:
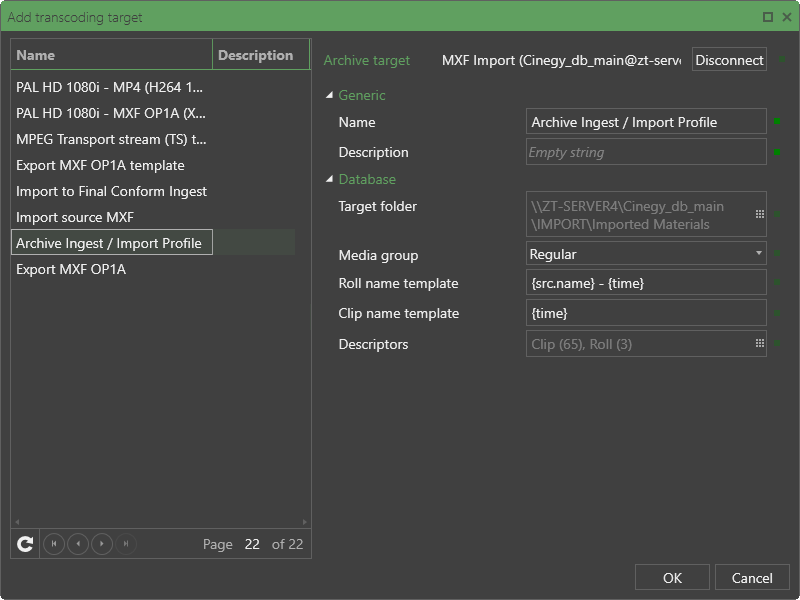
Here, from the list, choose the corresponding profile prepared using Cinegy Convert Profile Editor. Its settings will be open on the right-hand panel of the dialog allowing you to make changes in the selected profile if needed. Then press the "OK" button.
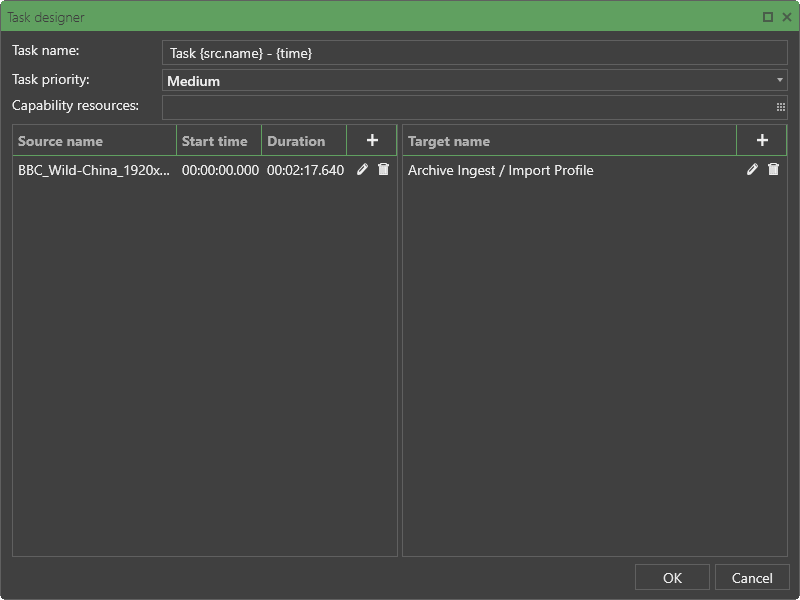
Several output targets can be added to the transcoding task defining different output formats like MXF, MP4, SMPTE TT, etc. To do this, invoke the "Target edit form" dialog again and choose another profile.
It is possible to add any source with any target schema. The automatic mapping with resampling and rescaling will be applied to the source media to fit with the defined target schema.
If there are some inconsistencies between source and target media formats, the yellow indication will be displayed. Hovering the mouse pointer over the yellow indicator displays a tooltip with information on what changes will be applied to the source media:

To edit a source/target from the list, use the  button on the right of the source/target name.
To delete a source/target, use the  button.
|
Note
|
The validation will be done at the start of the conversion task processing. |
|
Note
|
If direct transcoding is expected, all sources should have the same compressed stream format. |
Queue
The "Queue" tab lists all active transcoding tasks registered in the Process Coordination Service database with their statuses and progress:
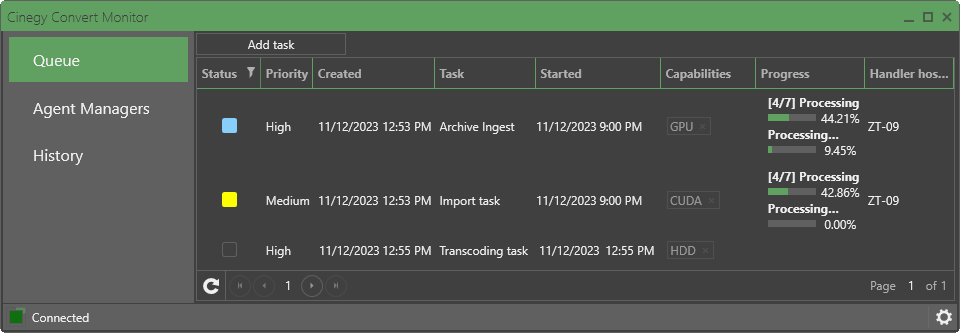
When a task is being processed by Cinegy Convert, its progress bar displays two independent processes:
-
the top bar shows the progress of stages 1 to 7.
-
the bottom bar shows the progress of an individual stage from 0% to 100%.
Task Status
The color of the "Status" column indicator corresponds to the transcoding task state:
|
the task is in progress. |
|
the task is paused. |
|
task processing is completed. |
|
the task is suspended. |
When task processing is completed, its status turns green and after several seconds it is removed from the list of active tasks.
Task Priority
Tasks processing is performed in the order of task priorities. The priority of a task is displayed in the dedicated column.
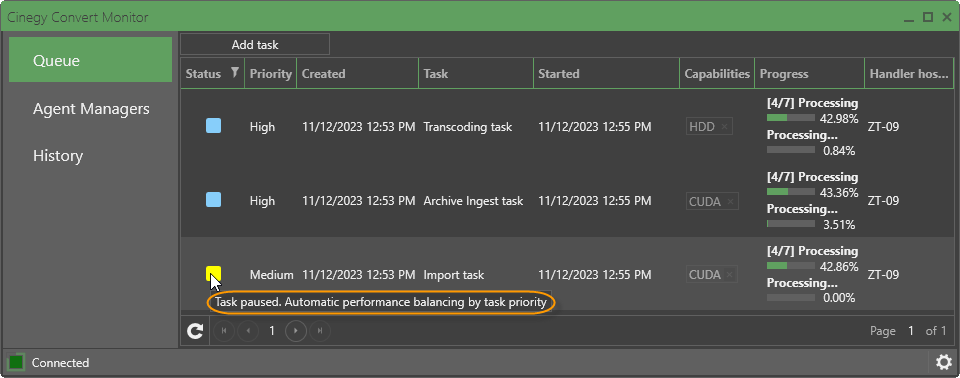
If the task with higher priority is received for processing, all tasks with lower priorities will be automatically paused. When the higher-priority task processing is completed, the lower-priority task processing is automatically resumed.
|
Caution
|
Please note, that the license is active and the resources being allocated for the paused task are not released. When the pause request is initiated, only CPU/GPU resources allocated for task processing are released. |
Hover the mouse pointer over the status cell of the specified task to see its full status description:
|
Note
|
Processing of the manually paused tasks is not automatically resumed. Use the "Resume task" command to proceed with manually paused task processing. |
It is possible to change priority for tasks being currently processed by Cinegy Convert Agent Manager by right-clicking the desired task and choosing the required command from the "Priority" menu:
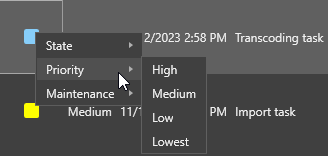
The tasks with lower priority will be suspended and higher priority ones will go to the top of the tasks list and continue being processed in the first instance.
|
Important
|
Refer to the Watch Folders Tab description in the Cinegy Convert Watch Service Manual for more information on setting priority for automatically created tasks. |
Tasks Management
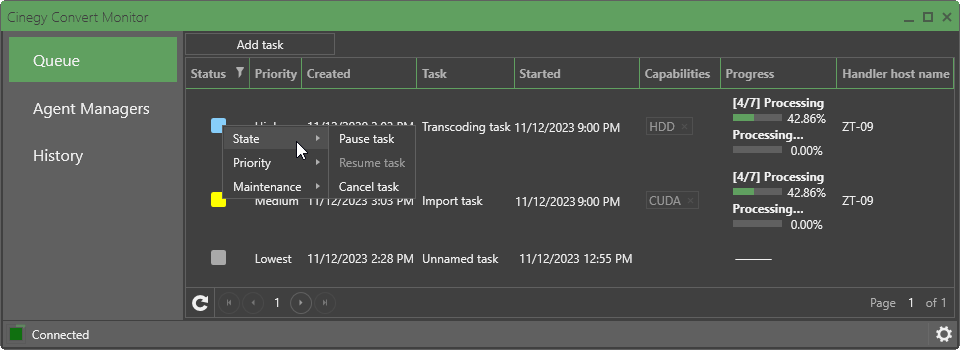
Tasks being processed can be paused/resumed or canceled. To do this, right-click the desired task in the list and choose the corresponding command from the "State" menu:
|
Note
|
In the case of canceling a task of importing to Archive, the part of the media, that has already been imported by that task, will be removed from the Roll. |
To resume the paused task processing, use the "Resume task" command.
If a task has not been taken for processing by any Cinegy Convert Agent Manager yet, it can be suspended. To do this, right-click the desired task and use the "Suspend task" command from the "State" menu:

To bring the task back to the queue, select the "Queue task" command from the suspended task right-click menu.
Manually assigned tasks can be easily duplicated using the "Submit copy" context menu command from the "Maintenance" menu:

|
Note
|
Due to the specifics of processing tasks automatically created from watch folders, please avoid copying them. |
|
Tip
|
Creation of a copy is also available for the completed transcoding tasks on the "History" tab. |
You can also create a copy of an already completed transcoding task in the "History" tab in a similar way.
The "Reset task" command resets the task status.
Tasks Filtering
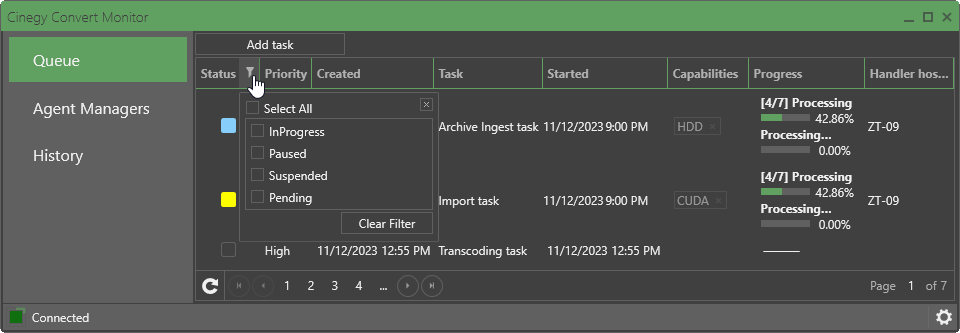
Filtering of the task queue is supported, which allows the user to hide tasks with specific statuses from the list to make it easier to find and manage them.
Use the ![]() icon in the "Status" table column; the following dialog box appears allowing you to choose the statuses to be displayed:
icon in the "Status" table column; the following dialog box appears allowing you to choose the statuses to be displayed:
|
To discard all filtering conditions, press the "Clear Filter" button. |


