Step 2: Configuring Cinegy Multiviewer
Reading time ~8 minutes
The Cinegy Multiviewer configuration tool is launched automatically during installation. Alternatively, it can be started manually via the MultiviewerConfigurator.exe file from the installation folder or can be opened from Start > Cinegy > Cinegy Multiviewer > Cinegy Multiviewer Config.
General Settings
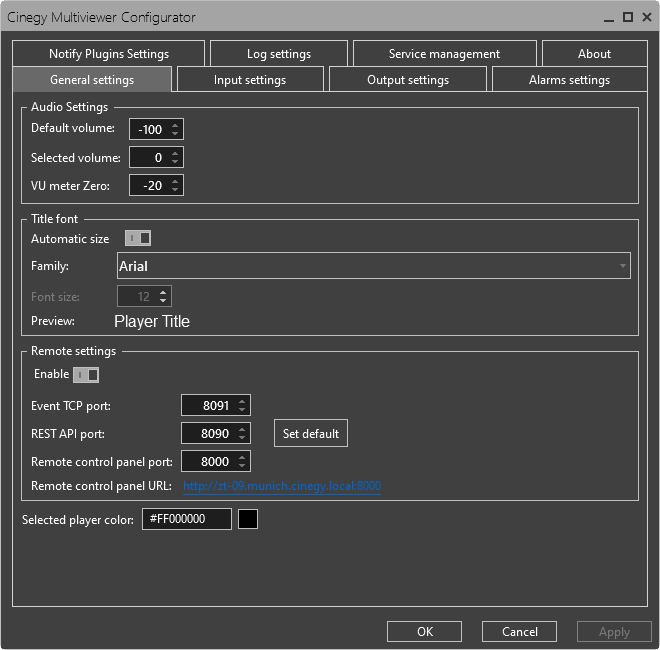
In this tab, you can configure audio settings for the players displayed by Cinegy Multiviewer, as well as the font used for displaying the Player Title, and set up the Remote Control panel.
Input Settings
In this tab select and configure the layout of the channels preview in the main window. There are two layout types in Cinegy Multiviewer:

-
Mosaic layout – predefined mode in which all the channels to be monitored are displayed one after another. For a simple demo, you can use this mode.
-
Designer layout – mode in which the channels to be monitored are displayed in the order customized via the Cinegy Multiviewer Layout Designer tool.
Each layout type has a different set of parameters. This document describes the mosaic layout configuration.
Mosaic Layout Settings
Mosaic layout settings should be configured here:
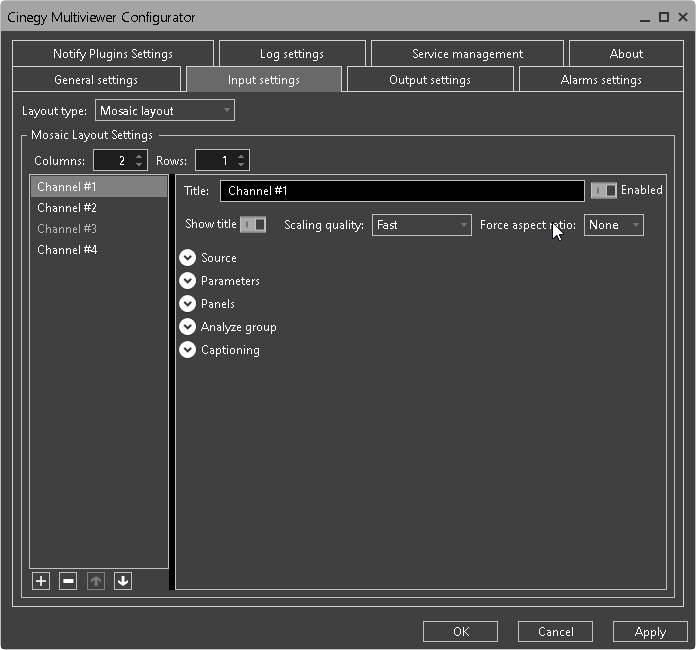
Define the number of columns and rows of the channels preview grid to be displayed.
To manage the list of monitored streams use the corresponding buttons.
|
To add a new stream, press the "Add Stream" button. |
|
To remove a stream, use the "Remove Stream" button. |
|
You can sort the stream list using the "Move up" / "Move down" buttons. |
Specify the stream title to be displayed on top of the channel preview. Activate the "Enable" toggle switch to include the selected stream in the mosaic layout display. If the "Show title" option is enabled, the specified title is displayed in the player.
In the "Scaling quality" drop-down list choose desired scaling mode applied when processing HD and UHD signals.
In the "Force aspect ratio" drop-down list choose the aspect ratio to be used for display in the player or leave "None" to display the original aspect ratio of the stream. Half-height frame dimensions are used to distribute the CPU and GPU loads between several servers.
Source
The "Source" configuration group contains many settings that depend on player mode chosen:

For demo purposes choose either MPEG-TS or SDI player mode.
For MPEG-TS player mode, configure the following settings:
-
URL – the RTP/UDP/SRT URL for this stream;
-
IP listen – for a simple demo leave this parameter set to 0.0.0.0.
For SDI player mode configure the following settings depending on which device is selected (DeckLink, DVS, AJA, or Deltacast):
-
Video format – choose the necessary video format;
-
Board number – define the board number; for the DVS input device also define channel mode, for the Deltacast input device define the channel number;
-
Video input – choose the video input type for the AJA input device. If the Analog video input is selected, it is also necessary to select a format from the "Analog input format" drop-down list;
-
Audio input – define the audio input type (Embedded, AES, Analog, or HDMI) for the AJA input device;
-
Reference source – define the reference source for the AJA input device.
Parameters
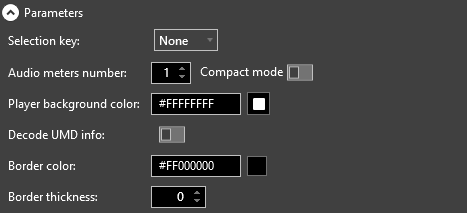
The "Parameters" configuration group is identical for both player modes; here set up the following parameters:
-
Selection key – a keyboard key to be used to select this stream.
-
Audio meters number – the number of audio meters (up to 8) shown for this channel preview.
-
Player background color – custom background color for a player.
-
Decode UMD info – to enable the display of special metadata that will be taken from the defined stream, activate this toggle switch. Metadata will be shown at the top of the player window instead of the stream title (this option is not available for SDI and NDI players).
-
Border color – a custom color for player borders. With the value set to "0", player borders are invisible.
-
Border thickness – the width of player borders.
Panels
The display of informational panels is adjusted here:
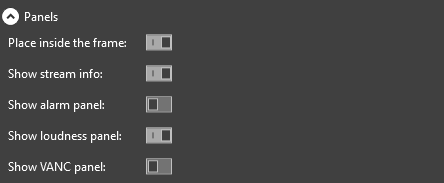
To enable the display of the monitored stream filling in the whole space within the player window with other panels and indicators being overlaid, activate the "Place inside the frame" toggle switch.
To enable the display of stream encoding and format, as well as video resolution and frame rate, activate the "Show stream info" toggle switch.
To enable the display of the alarm panel in the players, activate the "Show alarm panel" toggle switch.
To enable the display of the panel showing the calculated loudness value and the dialnorm parameter, activate the "Show loudness panel" toggle switch.
To enable the display of the VANC (Vertical Ancillary Data Space) information panel that includes CC, AFD, and PR data, activate the "Show VANC panel" toggle switch.
Analyze Group
In the "Analyze group" section select the desired checkbox(es) to analyze video/audio/VANC or all of them.

Captioning
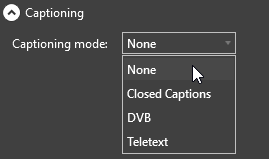
In the "Captioning" section select mode with which music cues, environmental sounds, and dialogs that occur during the program, will be decoded: None, Closed Captions, DVB, or Teletext.
|
Note
|
If the stream contains the CC-608 format for the closed captions in the Korean language, select "Korean" in the "Charset" drop-down list; otherwise, leave the default "Standard". |
|
Important
|
For a detailed description of input configuration, please refer to the Input Settings article in the Cinegy Multiviewer Manual. |
Output Settings
The four output modes in Cinegy Multiviewer are Window Output, MPEG-TS Output, Shared RAM Output, and NDI Output. For a simple demo, select Window Output mode, in which a frame is formed from the data of all the incoming RTP streams and is played in the Cinegy Multiviewer window:
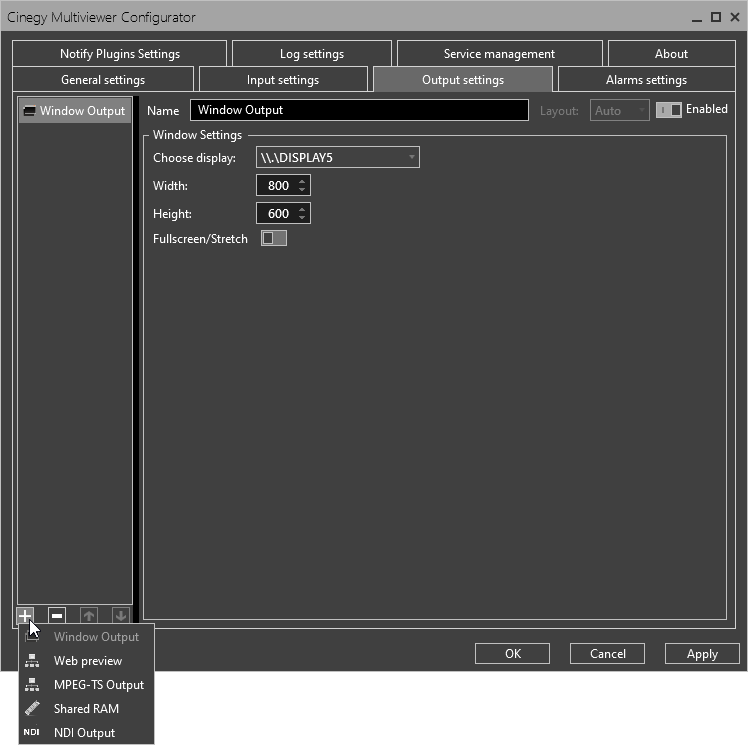
Define the display on which the Multiviewer window will be opened and specify its size. To expand the Cinegy Multiviewer window to full screen, activate the "Fullscreen/Stretch" toggle switch.
|
Note
|
The F12 key toggles full-screen mode of the Cinegy Multiviewer window. |
|
Important
|
For a detailed description of all output modes, please refer to the Output Settings article in the Cinegy Multiviewer Manual. |
Alarms Settings
The parameters of alerts can be configured in this tab.
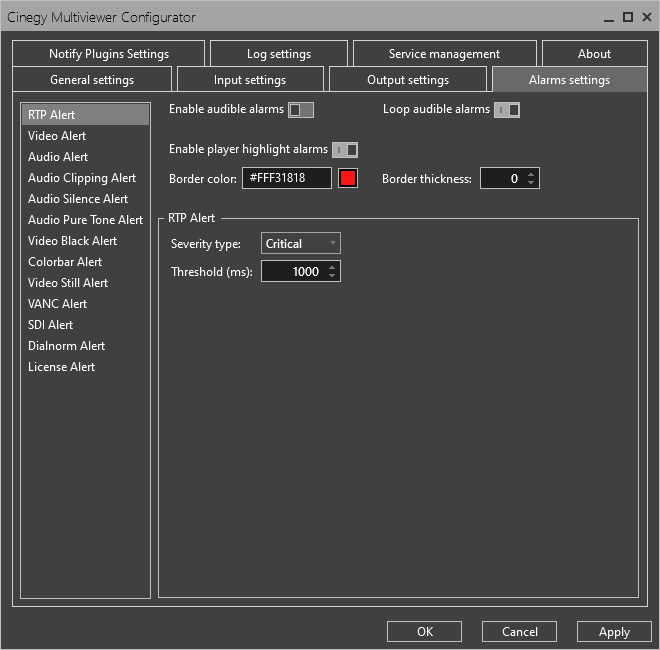
The alarms are displayed below the player screen if the "Show alarm panel" option is enabled in the settings of the corresponding stream. They serve as indicators of various signal problems.
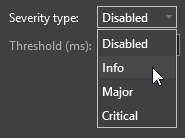
You can select the severity type of the alert or disable it; the threshold time for the alert can be specified in the "Threshold (ms)" field:
The following alerts are available:
-
RTP Alert – alerts for cases when the RTP stream is missing;
-
Video Alert – alerts for cases when the video stream is missing;
-
Audio Alert – alerts for cases when the audio stream is missing;
-
Audio Clipping Alert – alerts for cases when the audio volume exceeds the specified level (clipping); the maximum audio level in dB should be specified;
-
Audio Silence Alert – alerts for cases when the audio volume is below the specified level (silent); the minimum audio level in dB should be specified;
-
Audio Pure Tone Alert – alerts for cases when the pure audio tone is detected;
-
Video Black Alert – alerts for cases when black frames are detected. You can also define the algorithm and value that will be used to find the difference between the first and the following frames in the sequence;
-
Colorbar Alert – alerts for cases when colorbar displaying is detected;
-
Video Still Alert – alerts for cases when freeze frames are detected. You can also define the algorithm and value that will be used to find the difference between the frames like for the black video alert.
-
VANC Alert – alerts for cases when VANC information loss is detected. Activate the "Closed caption" / "Active format description" / "Parental rate" toggle switch(es) to receive alerts when the corresponding information is missing.
NoteIf the VANC" option is not selected within "Analyze Group" in the "Input Settings" tab, VANC alert settings will not be enabled. -
SDI Alert – alerts for cases of SDI connection loss.
-
Dialnorm Alert – alerts for cases when the dialnorm metadata is out of the specified range in AC-3 streams.
-
License Alert – alerts for cases of license loss.
|
Important
|
For a detailed description of all alert settings, please refer to the Alarms Settings article in the Cinegy Multiviewer Manual. |
Notify Plugins Settings
Having set up the parameters for alerts, go to the "Notify Plugins Settings" tab to configure the alert receiving options. It is possible to receive alerts in various ways described below.
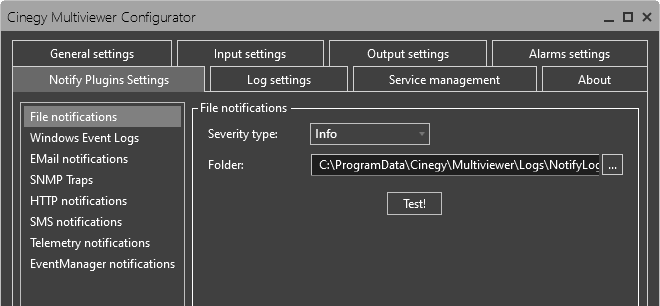
Using the "Severity type" drop-down list, you can set the severity type of the notification or disable it. The following notifications are available:
-
File Notification – a report is saved to a text file located in the defined folder;
-
Windows Event Log – an event of the specified type is logged to the Windows Event Log;
-
EMail Notification – a message is sent from the configured e-mail account;
-
SNMP Trap – provides a history of SNMP traps, sent to the specified IP host;
-
HTTP Notification – alerts are sent to the specified WEB URL.
-
SMS Notification – alerts are sent to the specified phone number via SMS (a GSM device (mobile phone, SIM stick, etc.) should be connected).
-
Telemetry Notification – notifications are logged into the Grafana portal deployed inside the Cinegy Telemetry cluster.
-
Event Manager Notification – alerts are sent to a selected device via Cinegy Event Manager.
|
Important
|
A detailed description of notification parameters can be found in the Notification Settings article in the Cinegy Multiviewer Manual. |
Log Settings
In this tab, you can define the settings of log file creation: logging level, location for log files, and how often new log files should be created.
Having set up the necessary settings, press the "OK" button in the Cinegy Multiviewer Configurator.
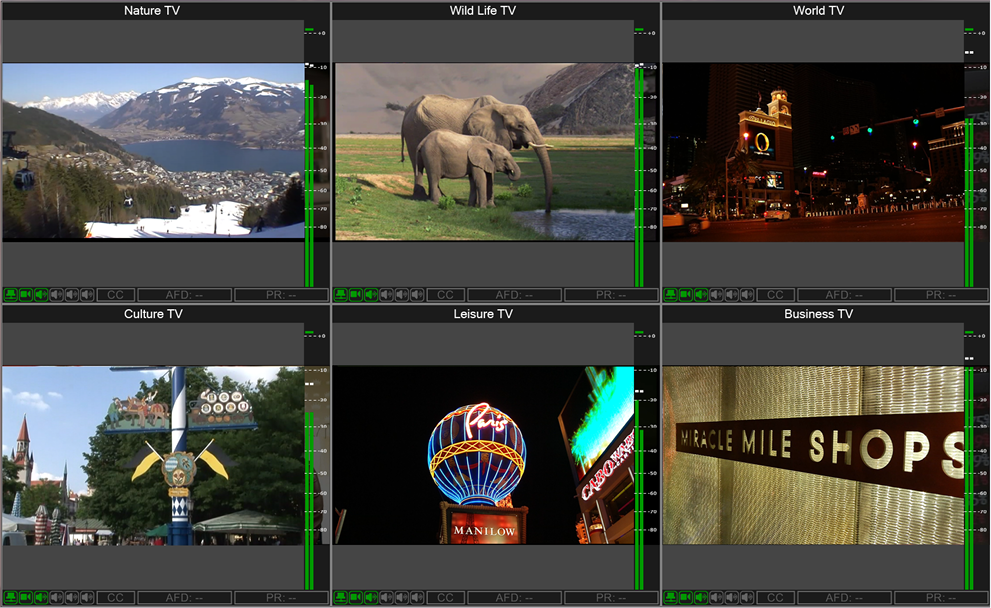
Then launch Cinegy Multiviewer; the following window will be opened:
|
Caution
|
To preview all video streams, a corresponding software or hardware dongle license is required. |


