Amino DHCP Configuration for Windows DHCP Servers
Reading time ~4 minutes
Amino set-top boxes [STB] are a favorite little unit, found in many Cinegy offices and customer sites around the world. They are a great balance between price and features, and for those times when you just need a quick converter box between IP and HDMI, they are perfect. However, to get the most out of them, you really need an easy way to manage a fleet of such boxes – and commanding them via DHCP options is the best way to do this! Follow this simple guide, and you too can shortly have your own small army of STBs doing your bidding…
Getting Started – Defining Vendors and Classes
|
Note
|
Let’s first assume that you have correct administrator rights on your server and that you have a basic, working DHCP system up and running already. If you do – great; the below was all tested on Windows 2012 Server, but should work on earlier and later versions too – the premise is all very standards-based. |
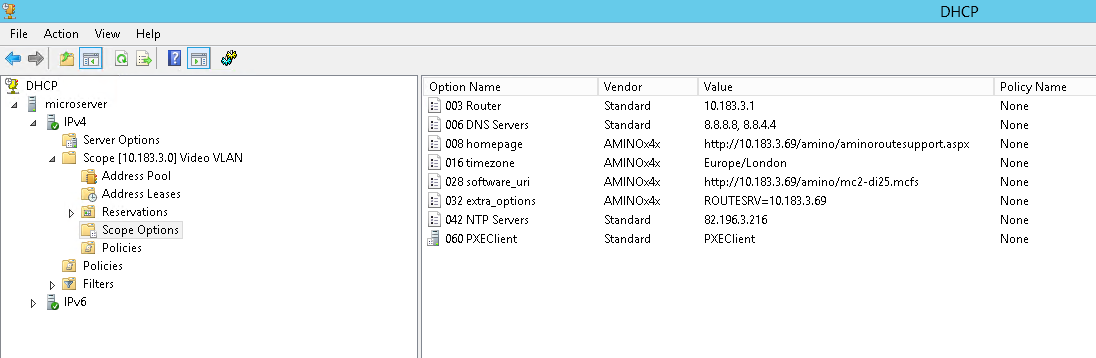
To send out commands to just Amino devices, you will need to associate some options with a specific vendor "class" that is requested during the address negotiation phase. To define this, first, open DHCP on the server, and then define the custom vendor class for the Admins – this needs the ASCII value set to AMINOx4x (this is the key the devices will lock onto, so don’t screw that up)…
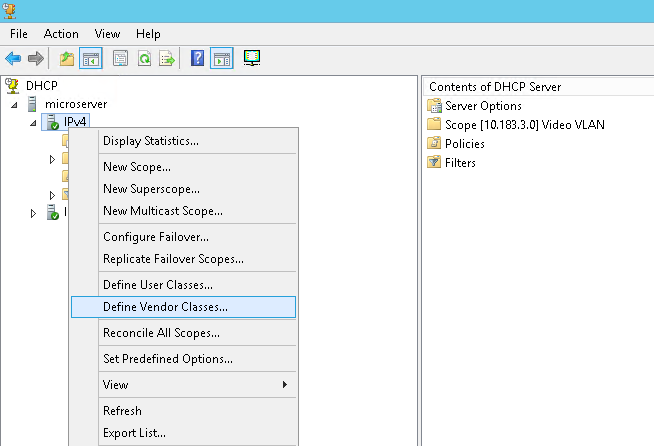

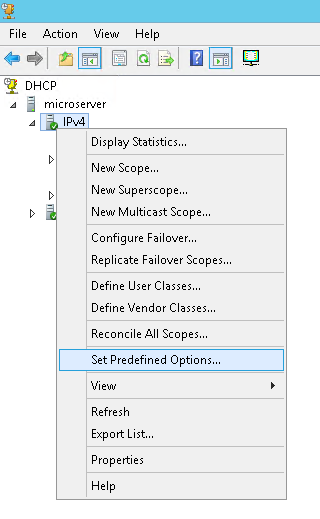
Once that is done, you can create some custom pre-defined options against this new vendor class, like this:
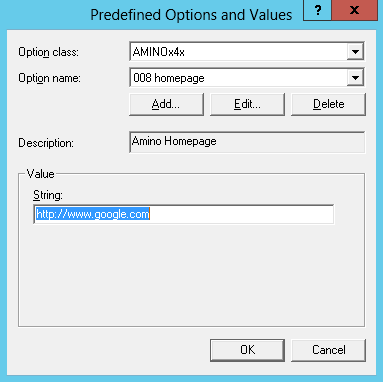
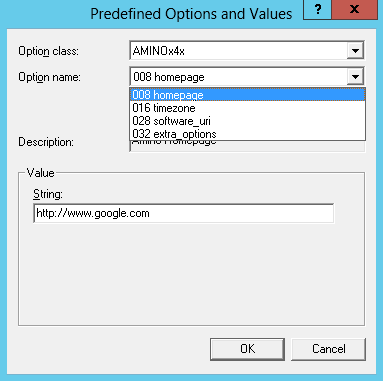
The Amino manuals show the various codes available to inject here, but the four most useful ones are shown below (these can be combined with DHCP standard options for DNS, routers, etc.):
-
008 homepage – surf to a specific page when they boot
-
016 timezone – sets the timezone of the Amino (only matters if you set a generic NTP server and want to telnet into the Amino and trace logs and such – can be skipped safely)
-
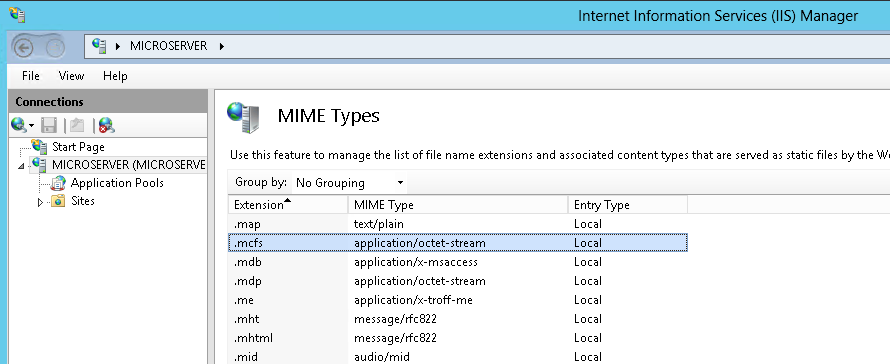
028 software_uri – if you need to apply new firmware, you must host the MCFS file somewhere (and don’t forget to add the MIMETYPE to the server) and the point to it here
-
032 extra_options – if you are using the Cinegy Route Directory Service to attach an Amino to a Route Virtual Destination, you need to specify space-delimited options here
More Advanced – Extra Options and DHCP Reservations
You can inject extra values into Amino set-top boxes using the "extra_options" setting. These extra options can be just made up and then read back within (for example) and webpages you point your Amino at using the JavaScript API. This is exactly what is done to make the Cinegy Route Directory Services integration work – an example of which is below (only useful when pointing the Amino at Cinegy Route control homepages):
vdestname=Desk_Amino vdestgrouppath=Amino onscreenlogging=trueExample homepage URL to read the Amino control page from Cinegy Route:
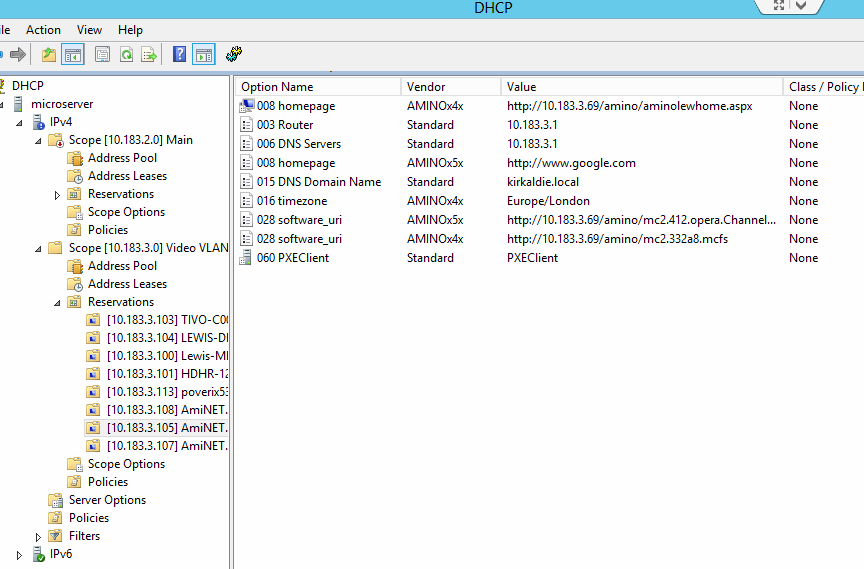
http://<routeservernameorip>:9996/control/amino/amino.htmlIn the next screenshot, you can see global scope options then applied to all units (so all Aminos get the same firmware):
|
Note
|
If using IIS to host the firmware, don’t forget you will need a MIME type registered for this – get used to using HTTP server logging to spy on the actions of misbehaving Aminos, to see what they are trying to do. Although 99% of the time it’s not the Amino misbehaving, but the sysadmin… |
However, the final piece of the puzzle is to not have all Aminos acting as clones of each other, but with specific identities with custom options. Not only can you set global options via DHCP, but if you reserve an Amino MAC address, you can override specific Aminos – below you can see the homepage being overridden for a specific Amino. In a normal environment, using the Cinegy Route Amino integration, it is expected that each Amino has a reservation, which tells it on boot "what" Cinegy Route virtual destination to bind to (and turns on/off on-screen logging and such):
That’s it for the basics of setting up an Amino via DHCP – you should now be able to start building and commanding your STB army!