Capture Configuration
Reading time ~3 minutes
Launching and Configuration
To launch Cinegy Capture Manager, go to Start > Cinegy > Cinegy Capture Manager. The configuration procedure begins with creating a new database.
|
Important
|
Refer to the Database Configuration article in the Cinegy Capture Manual to learn how to configure the database. |
Proceed with the setup and define the main parameters of your capture session. Pressing the "Common settings" button opens the following dialog:
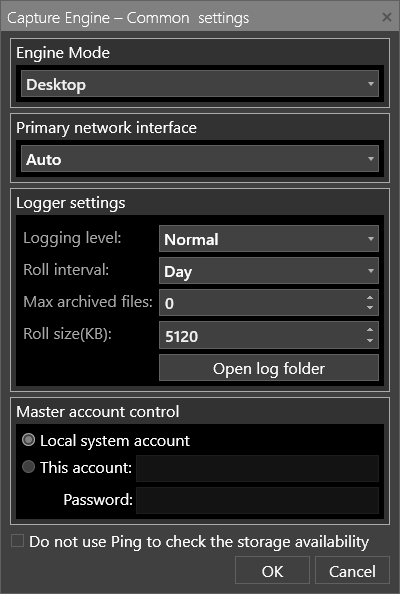
Here Cinegy Capture engine mode should be set to "Desktop".
The "Primary network interface" drop-down list contains all the IP addresses of the network adapters currently installed on the machine running Cinegy Capture Manager. Selecting the appropriate network adapter ensures stable network load balancing and should be based on the system administrator’s recommendations.
|
Important
|
Refer to the Main Configuration article in the Cinegy Capture Manual to learn how to configure the logging parameters of your capture session, along with managing accounts. |
Adding a Service
|
Note
|
Only a single Capture Service instance is allowed to run in the Desktop edition. |
Press the "Add" button to add a new Capture Service. It will appear in the "Engine Service" panel informing you of not been installed yet. To install the Service, press the "Install" button.
Press the "Configure" button and define the settings for your Engine Service, including common settings, audio and preview settings, as well as metadata and timecode settings.
|
Important
|
To get detailed information on the Service configuration, refer to the Service Configuration section within the Cinegy Capture Manual. |
At this step, it is also required to specify the video stream-capturing source type.
|
Important
|
Refer to the Capture Source article in the Cinegy Capture Manual for the list of supported input devices. |
Having performed the necessary Service configurations, select the "Capture Control" option from the drop-down list in the "Ingest & Capture" category in Cinegy Desktop:
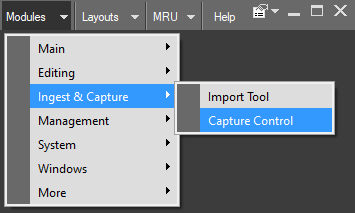
Cinegy Capture Control will be launched.
Setting Up a Capture Session
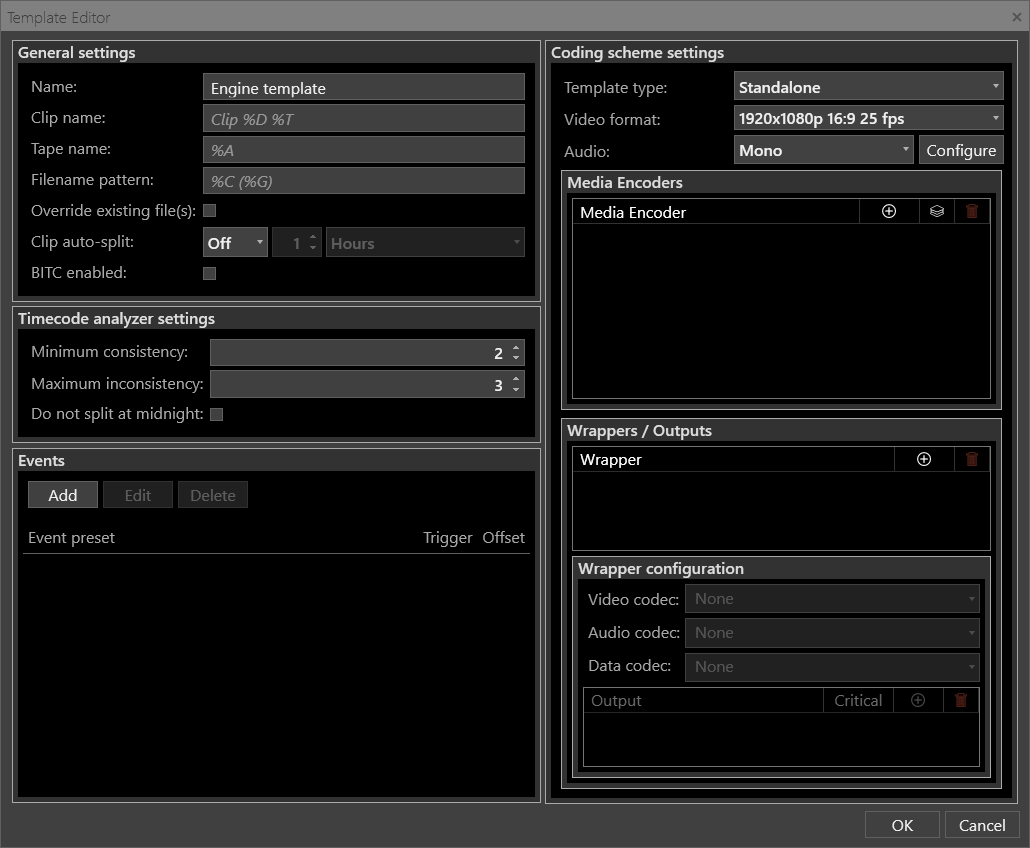
Before starting a capture session, at least one Cinegy Capture engine template must be prepared. Capture templates are customizable, allowing the user to define media encoding options such as video/audio formats, encoders, wrappers, and outputs for the captured media that will suit different production purposes.
Templates can be of archive or standalone type. They are created and customized on the Templates panel in Cinegy Capture Control. To create a new template for an engine, select the engine and press the  button. Below is an example of a blank standalone template:
|
Important
|
Refer to the Templates Panel article in the Cinegy Capture Control Manual to get information about the setup of templates. |
Having specified all the necessary parameters for a capturing session, press the "OK" button to finish the template creation process. All the templates are automatically checked for validity and have a respective indication (valid or invalid). Hovering the mouse pointer over the "Invalid" indicator displays the tooltip describing a problem.
You can create as many engine templates as you need to meet your capturing requirements.
Once the capture session has started, the resultant growing Roll in Cinegy Desktop can be viewed, sub-clipped, added to a Sequence, and controlled using a common set of keyboard shortcuts. During viewing, IN and OUT points of the Clip/Roll can also be adjusted whilst still recording, if required.
|
Important
|
Refer to the Capture Panel paragraph in the Cinegy Capture Manual for more information on controlling your capture session. |