Viewing and Editing Items
Reading time ~6 minutes
Video Items Preview
|
Select a playlist item and use the "View" button to quickly launch Clip Viewer for previewing video items and the "CG Browser" for previewing graphics items. It is also possible to double-click items or choose the "Preview" command from their context menu. |
|
Note
|
This function is only available for video clips and Cinegy Title templates. |
|
Important
|
Enabling/disabling of double-click action for certain commands is regulated in the "Preferences" dialog. |
Previewing Video Clips
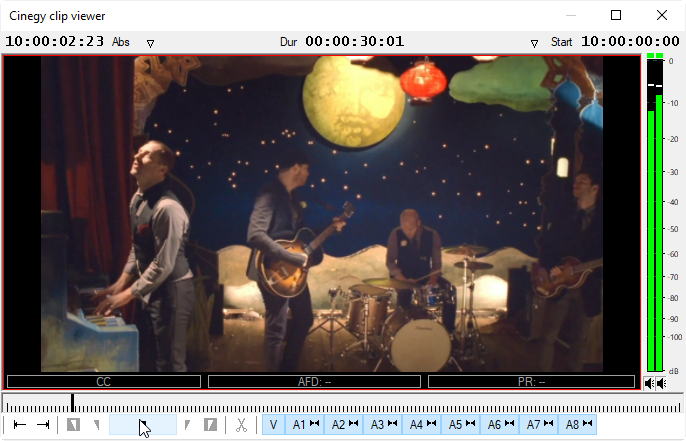
The Clip Viewer window appears for previewing video clips. Then press the "Play" button to play the clip in Clip Viewer.
|
Note
|
The items in this mode are viewed-only. |
Timecode
The timecodes are displayed on the top panel of the Clip Viewer window.
In the middle of the panel, the current duration of the clip is displayed. The other two counters can be set up to show one of the following display modes:
| Display Mode | Function | ||
|---|---|---|---|
Absolute |
Timecode for every frame corresponding to the original material |
||
Duration |
Clip duration |
||
Start |
Start timecode |
||
In |
In timecode |
||
Out |
Out timecode |
||
End |
End timecode |
||
Elapsed |
Time passed from the In point represented as TC
|
||
Remaining |
Time left to the Out point represented as TC
|
||
None |
No display |
Using Timecode to Find a Frame
Any time during the preview, you can enter a timecode value (using the numeric keypad on the right side of the keyboard) to navigate through a clip to a specific frame. In addition, you can cue forward and backward from the current position of the clip by a specified number of minutes, seconds, and frames using positive or negative frame offset values.
-
To cue to a frame based on a known timecode, enter the timecode using the numeric keypad.
-
To cue forward from the current position, enter + and the offset amount using the numeric keypad.
-
To cue backward from the current position, enter – and the offset amount using the numeric keypad.
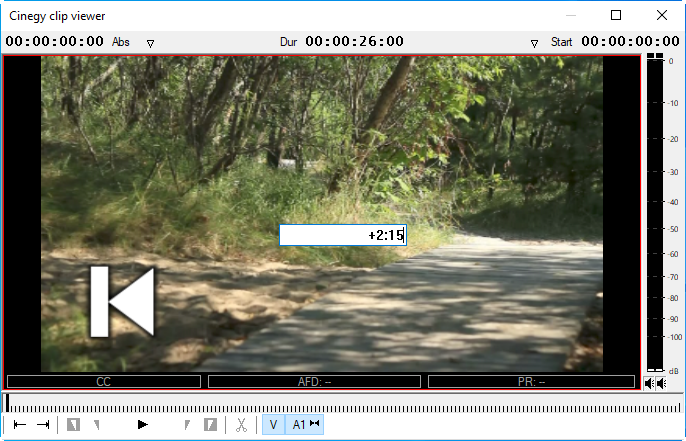
In the example above, the current viewing position will be moved forward to 2 seconds and 15 frames
Audio Preview
|
The VU meter is shown on the right of Clip Viewer. It shows peak and integrated audio levels in the dB scale as the master output for all the enabled audio channels mixed together. The zero dB level for the VU meter is defined in the Cinegy Studio configuration tool and is used in Clip Viewer when previewing video clips.
|
Previewing Graphics Items
The "CG Browser" window appears for previewing Cinegy Title templates:
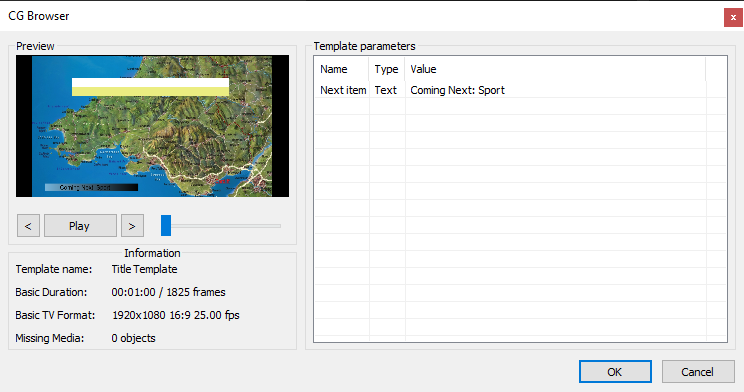
The template is played on the "Preview" section screen.
|
The "arrow" buttons jump to the first and last frame respectively. |
|
Press the "Play"/"Pause" button to toggle template playback mode. |
The "Information" section located below the preview screen displays the template name, duration, and TV format.
Template variables available for export are given in the "Template parameters" table next to the preview screen. The table consists of three columns with the template variable name, type, and value data. Template variable values cannot be edited in this mode.
Editing Playlist Items
|
Press the "Edit" button to quickly launch Clip Viewer for editing video items and the "CG Browser" for editing graphics items. |
|
Note
|
These functions are only available for video clips and Cinegy Title templates. |
Editing Clips in Clip Viewer
To edit the item, select it in the local playlist and choose the "Edit…" command from the context menu; the Clip Viewer window appears.
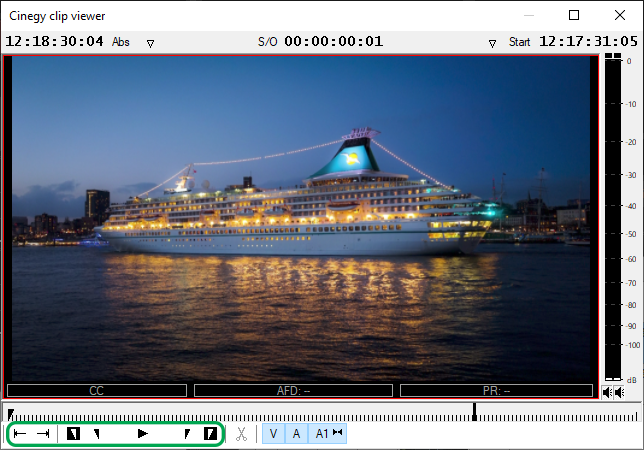
Use Clip Viewer to:
-
cut the clip;
-
set In and Out points;
-
clear In and Out points;
-
navigate to edit points.
|
Note
|
The In point represents the beginning of the In frame, and the Out point represents the end of the Out frame (or the beginning of the next frame). The duration of the item cannot be less than 0.5 seconds. |
You can also preview the clip before and after editing.
Cutting an Item
|
Press the "Razor" button to cut a clip at the current time slider position or hit the F key. |
|
Note
|
The In point represents the beginning of the In frame, and the Out point represents the end of the Out frame (or the beginning of the next frame). The item duration cannot be less than 0.5 seconds. |
Setting and Deleting In and Out Points
|
Press the "In" button or hit the I or E key to trim your clip from the left. |
|
To delete the In point, press the "Delete In" button (inversed In) or hit the D key. |
|
Press the "Out" button or hit the O or R key to trim your clip from the right. |
|
To delete the Out point, press the "Delete Out" button (inversed Out) or hit the F key. |
Moving to the Next or Previous Edit Point
You can use the "Jump to clip event" buttons to move from event to event. Events are: start, end of a clip, In and Out points.
|
Use the "Previous event" button to navigate between the edit events. You can also use the A key to jump to the previous clip event. |
|
Use the "Next event" button to jump to the next event. You can also use the S key to jump to the next clip event. |
Closing Clip Viewer
Press the  sign or the Esc key to close Clip Viewer.
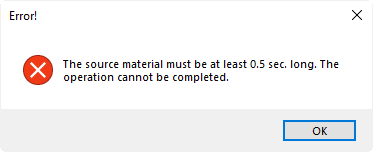
When closing Clip Viewer, the following error message appears if In and Out points are not set correctly. You should keep in mind that the new duration cannot be longer than the original or less than 0.5 seconds.
|
Tip
|
All changes made during editing can be undone and redone with the "Undo" and "Redo" commands from the right-click menu. |
Editing Graphics Items
To edit the item, select it in the local playlist and choose the "Edit Item" command from the context menu or use the "Edit" button. The "CG Browser" window appears for editing the variables available for export:
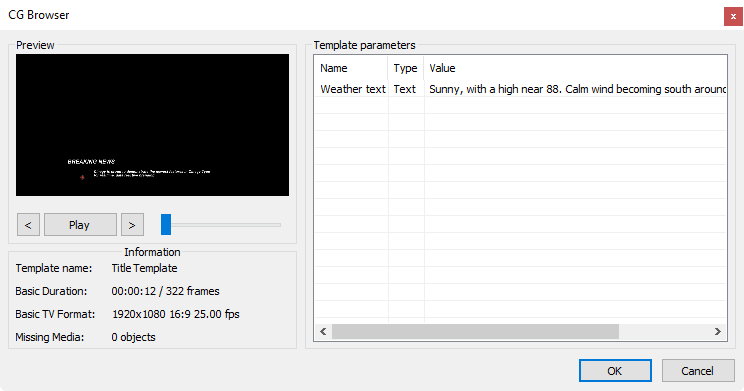
The template variables available for export are given in the "Template parameters" table. The fields in the "Value" column are editable in this mode. To change the values, double-click the "Value" field of the desired variable and use the keyboard to enter a new value. Press "OK" to save changes.


