Integrated Browser
Reading time ~7 minutes
The "Inventory Browser" option in the layout editing mode context menu enables the use of the Cinegy browser as a built-in part of the Cinegy Studio interface:

The built-in Inventory Browser fills the full width and the remaining height of the layout panel, on which its display is enabled.
Inventory Browser comprises three modules:
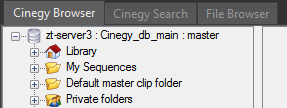
|
Note
|
The "Cinegy Browser" and the "Cinegy Search" tabs provide access to the Cinegy Archive database and are only available with Cinegy Desktop installed on the machine running Cinegy Studio. |
Cinegy Browser
Cinegy Browser is designed for efficient navigation through the Cinegy Archive database. This module allows users to browse the content of the database in a tree-like structure located on the left side of the panel. The right side displays the content of each folder or bin selected in the database tree.
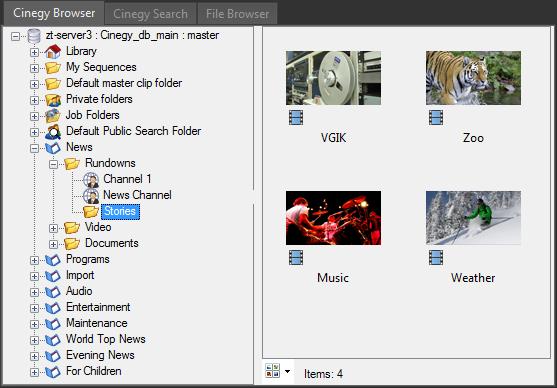
Each container can be expanded or collapsed by pressing the corresponding  and
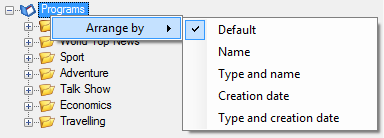
and  buttons. The content of any expanded folder can be sorted by name, type and name, creation date, or type and creation date. To do this, select the appropriate option from the "Arrange by" drop-down list in the context menu:
When you click on a ClipBin or Roll, all clips contained within it will appear on the right side of the browser window, while selecting a DocumentBin will display its contents as thumbnails.
Double-clicking a clip, Sequence, or Cinegy Title template will open it in the viewer.
|
Important
|
Refer to the Viewing and Editing Items article to learn about clips and graphics items handling in the viewer. |
|
The audio-only clips are indicated with the waveform icon. The system performs the audio-only playback in the viewer displaying the waveform of the audio. |
|
If all video qualities for a particular footage are unavailable, the clip thumbnails will display "Media Offline" instead of showing the clip picons or media material in the viewer. |
When working in standalone mode, the selected clip, Sequence, Cinegy Title template, or Story can be dragged and dropped directly to the Cinegy Studio Rundown or Media Pool playlist.
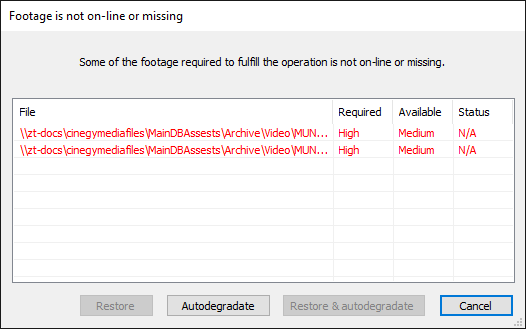
When high quality is not available for the clip, the following dialog box appears when you try to drag and drop it to the local playlist:
|
Press the "Restore" button to retrieve unavailable files of the clip moved to the HSM (Hierarchical Storage Management) from the Cinegy Archive database. |
|
Press the "Autodegradate" button to switch the clip to the next available quality. For example, if high quality is required, but not available and medium quality is available, the autodegradation will switch the clip to medium quality. |
|
Press the "Restore & autodegradate" button to retrieve unavailable files stored on the HSM and in case of failure to switch the clip to the next available quality. |
Cinegy Search
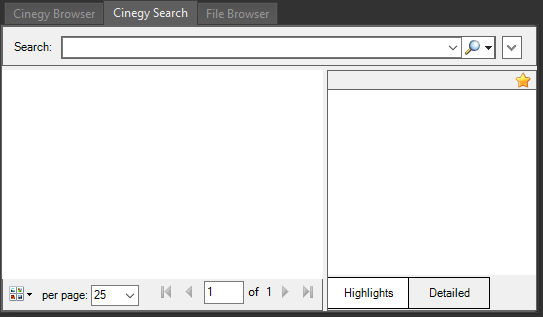
The built-in Inventory Browser allows searching through the Cinegy Archive database. Go to the "Cinegy Search" tab of Inventory Browser to perform search operations within the Cinegy Archive database and view the search results.
|
To start searching, enter your request in the "Search" field via the keyboard and press the "Search" button or hit Enter. |
All the nodes found according to the search request will be listed with their thumbnails.
|
Important
|
Refer to the Search article to learn how to search for items within the Rundown or local playlist. |
Advanced Search
Press the  button next to the "Search" field to show/hide advanced search options:

Enter your search request in the "Searching for the terms" field.
It is possible to narrow the search with the creation or modification time by specifying the time scale in the "Narrowed by items" field.
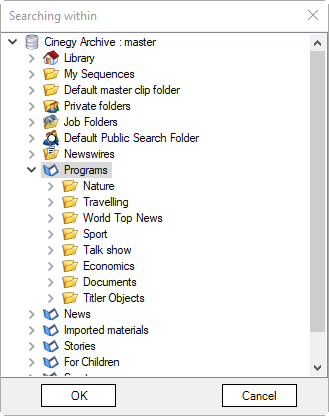
You can also define the search location in the "Searching within" field. Press the  button and define the search location using the "Searching within" dialog:
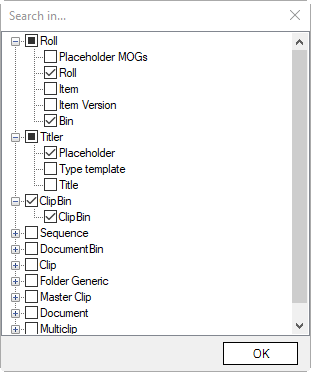
To narrow the search up to specific node types, press the  button next to the "Consisting of these items" field and select the desired asset type(s):
You can make additional limitations to your search. This can be done by adding conditions to the metadata fields. To do this, add a row in the bottom part of the advanced parameters configuration group by pressing the ![]() button.
button.
|
Important
|
Refer to the Advanced Search paragraph within the Cinegy Search article for a detailed information about advanced search parameters configuration. |
Search Request Syntax
It is possible to use multiple words for search. In this case, they are connected with the logical AND.
It is also possible to use AND, OR, and NOT operators, as well as brackets. If you enter several words separated by a space, the operator AND is assumed.
The wildcard * is also allowed.
The following tables explain the search request syntax in detail.
Expressions
| Expression | Description | Example |
|---|---|---|
any word |
All forms of that word |
man will find man and men |
"string" |
The exact string |
"man*" will find man* |
* |
Any string of zero or more characters |
man* will find man, many, manuscript, manner, and so on |
? |
Any single character |
?ean will find Dean, Sean, and so on |
[] |
Any single character within the range [a-k] or within the set [abcdef] |
[C-P]arsen will find Carsen, Larsen, Karsen, and so on |
[^] |
Any single character not within the range [^a-k] or the set [^abcdef] |
de[^l]* will find the words beginning with de where the third letter is not l |
"%exact phrase%" |
The exact word combination or phrase |
"%folder #1%" will find folder #1 |
|
Note
|
If the "?" symbol is placed at the beginning or the end of the word, it is processed as the "*" wildcard, i.e. "?" will be substituted by one or more characters. |
|
Note
|
When using the expression with a range of symbols (written in square brackets) and performing a search within some text rather than searching for a single word, add the "*" symbol at the beginning and the end of the search expression. For example, if you are searching within some text for the words starting with any symbol of the [b-t] range and the second part of which is "end", use the following search expression: *[b-t]end*. |
|
Note
|
When using the "%exact phrase%" expression, please note that the search process may take a long time, especially in large databases. |
|
Note
|
The natural-language search is language-dependent. Your SQL server must have the search engine for the language you are using; otherwise, the search function will not work. |
Operators
| Operator | Shortcut | Description | Example |
|---|---|---|---|
AND |
& or space |
Logical AND |
red monkey |
OR |
| |
Logical OR |
Joe | Willy |
NOT |
~ |
Logical NOT |
Joe NOT Willy |
( ) |
Logical grouping |
(~red monkey) | (John Smith) |
|
LIKE, NOT LIKE |
LK, NL |
Matching a specified pattern |
LIKE *land |
Search Results
The search results are displayed in the left-hand panel:
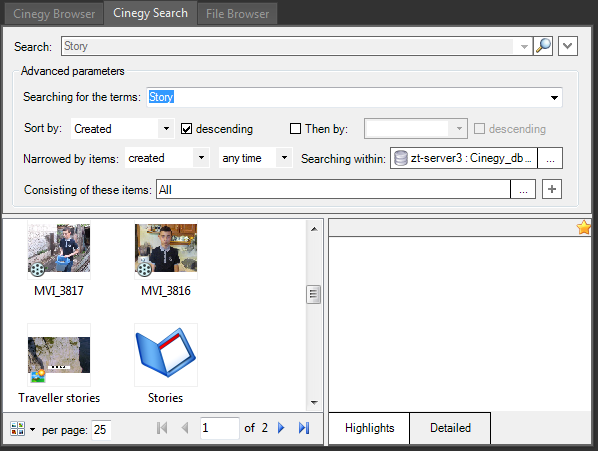
If the search comes up with more than one page of search results, use the  and
and  buttons to navigate the search result pages.
You can define the number of search results to be displayed per page by choosing the corresponding option from the "Results per page" pull-down list or entering the value from 10 to 2000 via the keyboard. The total number of search result items is displayed in the "Displayed" field.
|
Important
|
Refer to the Cinegy Search article for a detailed information on metadata display for the found objects. |
File Browser
File Browser provides access to the materials stored on your local computer or a shared location. It is used to compose the playlists with MCRitems (clips from Sequences, bins, and Rolls that have been exported to the inventory folder) and text files. This is useful for viewing previously created Cinegy Title templates.
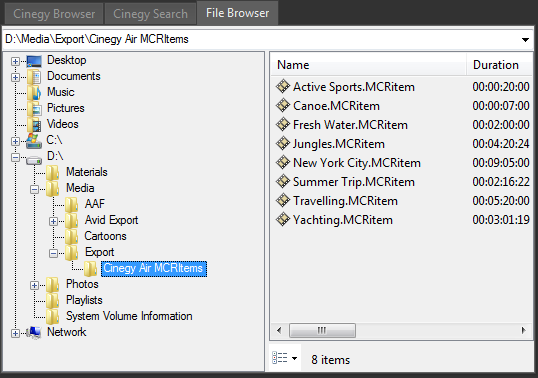
The right-hand panel displays only files of Cinegy Studio-supported formats for Video and Graphics devices, as well as text files that can be used as Prompter device items.
To add an item or items from the Inventory Browser to a playlist, simply use drag-and-drop.
|
Note
|
The item(s) will be inserted with the aspect ratio, defined in the Cinegy Studio Configurator. |
View
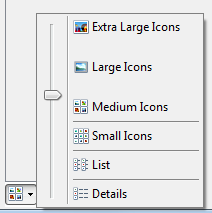
There are multiple view options for displaying content within the browser. To change the view, click the "Change your view" icon at the bottom of the browser window and select the desired option:
|
Note
|
The "Change your view" icon will look different depending on the view you have chosen. |
You can use the slider to manually change the thumbnail scale between the medium and extra-large icon sizes.


