Operating
Reading time ~14 minutes
After composing the Rundown in standalone mode or launching a prepared one in Cinegy Archive mode, the next step is configuring and running Cinegy Playout and any other devices required for your scenario.
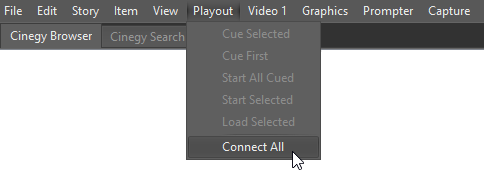
To connect all configured devices to the Cinegy Playout engine, use the "Connect All" command from the "Playout" main menu.
|
Note
|
If the "Autoconnect on start" option is enabled in the Cinegy Studio Configurator, all configured devices visible in the layout will automatically connect when Cinegy Studio is launched. |
Assigning Playback Device
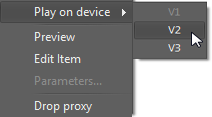
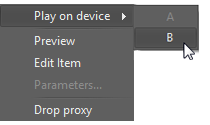
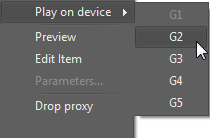
In standalone mode, if your setup includes multiple video devices, multiple graphics layers, or both, you can assign video items to specific video devices and graphics items to a particular graphics layer by dragging and dropping them onto the corresponding device panel. Alternatively, you can select a specific video device/graphics layer for the current item from the "Play on device" drop-down list in the "Item" menu or the item’s context menu.
|
|
Assigning Video Device |
Assigning Graphics Device |
Cue Selection
To ensure smooth playout at the scheduled time, the items need to be cued. If there were already cued items before the Rundown was updated or the Cinegy Studio application was restarted, the cued status for those items will be restored when the Rundown is reloaded.
|
The "CUE SEL" button on the clocks control marks the selected item in the Story as cued. |
|
Similarly, the "CUE" button in the Item Editor cues the selected item in the Story. |
Even if an item is currently being broadcast, it can still be cued using these buttons.
If you need to cue all items of different types within a Story at once, select the Story caption in the playlist and press the "CUE SEL" or "CUE" button.
To cue the first item in the playlist, select the "Cue First" command from the "Playout" main menu.
|
Note
|
The first script item can only be cued manually. |
Broadcasting Items
To work with output devices, they must be properly configured and enabled for display in the Cinegy Studio layout. Separate panels are available for each device type, controlling video, graphics, and text items respectively. These device controls allow individual management of cued items for each type.
Sending Video
It is possible to configure up to three video devices, each of which can be set to use either just the master or both the master and slave Cinegy Playout engines for broadcasting.
Working with a Video Panel
Each video device has a separate device panel in Cinegy Studio, which can be operated in one of several modes, enabled through layout editing:
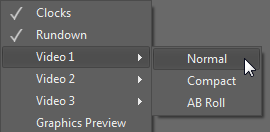
The normal view shows two preview monitors and provides detailed information, while the compact view displays a single preview with minimal information, which helps save layout space. The AB mode, available when enabled in the Cinegy Studio configurator, is described in detail below.
The video device panel in normal view mode consists of two monitors:
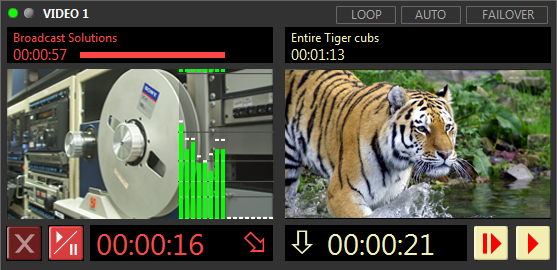
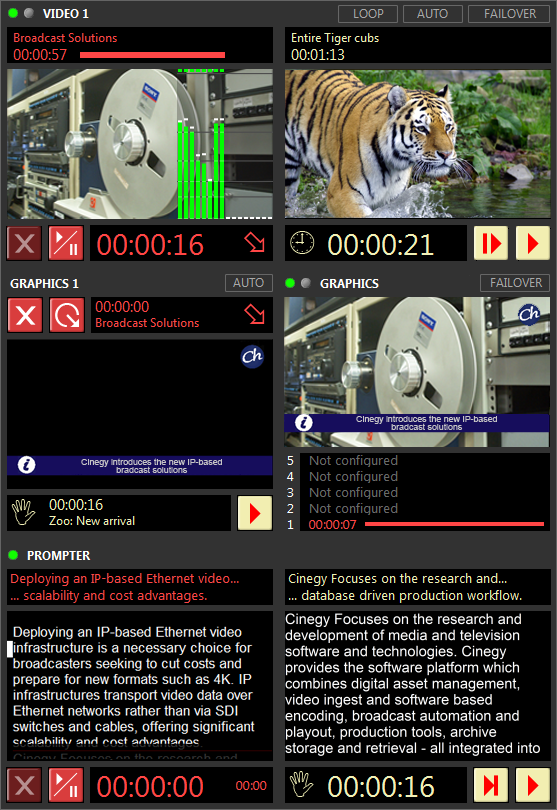
The left monitor is an on-air preview, displaying the picon of the loaded item or playing the video if the item is sent on air. An audio level meter on the right side of this monitor shows the volume levels of the on-air video. Both the number of audio channels displayed in the meter and the presence of the audio level meter can be configured in the "Preferences" dialog. The top field displays the name of the item in the on-air preview, along with its playing time and a progress bar. For paused or loaded items, the progress bar allows you to navigate to any desired clip position and view any frame by dragging the slider or clicking any position on the progress bar. The bottom field shows the time countdown to the end of the item and the icon representing its end trigger type.
The right monitor previews the picon of the cued video item. The top field displays the name of the cued item along with its duration. The bottom field shows the start trigger icon and the timing information, which can be configured through the "Preferences" dialog.
|
Tip
|
Double-clicking the on-air preview will highlight the last launched video item in the Rundown while double-clicking the preview monitor will highlight the cued video item. |
|
Tip
|
In compact mode, you can enlarge the timers on the monitors for configured video devices by enabling the "Display large timers on Video" option in the "Preferences" dialog. When this option is disabled, the timers are displayed in regular font size, and the timer fields also include the item name. |
Video AB Roll
Cinegy Studio supports using the "Video 1" device in AB mode, where the video item can be played via RS-422 on either the master or slave playout server, as configured in the Cinegy Studio configurator. The panel for working with video in AB mode should be enabled with the "AB Roll" submenu command from the "Video 1" context menu in layout editing mode.
The video AB device control consists of two parts; each corresponds to a configured server:
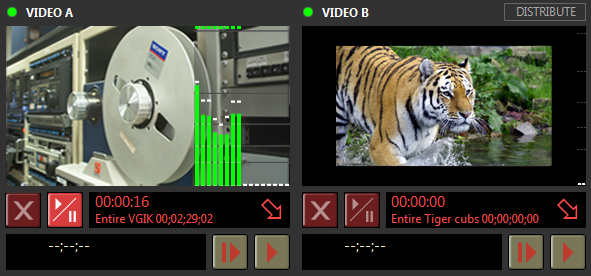
The video A and B devices playing the selected item can be switched by using the corresponding context menu commands as described earlier in this section. Alternatively, drag and drop the item to the corresponding part of the device panel.
|
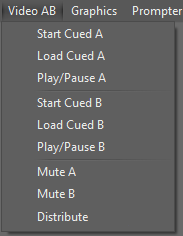
Press the "Distribute" button, or use the equivalent command in the "Video AB" main menu, to organize the playback of video items so that all the odd-ordered clips are sent to device A, and all even-numbered clips to device B. |
If one device connection fails, all video items will automatically be redirected to the remaining connected device.
Video Controls
|
Press the "Start" button to send the cued item (assigned to the video device) on air. This action will make the item appear on the "On-Air" monitor. At the same time, the next item of the same type will be automatically cued, with its picon displayed on the "Preview" monitor. |
|
Press the "Load" button to load the cued item (assigned to the video device, except for live items) to the video device output without sending it on-air. Its picon will appear on the "On-Air" monitor, and the item will be paused. The next item will be automatically cued. |
|
The "Play/Pause" button starts broadcasting the loaded item. It is played on the "On-Air" monitor. Pressing this button a second time pauses the playout. |
|
Note
|
When video playback is paused, the countdown begins blinking. |
|
The "Stop" button interrupts the current loaded, paused, or finished item and resets the device to the initial state. This button is inactive during the on-air item playback. |
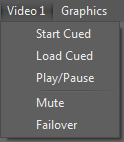
As an option, use the commands from the main menu of the respective configured video device to perform the actions described above:
|
|
Video Device Main Menu |
Video AB Device Main Menu |
The "Mute" command is used to mute the currently played video on the selected device panel.
The "Loop" button initiates continuous playback of all items in the Rundown and the "Auto" button automatically applies an auto trigger to all items assigned to the corresponding video devices.
The following buttons are available on top of the video devices panels:
|
The "Loop" button initiates continuous playback of all items in the Rundown assigned to the corresponding video device, respectively to the start trigger of every specific item. |
|
The "Auto" button automatically applies an auto trigger to all items assigned to the corresponding video devices. |
|
If you are using master and slave servers, your Rundown will be played back into two playout servers simultaneously. If the master playout server is disconnected, broadcasting will automatically be switched over to the slave playout server. If one of them fails and then becomes available again, Cinegy Studio does not connect to it automatically; to restore the connection manually, press the "Failover" button. |
|
Important
|
When the "Autoconnect on start" option is disabled in the Cinegy Studio Configurator, this function is unavailable on Cinegy Studio start. Refer to the General Settings article for details on how to set autoconnection at Cinegy Studio start. |
Sending Graphics
It is possible to display up to five graphics layer panels as well as the graphics preview panel, using the respective commands from the layout editing mode context menu:
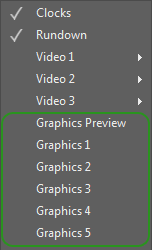
The graphics preview panel is represented by an on-air monitor, which displays engine output. The field below contains information on graphics layers:
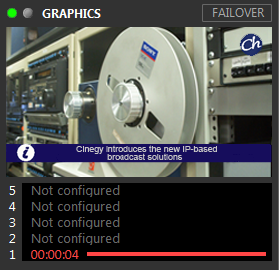
This section provides information on the configured graphics layers, including their number, the item’s playback time, and a progress bar. A Not configured message appears if the layer has not been enabled in the Cinegy Studio Configuration tool.
|
If you are using master and slave servers, your Rundown will be played back into two playout servers simultaneously. If the master playout server is disconnected, broadcasting will automatically be switched over to the slave playout server. If one of them fails and then becomes available again, Cinegy Studio does not connect to it automatically; to restore the connection manually, press the "Failover" button. |
A separate panel is dedicated to each graphics layer:
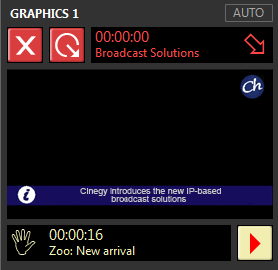
The top field displays the name of the Cinegy Title template being played, its countdown, and the end trigger type icon. The preview window shows the middle frame of the loaded Cinegy Title template. The graphics display in the preview window is regulated by the "Use first frame for Graphics preview" option in the Preferences dialog.
The bottom field shows the template name of the cued graphics item, its start trigger type icon, and the timing information, which can be configured through the "Preferences" dialog.
|
Tip
|
You can enlarge the timers on the monitors with graphics layers by enabling the "Display large timers on Graphics" option in the "Preferences" dialog. When this option is disabled, the timers are displayed in regular font size, and the timer fields also include the item name. |
Graphics Controls
|
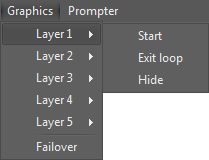
Press the "Start" button to send the cued Cinegy Title template (assigned to the graphics device) on air. This action will make the item appear on the "On-Air" monitor. At the same time, the next item of the same type will be automatically cued, with its picon displayed on the "Preview" monitor. |
|
The "Exit loop" button triggers the Cinegy Title scene to leave the loop, if any. |
|
The "Hide" button disables the currently broadcasted Cinegy Title template display on playout. |
As an option, use the commands from the main menu of the respective graphics device to perform these actions:
Sending Text to Prompter
The Prompter device control can be operated in two display modes: normal and compact, enabled through layout editing:
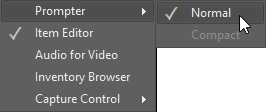
The normal view shows two preview monitors and provides detailed information, while the compact view displays a single preview with minimal information, which helps save layout space.
The prompter device panel in normal view mode consists of two monitors:
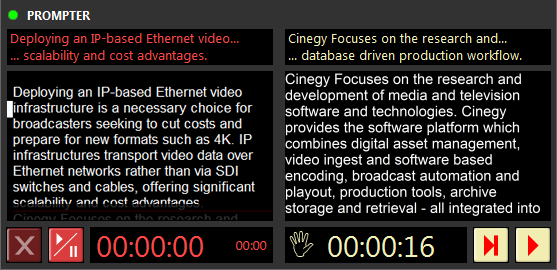
The left monitor serves as an on-air preview, displaying the scrolling presenter text. The top field shows the beginning and end segments of the currently played text. The bottom field contains two timers: the middle timer shows the countdown for the currently played item depending on its scrolling speed, while the variance timer on the right indicates the variance between the estimated end time of the item and its recalculated end time, reflecting any adjustments made to the scrolling speed during playback. A zero value in the variance timer indicates synchronization between the scrolling speed and the reading rate. If the scrolling speed is changed during playback, the timer displays the variance time in the minutes:seconds format, with a minus sign for decreased speed and a plus sign for increased speed.
|
Note
|
In Cinegy Archive mode, the reading rate is defined in Story Editor. For more details, refer to the Prompter Block paragraph of the Cinegy Desktop Manual. |
The right monitor previews the cued Cinegy Title template. The top field shows the beginning and end segments of the cued text. The bottom field shows the timing information, which can be configured through the "Preferences" dialog.
Text Controls
|
Press the "Start" button to send the text from the preview screen to Cinegy Prompter and start the text scrolling. This action will make the item appear on the "On-Air" monitor. At the same time, the next item of this type will be automatically cued and its text will be displayed on the "Preview" monitor. |
|
The "Find cued" button sends the cued item to Cinegy Prompter without starting playback. The item will remain paused, with the same script text shown on both monitors. The next text item will not be cued automatically, so you will need to cue it manually. |
|
The "Play/Pause" button starts playing the loaded item in Cinegy Prompter and on the "On-Air" monitor. Pressing this button a second time pauses the playout. |
|
The "Stop" button interrupts playback of the loaded item in Cinegy Prompter and resets Cinegy Prompter to the initial state. |
Alternatively, you can use the commands from the respective Prompter device main menu:
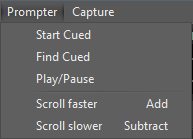
Use the "Scroll faster" command to add 10 words to the scrolling speed, and the "Scroll slower" command to subtract 10 words correspondingly.
It is possible to manage the script text scrolling through Cinegy Studio with the mouse or keyboard. Actions performed in Cinegy Studio are seamlessly reflected in Cinegy Prompter, enabling direct control over the most essential functions from within Cinegy Studio.
Actions performed in Cinegy Studio are seamlessly reflected in Cinegy Prompter, allowing direct control of key functions from within Cinegy Studio.
Status Indication
At the top of each video and graphics device panel, indicators are positioned to show device status. One indicator displays the status of the master video and CG servers, while the other one shows the status of the slave servers. The Prompter device panel includes only one indicator, as the Cinegy Prompter server operates exclusively in master mode.
|
When the device is set up to work as the master, the first indicator is green. If the slave device is configured, the second indicator is yellow. In case of the master device failure, the slave device automatically starts working as the master and its indicator becomes green. |
|
A red indicator warns the operator when problems with the connected device occur (for example, the connection loss). |
|
If the device is not configured, the indicator is gray. |
On-Air Mode
The "On Air" button enables/disables the counter values displayed on the clocks control.
|
Initially, the "On Air" sign over the button is displayed in green, meaning that on-air mode is disabled. |
The actual start values in the Rundown panel are not displayed. Once the first item is sent on air, the actual start value(s) will only be calculated for the following item(s) having the automatic start trigger. If the item following the one being on air has the manual start trigger, --:--:-- will be displayed instead of the actual start value, and all the next items regardless of their trigger type applied. The clocks controls display zero values for all the counters. This mode can be used for testing and preparatory work, as well as for inconsistent broadcast.
|
When the button is pressed, on-air mode is activated, and the sign over the button turns red. The first item of the Rundown becomes cued automatically. |
|
Important
|
Refer to the Programming Items article to get more information on setting item triggers. |
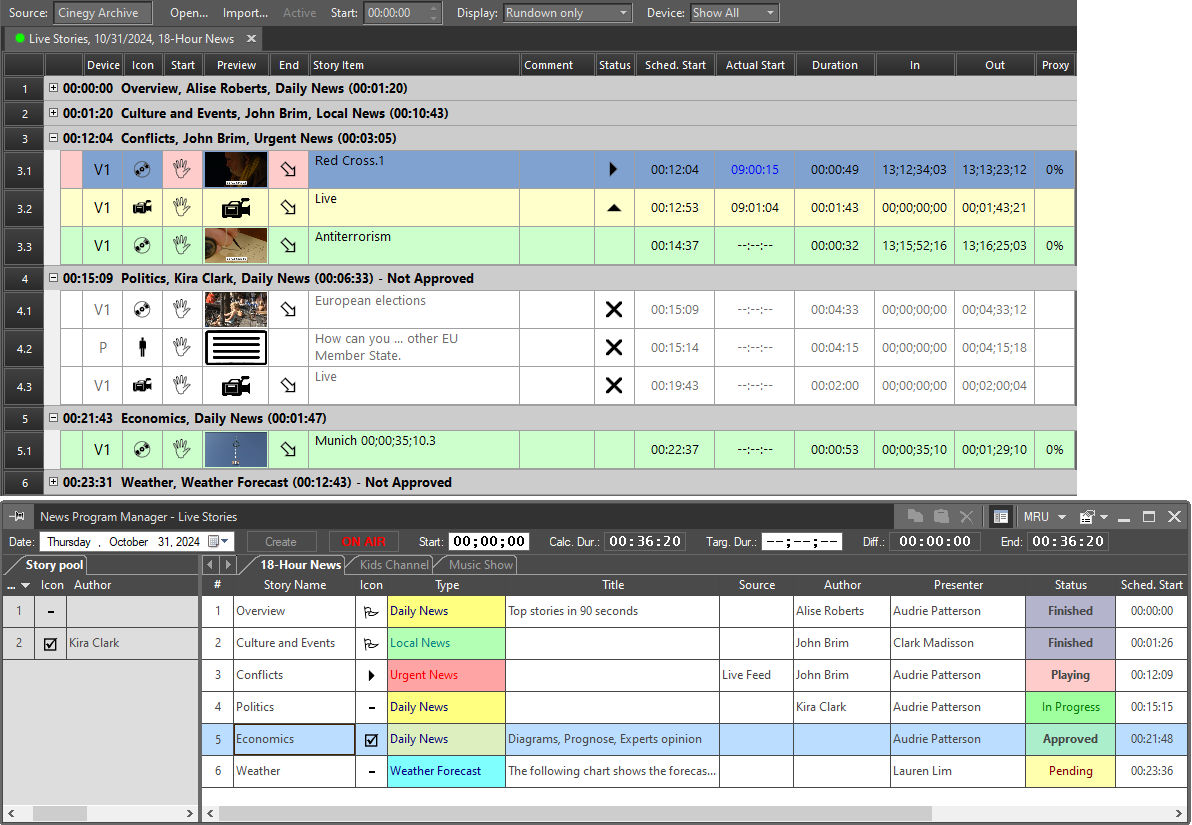
In Cinegy Archive mode, pressing the "On Air" button in Cinegy Studio enables/disables on-air mode in News Program Manager and vice versa. When on-air mode is enabled, the Story statuses, icons, and color coding in Cinegy Desktop are updated according to the statuses of items in Cinegy Studio:
|
Note
|
The cued item is not reset after the application restart. The cued item is reset if the current Rundown is closed, another Rundown is activated, or "Global Loop" is activated while the on-air item is not being played back. |
The system records the actual start of the Story item broadcasting; the clocks and devices controls display all the counters. Initially, the "Actual Start" column displays the scheduled start time values of each item with the automatic start trigger following the one being on air, if any. If an item with a manual start trigger follows the on-air item, the actual start value is automatically calculated for this item only according to the on-air item duration. When these items are sent on air, their actual start time values are displayed in blue. This mode is mainly intended for sending items on air consequently.
When working in Cinegy Archive mode, the corresponding statuses and start times of Stories are updated in the Cinegy Archive database as well.
The calculation is performed separately for each device configured and visible on the application layout.
All items above the one currently being broadcast on air become highlighted in a light gray color in the playlist, and it is not possible to cue them in this mode.
But if the "On-Air mode inconsecutive play" option is enabled in the "Preferences" dialog, you can cue and send on air items positioned above the current on-air item in the playlist. In this mode, the "Rundown countdown", "Rundown variance", and "Rundown end time" counters remain inactive.
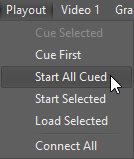
To start simultaneously the playout of all cued items assigned to all devices, select the "Start All Cued" command from the "Playout" main menu:
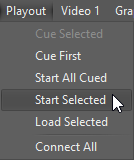
The selected item can be started immediately without being cued via the "Start Selected" command in the "Playout" main menu:
Database
|
The database indicator turns green when Cinegy Studio operates in Cinegy Archive mode and a connection to the Cinegy Archive database is established. It remains dark red when operating in standalone mode, where no database connection is required. |
