Layout Menu
Reading time ~2 minutes
Each layout added to the template can be configured separately according to your needs.
Adding and Deleting
Having created a new layout template as described above, you can add up to 9 more layouts.
|
Important
|
Refer to the Toolbar paragraph for more information on the layout template creation. |
To add a new layout to your template, choose one of the following options:
-
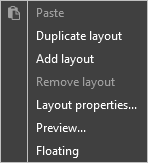
right-click anywhere in the layout editing area and choose the "Add layout" command from the context menu:

-
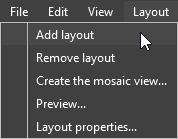
use the "Add Layout" command from the "Layout" main menu.

A new "Layout #2" tab appears on top of the editing area.
To delete a layout, choose the "Remove layout" command from the context menu or use the "Remove Layout" command from the "Layout" main menu. One last remaining layout cannot be deleted.
Previewing
You can preview the configured layout in full-screen mode. To do this, choose one of the following options:
-
select the "Preview" command from the "Layout" main menu;
-
right-click on the layout tree panel and choose the "Layout Preview" context menu command.
To exit preview mode, hit the Esc key.
Properties
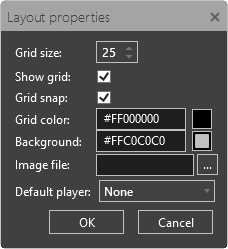
To view the layout properties, use the "Properties" command from the "Layout" main menu; the following "Layout Properties" dialog appears:

In this dialog you can configure the same parameters as on the properties panel of the Cinegy Multiviewer Layout Designer interface.
|
Important
|
Refer to the Properties Panel paragraph for detailed information on the layout settings. |
Creating the Mosaic View
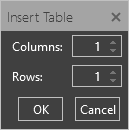
You can create the mosaic view for your layout. To do this, go to "Layout" > "Create the mosaic view"; the following dialog appears:

Here define the number of columns and rows of the channels preview grid to be displayed on the layout by pressing the up/down arrow buttons or entering the desired values via the keyboard. The mosaic view will be created on a separate layout displayed in the new tab.