Node Types
Reading time ~3 minutes
The nodes management and forming of the entire content of Cinegy Archive is performed here. The corresponding panel can be launched via the "Node Types" command from the "Metadata fields" submenu of the database context menu:
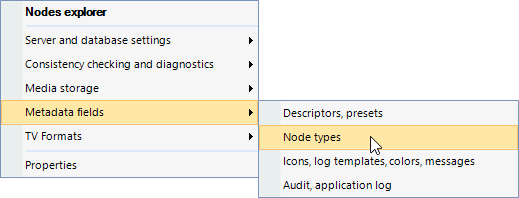
Node Types

Structure
This section describes an example of the nodes structure in Cinegy Archive.
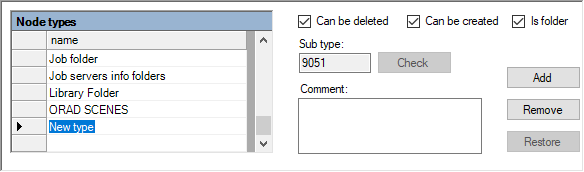
On the "Node types" tab, the Cinegy Archive nodes can be created and managed:
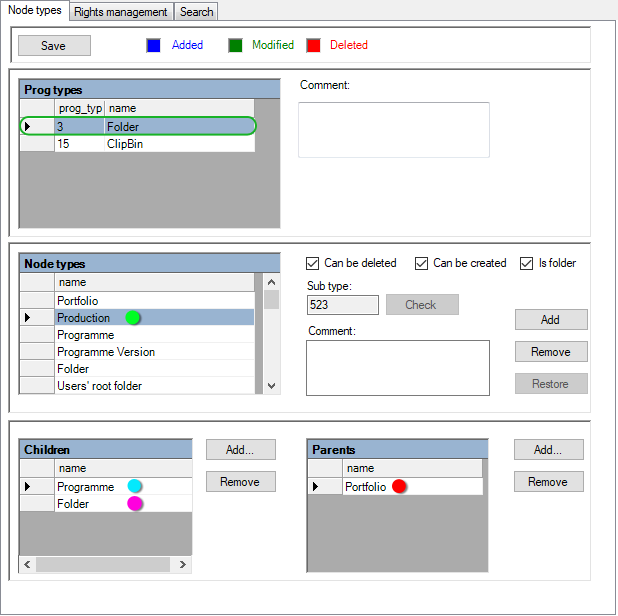
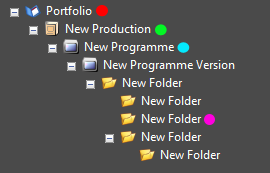
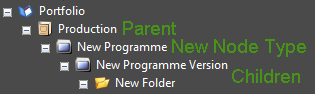
Select the "Folder" program type. Also choose the required node type. Having selected the "Production" folder, you can find its "Children" and "Parents" at the bottom of the dialog and see the entire structure of the "Production" node. Compare it with the node structure in the explorer window of your Cinegy Desktop client:
Status of Entries
At the top of the dialog there is the "Save" button for applying changes to the database, and markers in different colors, which show the status of changed entries.
|
The text/name of a newly added node type will be displayed in blue. |
|
The modified entry text will be displayed in green. |
|
The deleted entry text will be displayed in red. |
|
Once the changes are done, press the "Save" button. This will also switch the colored text back to black. |


Adding a New Node Type
-
Press the "Add" button. A new node type named "New type" will appear.
-
Rename the new node type and enter its short description into the "Comment" field.
-
Select or deselect the appropriate attributes:
-
Can be deleted – allows the node type to be deleted by Cinegy Desktop user.
-
Can be created – allows the node type to be created by Cinegy Desktop user.
-
Is folder – assigns the node type as folder.
-
-
The next step is the assignment of any "Children" and "Parents".
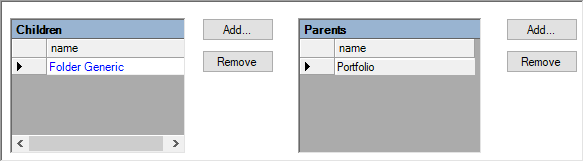
Example: Children and Parents
-
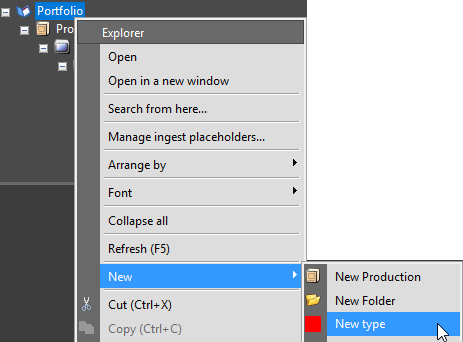
Press the "Save" button to save all changes.
-
Open Cinegy Desktop and right-click the portfolio icon. Open "New" and you will see the new node type.
|
Important
|
The default icon (a red square) is automatically assigned to new node type. Refer to the Icons, Log Templates, Colors, Error Messages article to learn how to give nodes suitable icons. |
Rights Management
On the "Rights management" tab, all the available nodes are displayed on the left side; all node types with rights management on the right side.
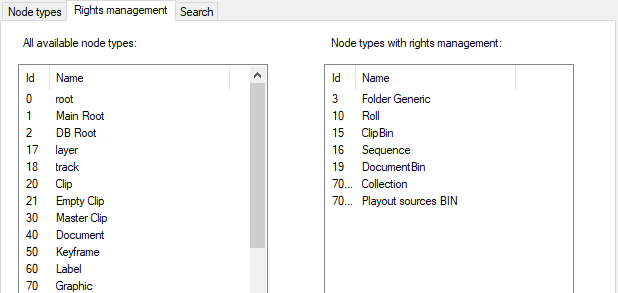
|
Important
|
For more information, refer to the Rights Management article within the Cinegy Desktop Manual. |
Search
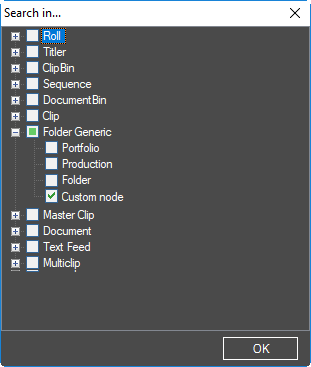
To include a specific node type in search, first add it to the list of searchable node types on the "Search" tab:
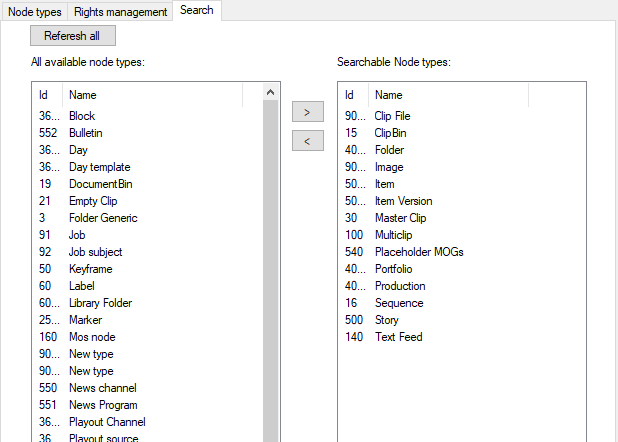
To do it, select the required node from the list of available nodes on the left and press the  button. It will be moved to the "Searchable node types" list on the right. To remove the node type from the "Searchable node types" list, select it and press the
  button.
The specified node type will become available for choosing during the advanced search configuration: