Media Groups, File Types
Reading time ~12 minutes
|
Note
|
For proper Windows file sharing (SMB/CIFS) via TCP/IP protocol it is necessary to have port 445 open in the Firewall. |
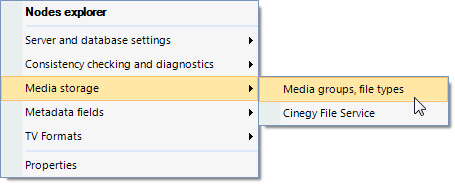
File types and media groups are managed on the media storage panel launched via the "Media groups, file types" command from the "Media storage" submenu of the database context menu:
|
Caution
|
The base path for different media file type shares nested inside each other cannot be used as file locations; this will lead to the incorrect results when performing the consistency checking operations and to the accidental deletion of media files. |
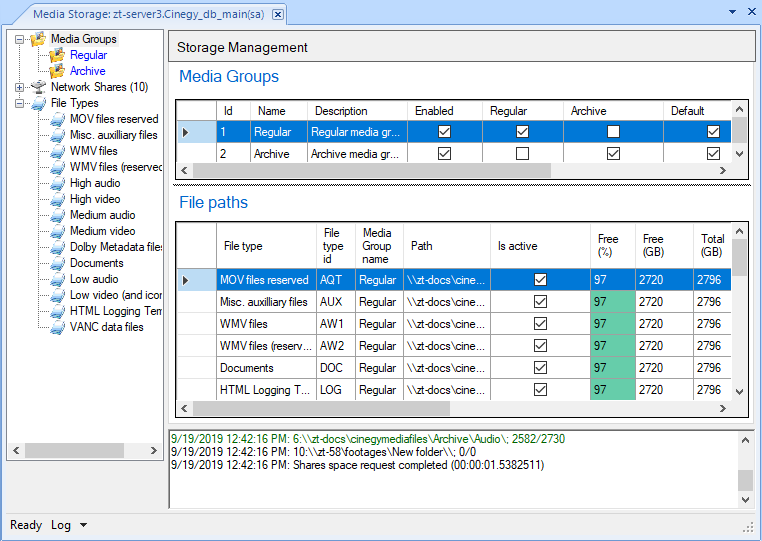
The left part of the panel lists media groups, network shares and file types in a tree-like structure. Selecting the top-level folder displays the group overview in the right part of the panel:
At the bottom of the media groups management panel, there is a system log window that contains a record of the media group and network share events as well as on storage management, including configuration messages and information about other activities:
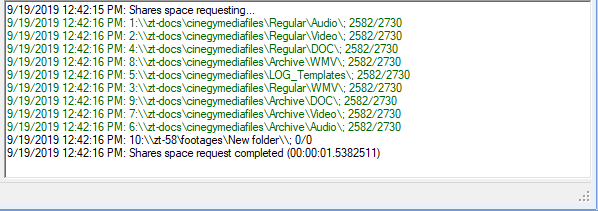
The "System log" functionality can be used to report any error messages to your system administrator, if something goes wrong.
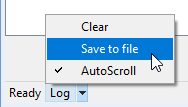
To save the log as a TXT file, use the "Save to file" option from the "Log" context menu that can be found in the bottom left part of the "Media Groups Manager" window:
In the common "Save As" dialog, enter a desired file name and choose the directory for your log file to be saved to.
You can also clear the system log and enable/disable its automatic scrolling using the corresponding commands in the same "Log" context menu.
Media Groups
Media groups are used to support simultaneous work of multiple production teams or use of different program types (e.g. news, drama and documentaries) within one Cinegy Archive database. Dividing into virtual groups covers the following requirements:
-
use of different access rights, which need to be set up on the Active Directory level;
-
use of different storage policy, especially when Linear Tape-Open (LTO) library is used for deep archiving;
-
use of different read/write speed requirements, due to different formats in use.
The "Media Groups" list in the left part of the manager displays all available media groups.
Select the required group to see its details:
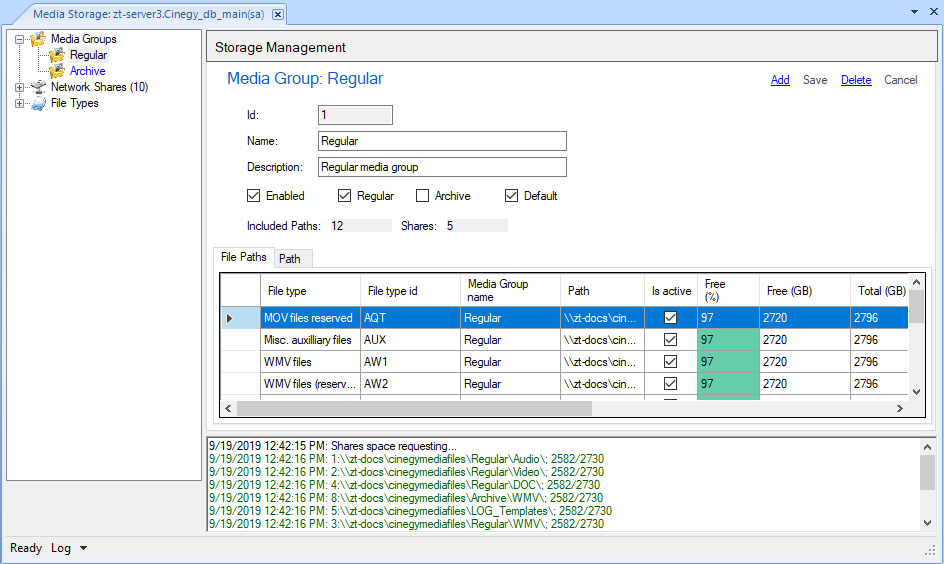
The following media group parameters are displayed:
-
ID – automatically generated internal unique identifier of the media group;
-
Name – the name of the media group;
-
Description – the description of the media group.
-
The Enabled, Regular, Archive and Default attributes are used to filter your media groups according to your needs:
-
Enabled – select this checkbox to make the media group usable within Cinegy Desktop:
-
Regular – when enabled, the group will logically inherit all media paths marked as "regular"; these paths will be used for storing the captured/imported material in corresponding file formats;
-
Archive – when enabled, the group will include all nodes marked as "archive"; all the archived files will be written to the location paths defined for this media group.
NoteThe group should have the "Archive" attribute to be used for archive-related operations such as media cleaning. -
Default – reserved.
NoteThis attribute is reserved for future use. Currently does not affect the system functionality.
-
-
The Included Paths and Shares fields display the number of paths and shares used by the group correspondingly.
|
Caution
|
Never use the same network share for different media groups. |
If you add already used network share to other media group, the following error message appears in the log panel:

To add already used share, remove it from the current media group and then add it to the required one.
Creating a New Media Group
To create a new media group, select any existing group in the directory tree and press Add in the right part of the dialog box:

A blank "Media Group" form appears:
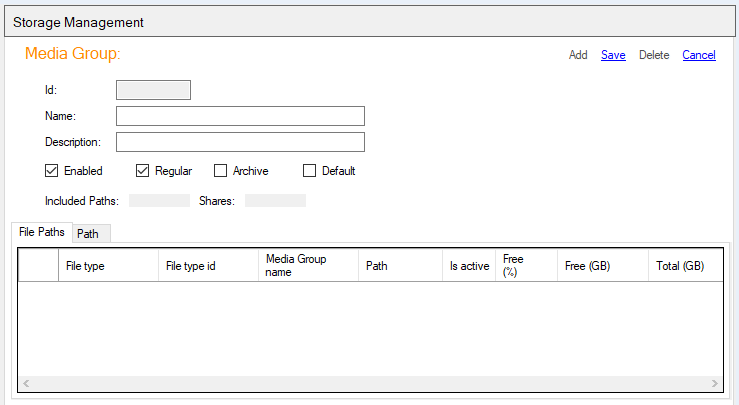
Fill in the media group fields and select the required attributes. Press Save to confirm creation of the new media group or Cancel to reject the changes.
Any parameters of the existing media group can be changed and then saved by pressing Save.
To remove a selected media group, press Delete.
File Paths
All paths for the Cinegy output files are listed here providing easy-to-use monitoring of their status:
|
Caution
|
Make sure you have at least one location for every file type. Missing locations will cause serious system malfunctioning. |
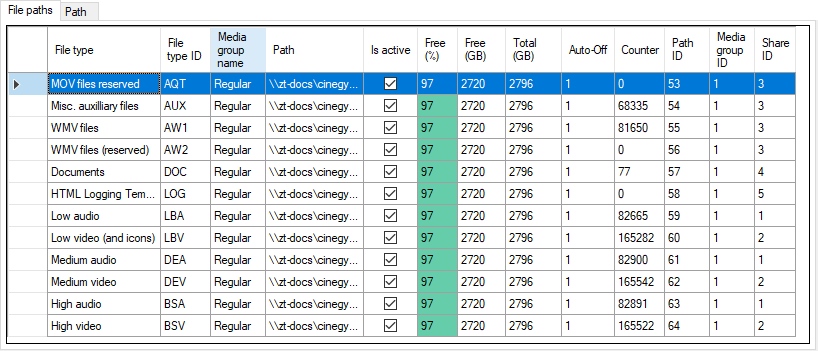
The "File Paths" tab provides the following information:
-
File type – the file type used in Cinegy Archive by the corresponding media group.
-
File type ID – the file type internal unique identifier (generated automatically).
-
Media group name – the name of the current media group.
-
Path – the path to the location where output files are written to and stored.
NoteIf multiple locations for the specific file type are defined, writing of the files will be performed to each storage in turn. -
Is active – access indicator that informs if writing to a particular location is allowed or prohibited.
-
Free (%) – free space on location, in %.
-
Free (GB) – free space on location, in GB.
NoteThe information about free space on location should be checked regularly in order to provide smooth system performance. -
Total (GB) – total amount of space available on location, in GB.
-
Auto-off – if the "Auto-off" value is set to "1", the system automatically makes the location with less than 20% of free space not write-active to avoid disk fragmentation; setting this value to "0" will enable writing files to the locations regardless of their free space. If the "Auto-off" value is set to "2", the system administrator has to manually define which location is not write-active.
-
Counter – the path internal accesses count.
-
Path ID – the internal unique identifier of the path (generated automatically).
-
Media group ID – the media group unique identifier (generated automatically).
-
Share ID – the network share unique identifier (generated automatically).
Path
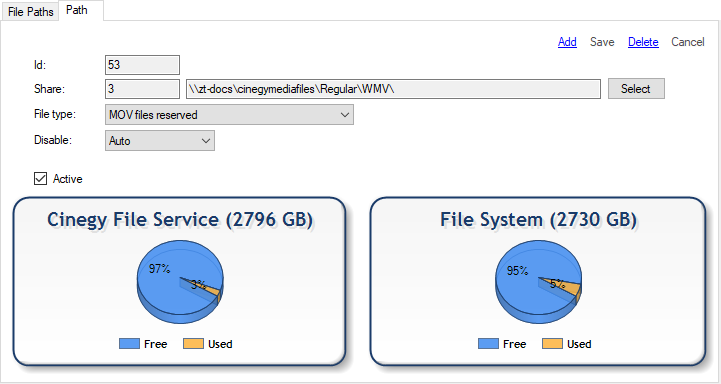
The "Path" tab allows you to add, change, and delete the paths to the network shares:
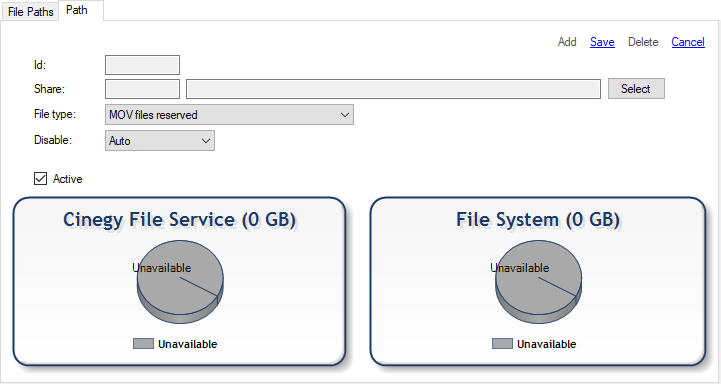
Creating a New Path
Cinegy Archive stores its essences on a number of file servers, connected via network shares. For every file type the list of shares can be defined separately.
|
Caution
|
If there is only one location for a particular file type, the system will continue writing to it. It is recommended to have at least two locations for a file type in a sizable Cinegy software installation and do not mix different file types on one network share. |
|
Caution
|
Never use the same file locations for different databases. This may cause deletion of files in another Cinegy Archive database! |
In order to create a new network share, follow these steps:
-
Press Add in the right part of the "Path" tab in this dialog; the following form appears:

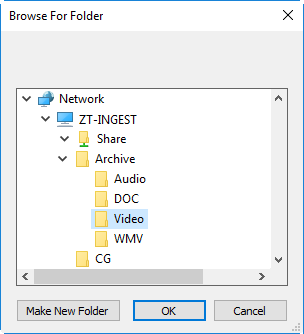
Press the "Select" button and navigate to a new file share within a configuration dialog that appears:

Press "OK" to confirm your selection and close the window.
NoteIt is not recommended to use the same paths in different file locations. -
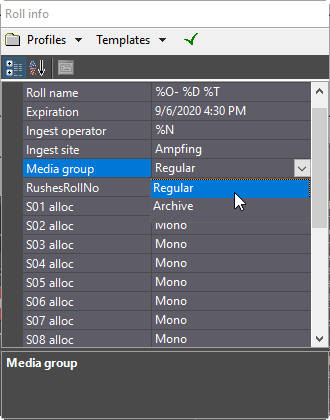
Use the drop-down list to choose the media file type to be operated and then written to the defined network share:
 Note
NoteIf you define multiple locations for the single file type, the files will be written to each storage in turn (all files captured/imported during one session will be written to one of the storages, and files captured/imported in the next session will be written to the second storage and so on). -
From the "Disable" drop-down list choose the "Auto" option for the system to automatically disable writing of files to the locations with less than 20% of free space (to avoid disk fragmentation), or select "Manual" for the system administrator to define it manually.
ImportantRefer to the Low Free Space Limit paragraph to learn how to change the limit value via Cinegy File Service. -
Select the "Active" checkbox to make your file location write-active or remove the tick to prohibit writing to this location.
CautionIf there is only one location for a particular file type, the system will continue writing to it. It is recommended to have at least two locations for a file type for a sizable Cinegy software installation. -
Press Save to confirm creation of a new network share or Cancel to reject the changes. The newly created network share automatically gets its own "ID" that is used by the system.
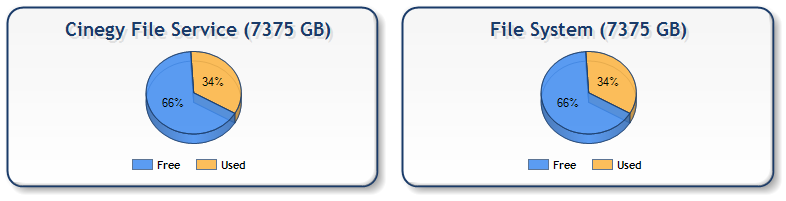
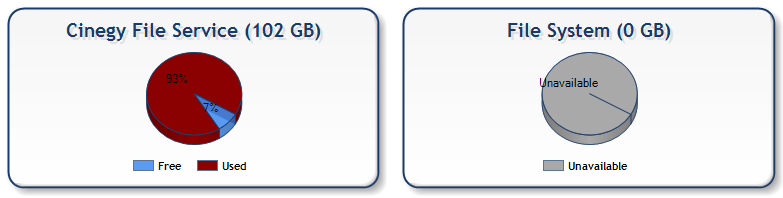
The charts below are the graphical representation of the storage consumption reported by Cinegy File Service and File System, where the blue parts indicate the free storage space, while the yellow parts – the used storage space:
When the free space of the storage is less than 20% of total space, the used space section is shown in red; the unavailable storage is shown in gray:
The main parameters of the existing network share can be changed and then saved by pressing Save.
To remove a selected network share, press Delete.
Network Shares
The "Network Shares" section contains a list of shared resources available in the current database:
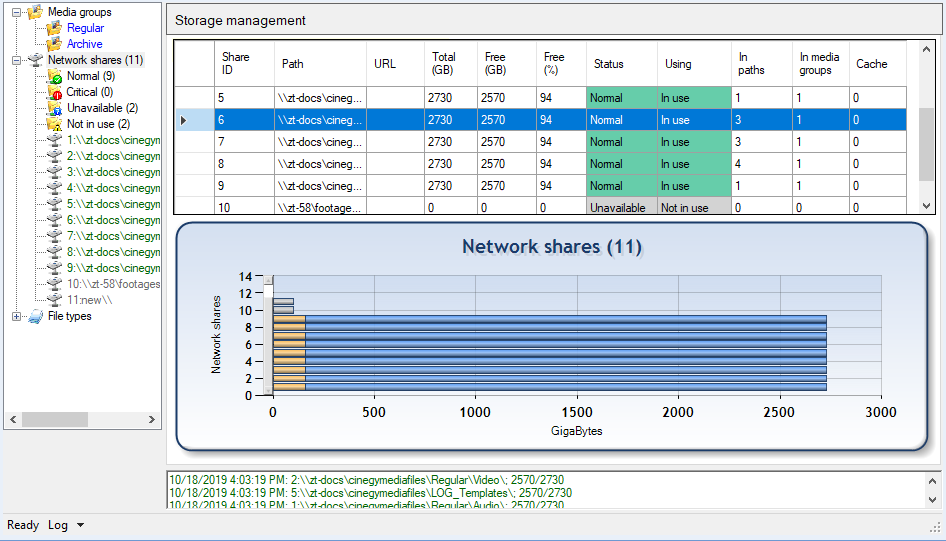
All network shares are correspondingly colored to indicate their status and storage consumption.
In the left part of the "Media Groups Manager" window all network shares are displayed; they are allocated in categories and then listed below.
There are 4 network share categories:
-
Normal – lists network shares that can be used for recording without any limitations.
-
Critical – lists network shares with low available disk space.
-
Unavailable – lists network shares that are not available.
-
Not in use – lists network shares that are not currently in use. They are filtered out of the general number of network shares for administrative purposes.
The number in brackets next to each network share category name indicates the total amount of network shares of each type.
Click the category folder to display its network shares information in table view on the right part of the "Media Groups Manager" window, where:
-
Share ID – the internal unique identifier of the network share. It is generated automatically and cannot be changed.
-
Path – the path to the location where output files are written to and stored.
-
URL – the virtual directory name for the WEB quality files.
-
Total (GB) – shows the total amount of space available on location, in GB.
-
Free (GB) – shows the free space on location, in GB.
-
Free (%) – shows the free space on location, in %.
NoteThe information about free space on location should be checked regularly in order to provide smooth operation of the system. -
Status – the network share status (normal, critical, unavailable, not in use).
-
Using – indicates if the network share is used in paths and/or media groups.
-
In paths – the number of paths, where the network share is used.
-
In media groups – the number of media groups, in which the network share is used.
-
Cache – the number of cached items in the network share.
The diagram at the bottom of the "Media Groups Manager" dialog contains the graphical representation of the storage consumption by each network share: the blue part shows you the free storage space, the orange part – the used storage space. Hover over the desired entry on the diagram to see its network share path:
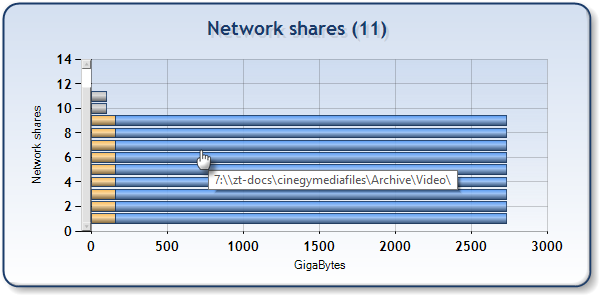
To view certain network share details, select the desired one in the "Network Shares" list or click the corresponding entry on the diagram; the "Network Share" form appears:
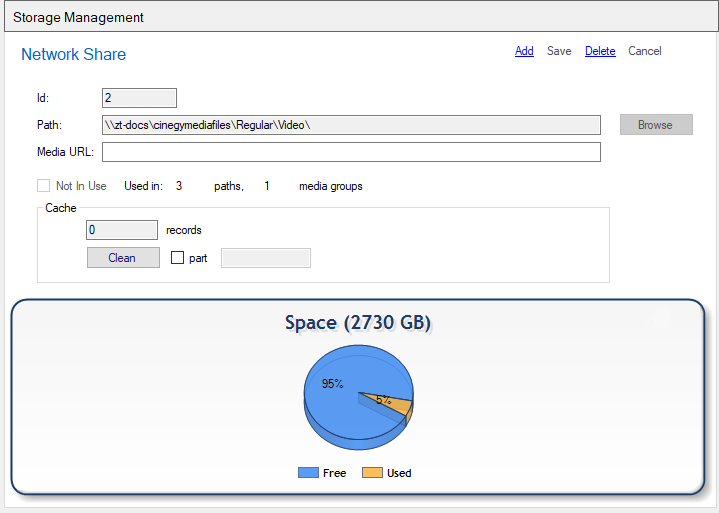
The network share information, including the graphical representation of its storage consumption, is displayed here.
|
Note
|
The detailed explanation of all network share parameters is listed earlier in the current subsection. |
|
Press the "Clean" button to delete cached records for the current network share. To delete a part of cached records, select the "part" checkbox and enter the desired records number via the keyboard. |

Creating a New Network Share
To create a new network share, press Add in the top right corner of the "Network Share" form with the existing share details; a blank form will appear:
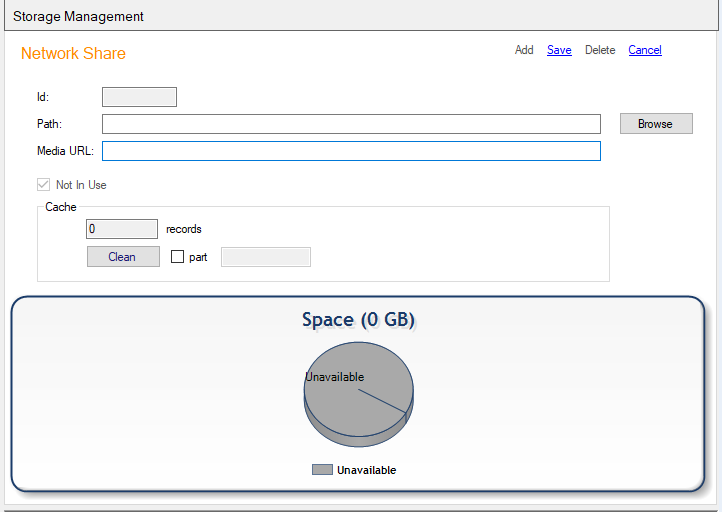
Use the "Browse" button to navigate to a new file share:
|
Note
|
Using local network share(s) is not recommended. |
Fill in the "Media URL" field with the URL for the WEB quality files:
The "Media URL" is required for accessing WEB quality assets by web based clients like Cinegy Workspace.
When using IIS (Internet Information Services) as a web server the common URL is as follows:
http://<IIS server name>/<Virtual directory name>/
|
Note
|
The "<Virtual directory name>" value of the URL must point to the previously defined network share in the "Path" field. |
The example below shows how to add virtual directory:
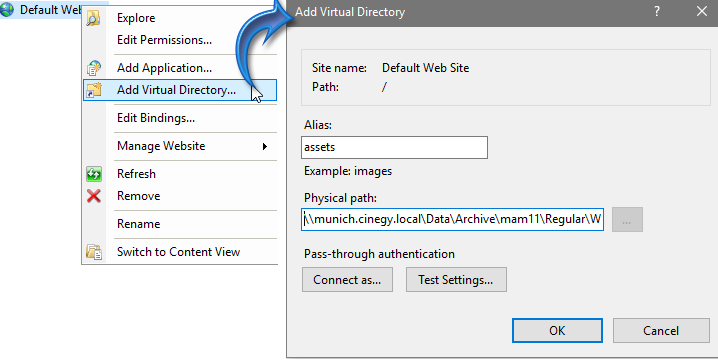
-
Physical path:
\\munich.cinegy.local\Data\Archive\mam11\Regular\WMV -
Media URL:
http://cinemedia/assets/
|
Note
|
The Media URL must end with a slash. |
Having defined the Media URL, press Save to confirm creation of the new network share or Cancel to reject the changes.
Any parameters of the existing network share can be changed and then saved by pressing the "Save" button.
Relocating an Existing Network Share
To edit an existing network share, select the desired one and navigate to a new file share using the "Browse" button or enter the desired path manually in the corresponding field.
Fill in the "Media URL" field or edit the current one via the keyboard, if needed.
|
Important
|
Refer to the Common Settings paragraph to learn how to enable entering the network shares manually. |
Physical Replacement of a File Server
The most typical practice of using this method is replacing a file server experiencing technical problems or performing maintenance. The following procedure is recommended:
-
Prepare a new file server that needs to be at least the same size as the old one.
-
Deactivate the location you want to replace.
ImportantRefer to the Creating a New Path paragraph. -
Copy all the Cinegy Archive-relevant footages to the new server.
-
Replace the network share.
-
Activate the location again by selecting the "Active" checkbox on the "Path" tab of the "Media Group" form.
|
Note
|
Please note that the procedure described above works only if you have more than one location for the file types on that server. |
Removing a Network Share
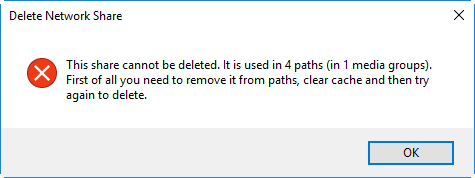
To remove a network share, select the desired one and press Delete in the top right corner of the "Network Share" form. If the network share you are trying to delete is already used at least in one path, its deletion cannot be performed; you will be warned about it with the corresponding message:
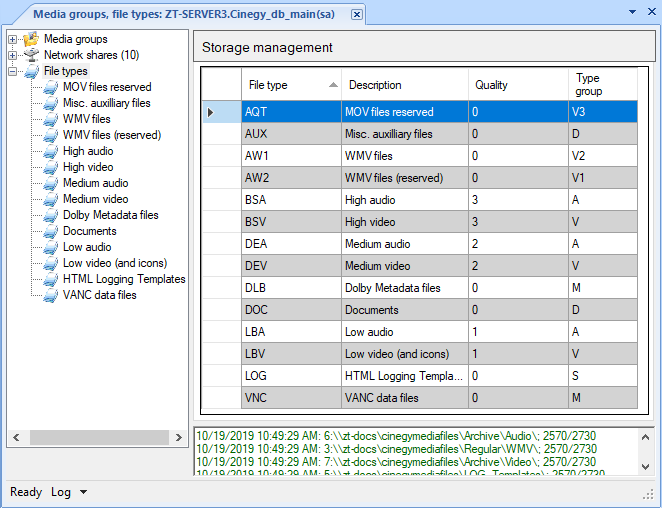
File Types
|
Caution
|
This table is for internal Cinegy Archive use only. Do not change anything here. |
The "File Types" section contains a list of file types used in Cinegy Archive:
| Type | Description | See Also |
|---|---|---|
BS* |
High quality Audio/Video |
The Available Qualities paragraph |
DE* |
Medium quality Audio/Video |
The Available Qualities paragraph |
LB* |
Low quality Audio/Video |
The Available Qualities paragraph |
AW* |
Web Quality files |
The Available Qualities paragraph |
DOC |
Documents |
The Working With DocumentBin article in the Cinegy Desktop Manual |
VNC |
VANC data files |
The VANC data files section in the Cinegy Desktop Manual |
LOG |
Logging Templates |
The Logging Template article |
|
Note
|
Some of the other types that may appear in your setup are for future extensions. |