Launching and Configuration
Reading time ~5 minutes
|
Note
|
Installation of Cinegy Capture Planner is skipped by default, and if you plan to use it, select the appropriate option during the Cinegy Capture installation procedure. |
The Planner host service provides interaction between Cinegy Capture engine services and a web interface for scheduling recordings.
|
When started, the Cinegy Capture Planner Manager icon is displayed in the notification area of the taskbar. |
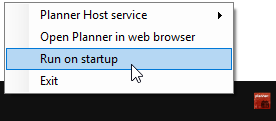
To make Cinegy Capture Planner Manager automatically run on Windows startup, right-click the icon on the taskbar and select the corresponding option from the context menu:
Planner Settings
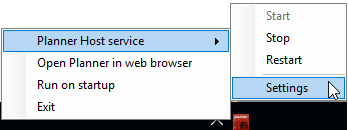
To configure the service, right-click the Cinegy Capture Planner Manager icon on the taskbar and select "Planner Host service" > "Settings" from the context menu:
Server Settings
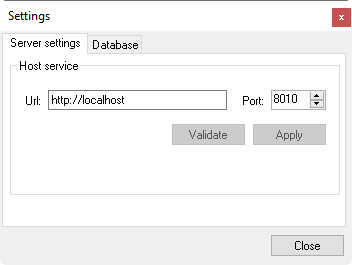
In this tab, specify the URL and the port of the machine with the running Host service and press "Apply".
Database Settings
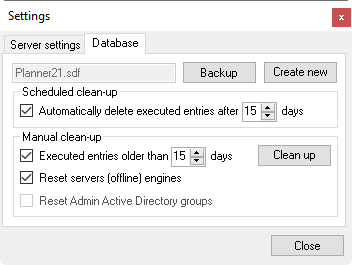
|
Press the "Backup" button to back up the existing database. |
|
Press the "Create new" button to create a new database. |
Please be aware that the creation of a new database may cause data loss in the existing database. To save the database data, it is recommended to back up the existing database before creating a new one. In this case, you will be notified with the following message:
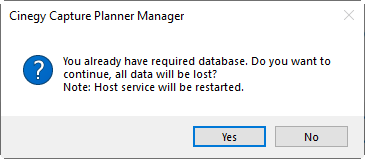
Database Clean-up
|
Important
|
The given database clean-up is only applied to records stored in the Scheduler Database. Local engine database clean-up is performed independently. Refer to the Database Clean-up section in the Cinegy Capture Manager Manual to get more information on cleaning up the local database. |
Options for automatic and manual database clean-up are available in the "Database" tab. To perform the manual clean-up operation, check the corresponding options, then press the "Clean up" button to start the database clean-up procedure.
Managing Service
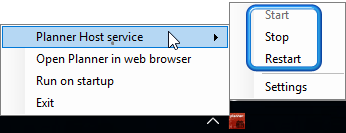
The service can be managed using the corresponding commands from the context menu of the Cinegy Capture Planner Manager icon in the notification area of the taskbar:
Launching Planner
To launch Cinegy Capture Planner Manager, use the "Open Planner in web browser" command from the context menu of the Cinegy Capture Planner Manager icon in the notification area of the taskbar:
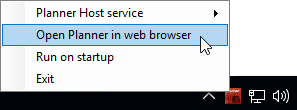
The application will be opened in your web browser asking you to specify user account information:
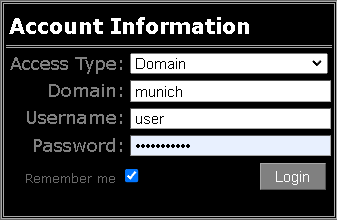
Choose the access type from the drop-down list and enter the domain/computer name, user name, and password.
Access to Cinegy Capture Planner is limited by domain user rights. During the first launch, "Guest" rights are assigned to the user. To assign "Admin" rights to a group, select the corresponding user group from the list and press the "Enter" button:
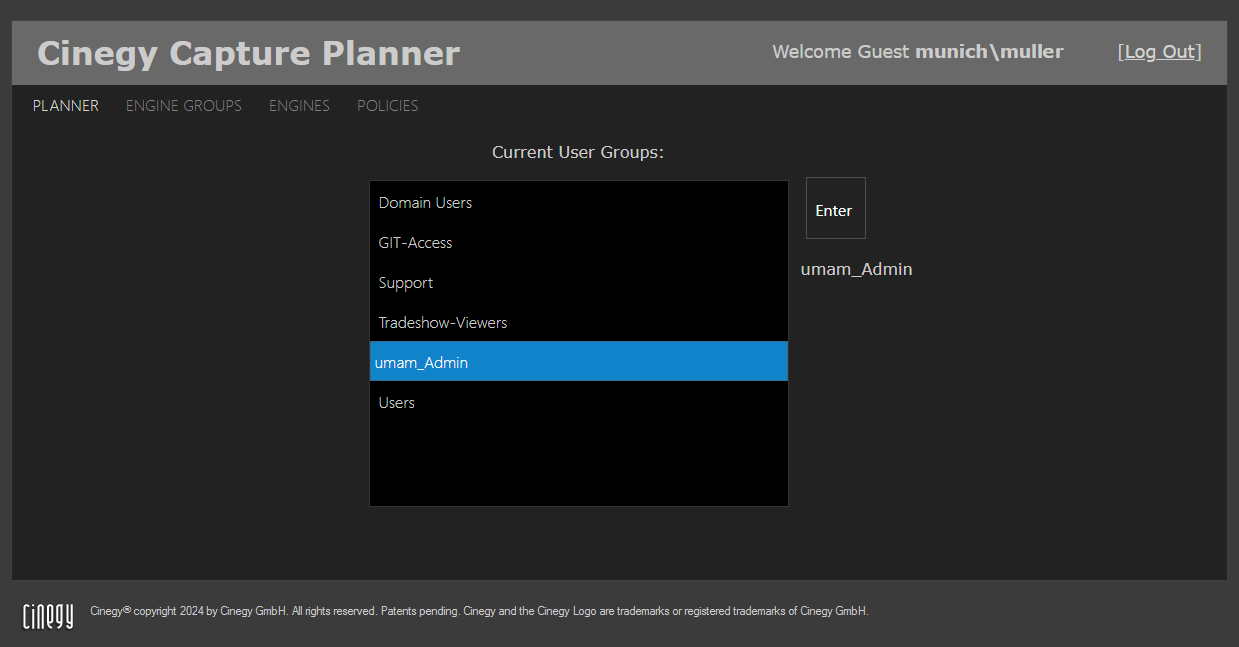
Configuring Engines
To configure engines to be controlled via Cinegy Capture Planner, go to the "Engines" tab.
During the first launch, you will be prompted to add at least one Capture server:
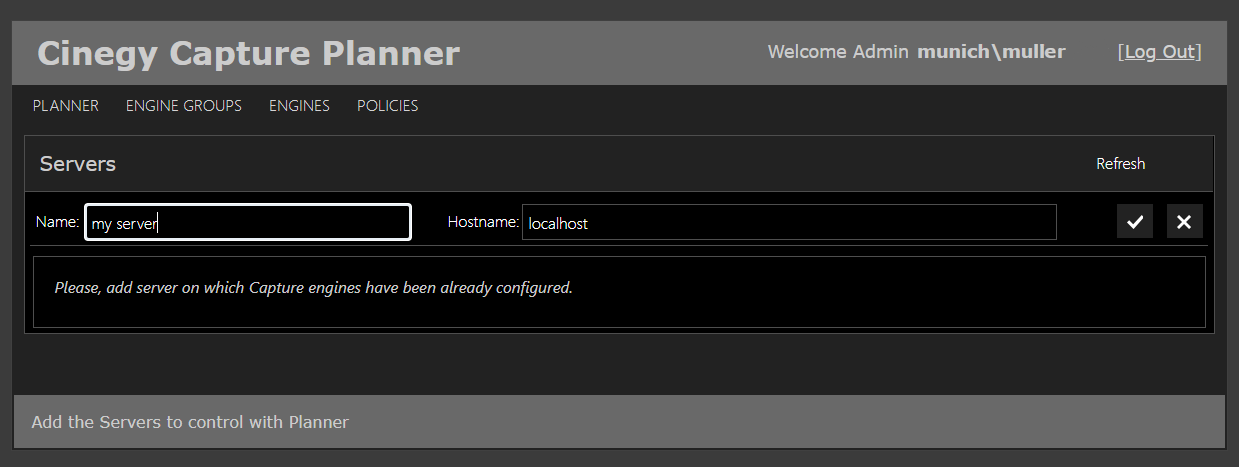
Here, define the server display name and machine name or IP address; then press the ![]() button. The server with its installed engine services will be added to the "Servers" list:
button. The server with its installed engine services will be added to the "Servers" list:
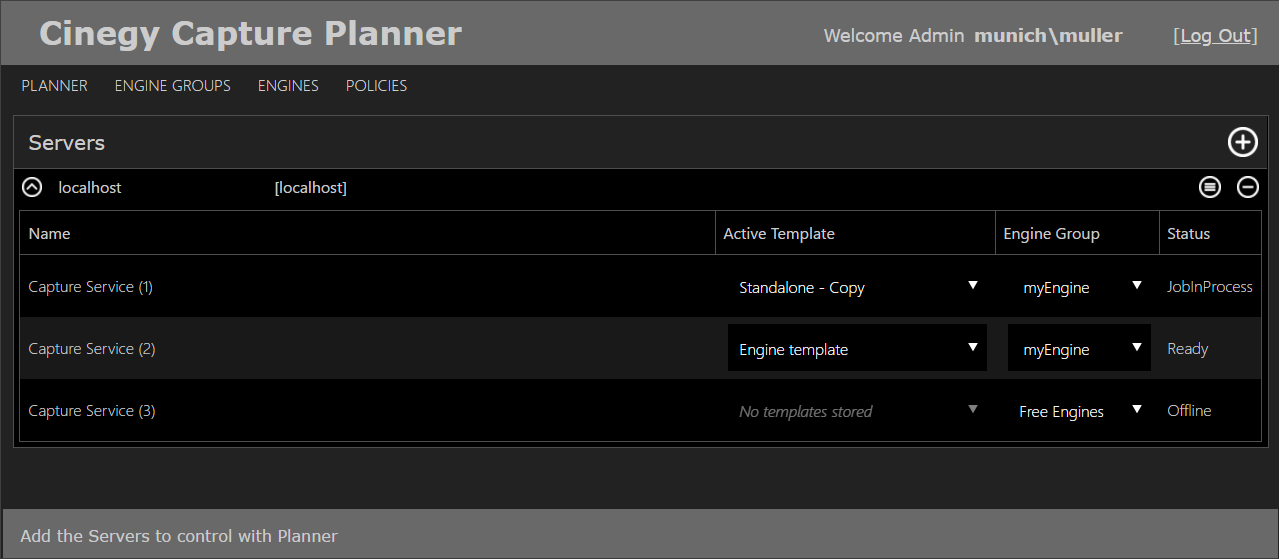
The current status of engines is displayed in the "Status" column.
|
Tip
|
To check the current status of the engine, refresh your browser by using the Ctrl+F5 shortcut. |
The engine status can be of several types:
-
Ready – the Cinegy Capture service is started and running.
-
JobInProcess – the engine is busy with recording.
-
Pending – the Cinegy Capture service is being configured at the moment.
-
Failed – the Cinegy Capture service is not properly configured.
-
Offline – the engine is offline, meaning it has the wrong URL or the Cinegy Capture service is not started.
|
To add a new server, press this button and enter the required server details – its display name and hostname or IP address. |
|
To edit a particular server, press this button, set the required parameters, and press the |
Engine templates intended for the recording session can be chosen from the "Active Template" drop-down list next to the required Capture service:

|
Important
|
The "Active Template" drop-down list displays only valid engine templates. Refer to the Templates Panel article in the Cinegy Capture Control Manual to learn about the creation and management of templates. |
|
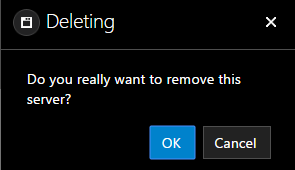
An unrequired server with its nested engines can be deleted using this button. You will be asked to confirm your decision: |
|
Engine Groups
Engine groups are used to organize multiple engines into groups for simultaneous capture recordings processing.
Go to the "Engine Groups" tab:
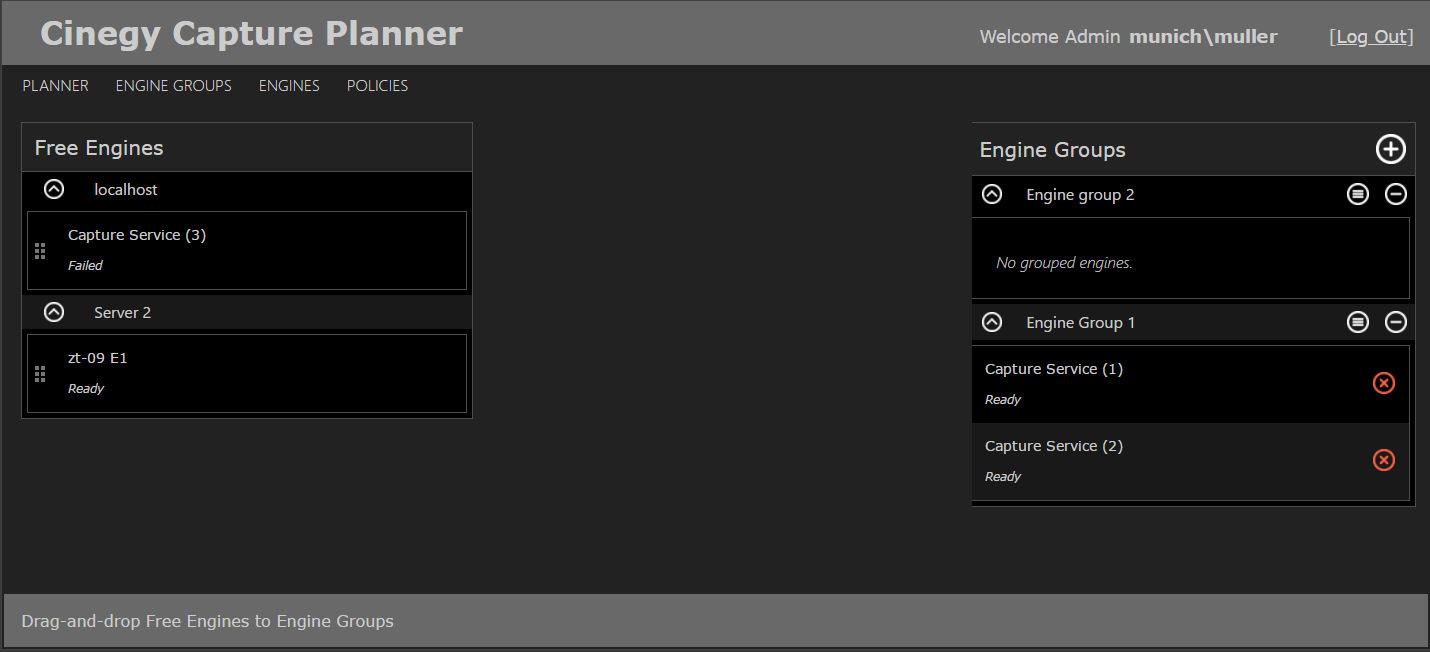
The Free engines panel contains engine services not assigned to any of the engine groups. The engine groups panel comprises engine services arranged in a group. Free engines can be assigned to engine groups via drag-and-drop. To remove an engine from the group, press the  button.
Use the buttons below to manage and control engine groups:

|
To add a new engine group. |

|
To delete an engine group. |

|
To edit an engine group. |
Policies
This tab allows assigning various Cinegy Capture Planner access rights for domain user groups:
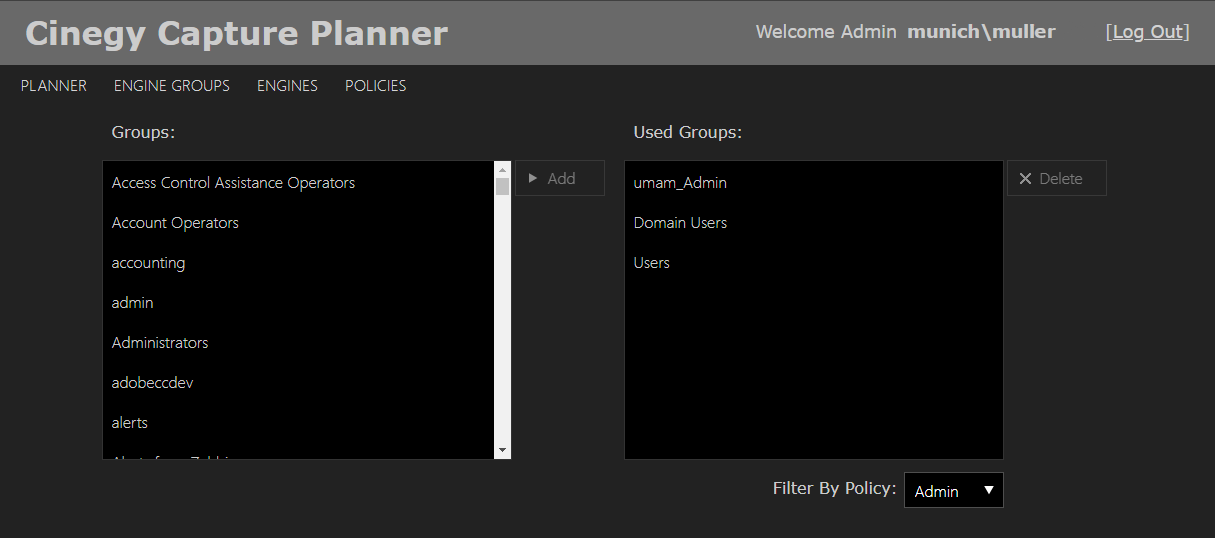
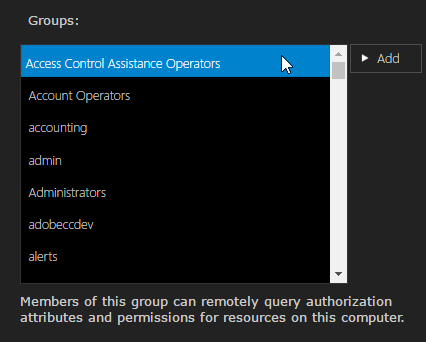
The Groups panel on the left shows all existing user groups. Click a user group to display its description:
User groups authorized to have access to the Cinegy Capture Planner configuration are displayed on the right in the "Used Groups" list. There are three types of policy privileges:
-
Admin – provides full access to the Cinegy Capture Planner configuration and management on the website.
-
User – provides the rights to edit the recordings on the Cinegy Capture Planner website.
-
Guest – provides view-only rights on the Cinegy Capture Planner website.
Note"Guest" rights are assigned to the users logged in to the Cinegy Capture Planner website for the first time.
To assign new access rights to the user group, follow the steps:
-
Select the required group in the "Groups" list.
-
Define policy privilege by choosing either "Admin" or "User" from the "Filter By Policy" drop-down list.
-
Press the "Add" button.
-
All the group users will have access to the Cinegy Capture Planner configuration and management determined by the predefined policy.


