Trimming Clips
Reading time ~2 minutes
Trimming a Clip
The player provides clip trimming functionality.
|
Note
|
The In point represents the beginning of the In frame, and the Out point represents the end of the Out frame (or the beginning of the next frame). |
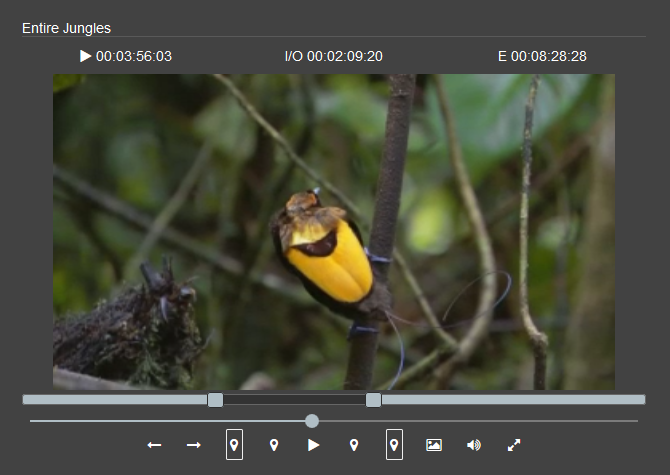
Setting the In Point
|
Press the "Mark In" button situated on the left of "Play/Pause" button (or use the I shortcut) to trim your clip from the left. |

|
To delete the In point, press the "Clear Mark In" button situated on the left of "Play/Pause" button. You can also use the knob on the dedicated ruler to define the In point position. |

Setting the Out Point
|
Press the "Mark Out" button situated on the right of "Play/Pause" button (or use the O shortcut) to trim your clip from the right. |
|
To delete the Out point, press the "Clear mark Out" button situated on the right of "Play/Pause" button. You can also use the knob on the dedicated ruler to define the Out point position. |
Creating a Subclip
When you mark a piece of footage with In and Out points, you can either save the entire clip along with the new boundaries, or you can create a subclip based on the In and Out points you set, to break longer clips into smaller segments.
|
Press the "Make subclip" button on the player toolbar or use the C shortcut. The new subclip will be created in the container currently open in a tab. |

|
Note
|
In a Roll it is only possible to create subclips from the entire (not from subclips). |
Each new subclip name will be equal to the name of the entire or parent clip, with the addition of the sequential number in brackets to help identify clips in highly populated bins.