Channels Grouping
Reading time ~2 minutes
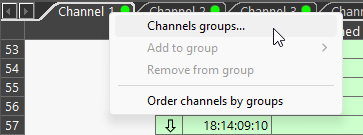
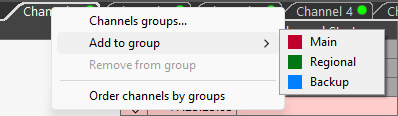
Channel tabs can be assigned specific colors for quicker and easier identification. This is achieved using channel groups. To open the "Channel Groups" window, where groups can be managed, right-click any channel tab or the channel name in the Timeline panel, and then select the "Channel Groups…" command:
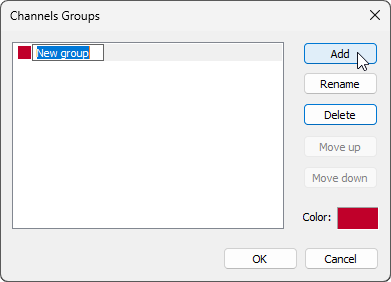
Press "Add" button to add a new channel group, specify its dedicated name:
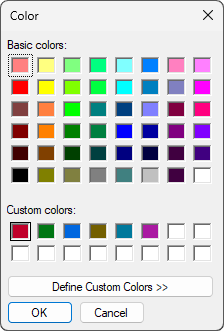
The group color can be customized by clicking in the "Color" field and selecting the desired color from the dialog that appears:
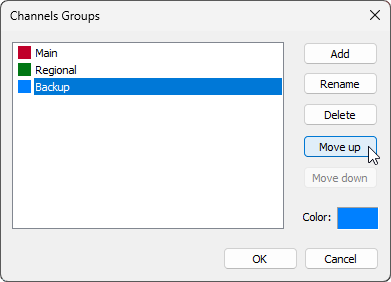
The order of channel groups can be changed using the "Move up" and "Move down" buttons:
Click "OK" to complete the channel group creation.
To assign a channel to a specific group, right-click the channel tab and select the desired group from the "Add to group" menu.
|
Note
|
The same menu is also available by right-clicking the channel name within the Timeline panel. |
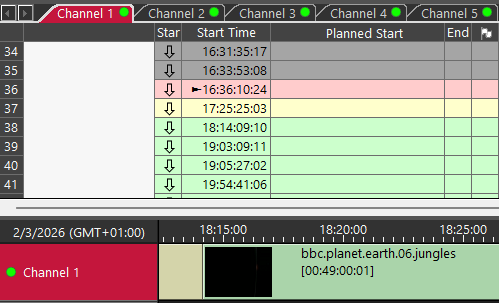
The channel tab will be highlighted with the color defined for the selected channel group. The channel name in the Timeline panel is highlighted as well:
To remove the channel name highlighting, use the "Remove from group" command.
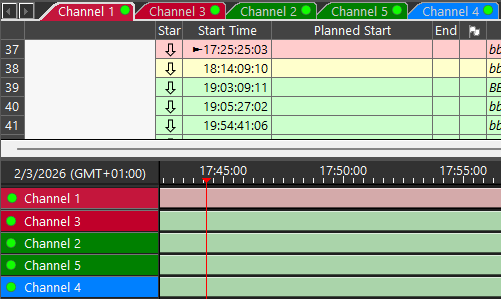
Channel tabs can be grouped and displayed in an ordered manner on the Timeline and in the Playlist grid. To enable this behavior, select the "Order channels by groups" option.
|
Note
|
The tab of the channel that doesn’t belong to any group is displayed last. |
Deselect the "Order channels by groups" option to restore the original order of the channel tabs.