Preferences
Reading time ~5 minutes
Preferences
Select the "Preferences…" command from the "Edit" main menu to open the "Preferences" dialog. The settings are divided into two tabs: General and Categories.
General
The "General" settings tab contains key options that define the operational logic of the Cinegy Air applications:
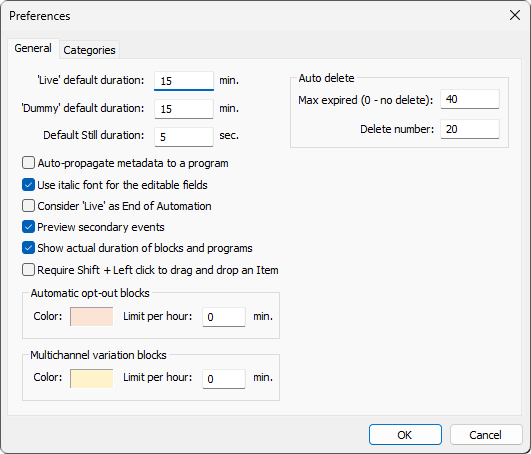
Default Duration
-
'Live' default duration – defines the default duration for a newly created live item.
-
'Dummy' default duration – defines the default duration for a newly created dummy item.
-
Default Still duration – defines the default duration for a newly inserted images and Cinegy Title templates with infinite loop.
Such items are inserted into the playlist with their default durations:

|
Tip
|
After an item is added to the playlist, you can modify its duration by double-clicking the "Duration" cell and entering the desired value. |
Auto Delete
Parameters in this section configure automatic removal of expired items from the playlist in the Cinegy Air control application using the following parameters:
-
Max expired – defines the number of expired items that must accumulate in the playlist before automatic deletion is triggered.
NoteSet the "Max expired" value to 0to disable automatic deletion. -
Delete number – specifies how many expired items are removed at a time when automatic deletion occurs.
Auto-propagate Metadata to a Program
This option enables the automatic fulfilment of metadata to the program properties. So that, when you insert an item into a newly created empty program, the program metadata is replaced by the item metadata.

Any subsequently inserted items will not affect the program metadata.
Use Italic Font for the Editable Fields
Select this option to display all editable fields in the playlist using an italic font:

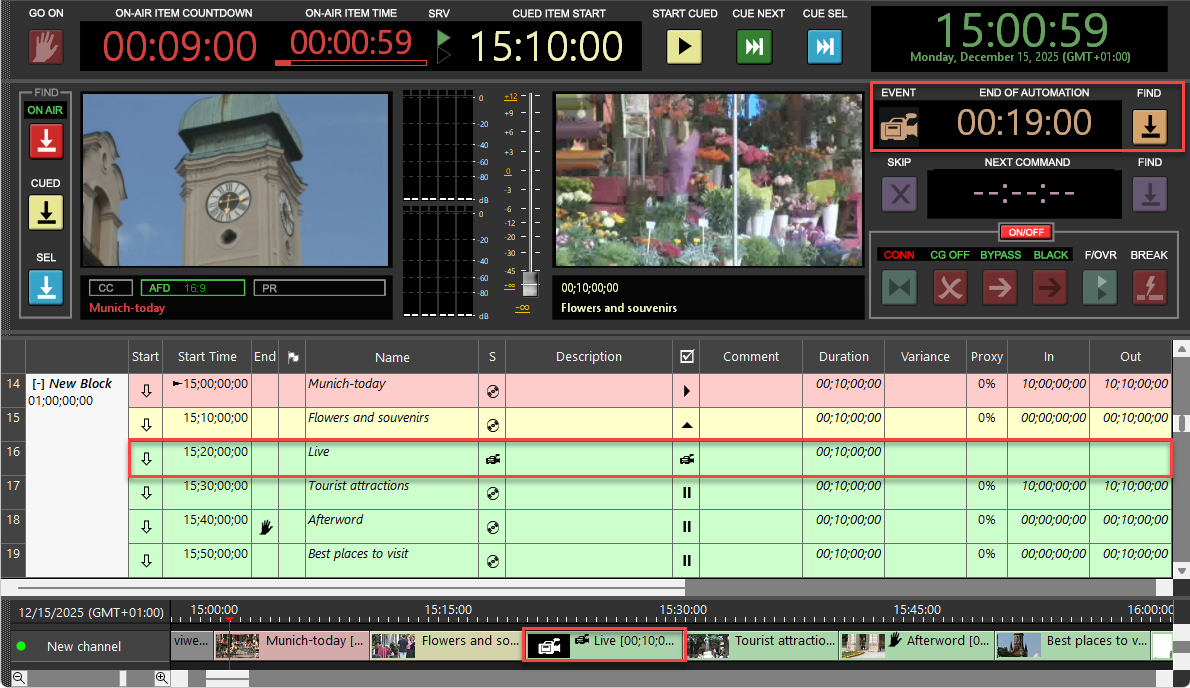
Consider Live as End of Automation
With the "Consider 'Live' as End of Automation" option enabled, the start time of the next live item is considered as a starting point for the "End of automation" countdown field.
The option is enabled
When disabled, this countdown shows the time remaining until the end of automation:

The option is disabled
Preview Secondary Events
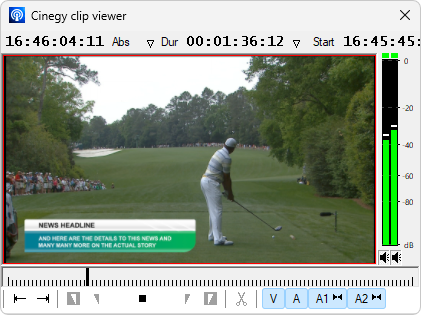
This option enables/disables the Cinegy Title secondary events rendering in the built-in Clip Viewer.
|
|
The option is enabled |
The option is disabled |
Show Actual Duration of Blocks and Programs
The "Show actual duration of blocks and programs" option defines how block and program durations are calculated, and objects are displayed on the timeline.
When enabled, the durations reflect the actual summed duration of all contained items, including any variance:
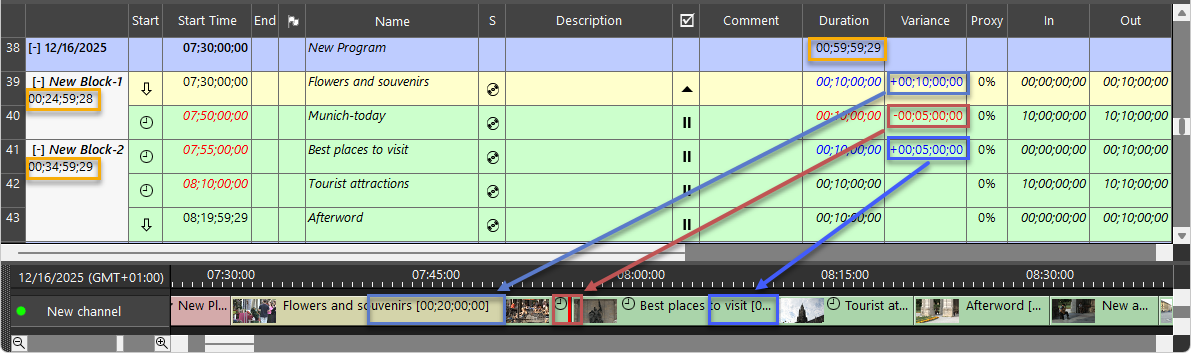
The option is enabled
When disabled, variance is not taken into account:
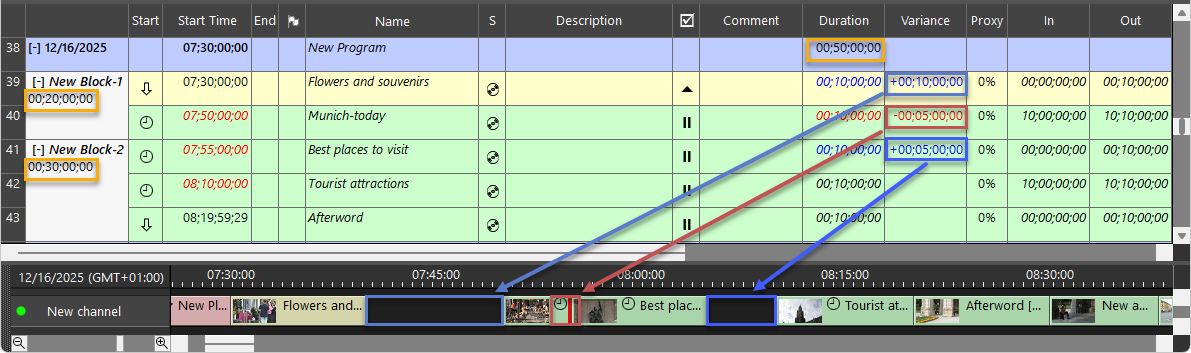
The option is disabled
Require Shift + Left Click to Drag and Drop an Item
This option restricts item insertion and movement via drag-and-drop, requiring the Shift key to be held while performing the action.
Automatic Opt-Out and Multichannel Variation Blocks
Specify the background highlight color for automatic opt-out and multichannel variation blocks in the playlist in the "Automatic opt-out blocks color" and "Multichannel variation blocks color" fields, respectively.
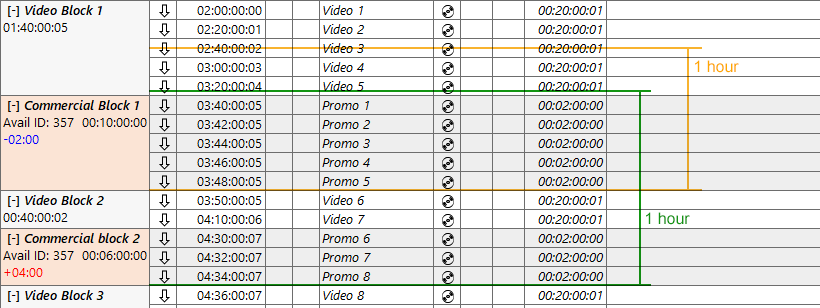
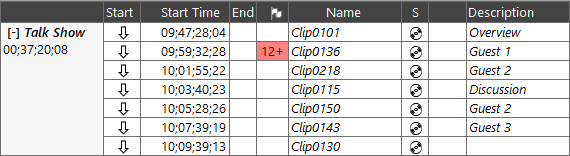
The "Limit per hour" field defines the maximum number of minutes per hour for advertising. While the amount of advertising time does not exceed this limit, the variance value highlighted in blue is displayed in the playlist beneath the block duration. If advertising time exceeds this limit, its variance value becomes highlighted in red:

The out-of-network duration is calculated for each opt-out block, starting from the end time of the current block and one hour earlier. The broadcasted items are also included in this calculation.
The following illustration shows a sample playlist, for which the "Limit per hour" parameter is set to 12 minutes for automatic opt-out blocks. For the "Commercial Block 1", the total duration of opt-out blocks is 10 minutes of advertising time, and 2 spare minutes are highlighted in blue. For the "Commercial Block 2", one hour of broadcast time contains 16 minutes of advertising time, and the variance value of 4 excess minutes is indicated in red.
Categories
In the "Categories" tab, custom categories can be defined for marking specific items in the playlist with custom colors.
To create a new category, press the "Add" button. It will be added to the list. You can specify a suitable name for this category.
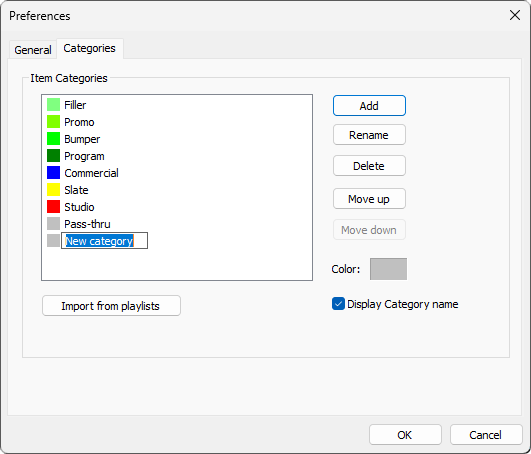
Then you can define a custom color for the newly created category. For this, click on the "Color" field; the standard color selection dialog will be opened:
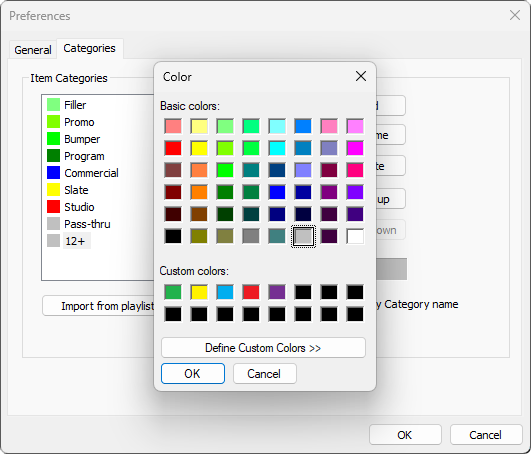
Here select the color and press "OK" to apply it. The color will be applied to the "Item Categories" list.
Thus, you can create a list of custom categories. The items in this list can be renamed, deleted, or rearranged by using the corresponding "Rename", "Delete", "Move up", and "Move down" buttons.
The name of the category can be displayed in the playlist on a defined color background. To do this, enable the "Display Category name" option.
Press "OK" to save the created list of custom categories.
The "Import from playlist" command allows the loading or updating of the categories according to the categories used in the current playlist. If you have a playlist previously saved with defined custom categories and the categories have the same name but different colors, you will be asked to define which color to keep with the following dialog:
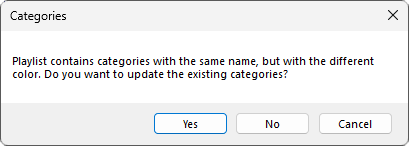
Press "Yes" to load the category color from the current playlist and apply it to the category from the "Item Categories" list. Press "No" to keep the color for categories defined in the "Item Categories" list.
|
Important
|
Refer to the Custom Categories article to learn how to apply custom categories to playlist items. |