Settings
Reading time ~5 minutes
|
Press this button on the main toolbar; the following "Settings" dialog box appears: |

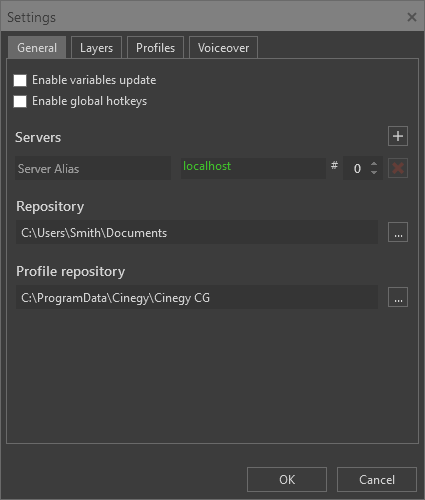
General Settings
In this tab the general Cinegy CG application settings are defined.
Select the "Enable variables update" option to allow the operator to update variables in real-time. With the "Enable variables update" option deselected, the variables panel becomes unavailable and the variables update is disabled.
Select the "Enable global hotkeys" option to ensure that shortcuts remain operational even when the Cinegy CG window is minimized.
|
Caution
|
When the "Enable global hotkeys" option is enabled and the Cinegy CG window is minimized, shortcut activation will interfere with another active application if the same shortcut is used there. |
Servers Configuration
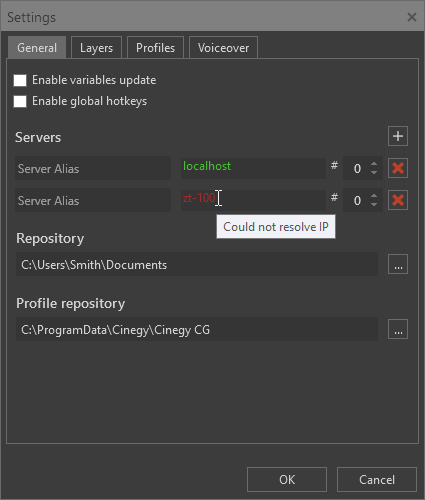
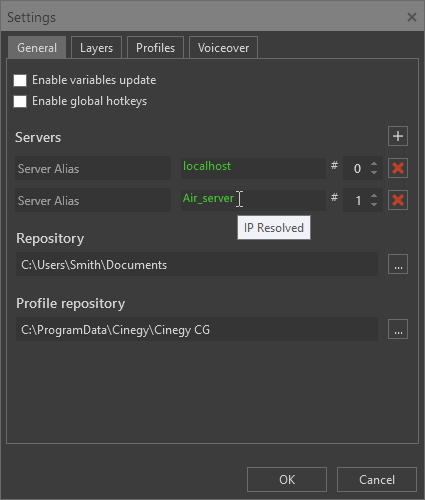
In this section servers running the Cinegy Playout engine are defined. Only one server is enabled by default, you can add more servers by pressing the  button.
If several Cinegy Playout engine instances are started on the same server, define what engine instance will be used to process the specified playlist in the corresponding "#" field next to the server IP address.
While entering the name of the server and during its validity check, the value of the server name is displayed in grey. The correct and accessible Cinegy Playout engine name and instance number are displayed in green. In case of errors in server path configuration or server unavailability, they will be displayed in red, and hovering the cursor over the path will show the tooltip for the reason:
|
|
To remove a server, press the  button.
|
Note
|
Please note that for the graphics scenes to be sent to playout, the "CG and Channel Branding option" should be set to "Cinegy Title" via the Cinegy Playout engine configurator for each corresponding Cinegy Playout instance. |
Repositories Configuration
The "Repository" field displays the folder location where Cinegy Title templates are stored. Press the  button to define the desired location in the "Select repository folder" dialog. Alternatively, you can type in the folder location manually. If the specified path is unavailable or does not exist, the following warning is displayed:
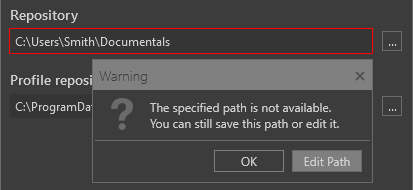
Press "Edit Path" to correct a mistake or define another path. Alternatively you can save the unavailable path in the settings by pressing the "OK" button.
The "Profile repository" is the folder location where user profiles containing Cinegy CG settings in XML file format are stored. Press the button and change the default location in the "Select settings folder" dialog.
Layers
On the "Layers" tab select the layers to be available for graphics application. 10 layers of graphics are available: "Layer 0", "Layer1", …, "Layer8" and "Logo".
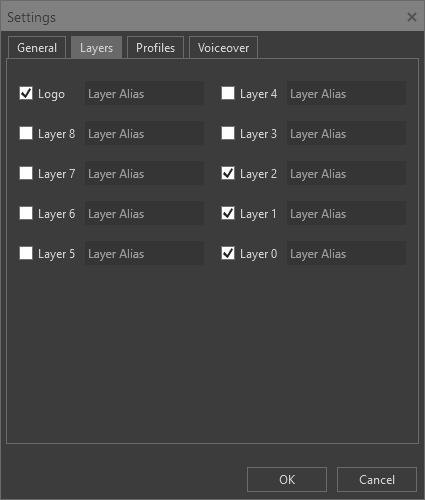
The "Logo" layer is the topmost layer, while the lowest layer is "Logo 0."
Having applied the settings on the "Layers" tab, the corresponding layers will be displayed on the main Cinegy CG window:
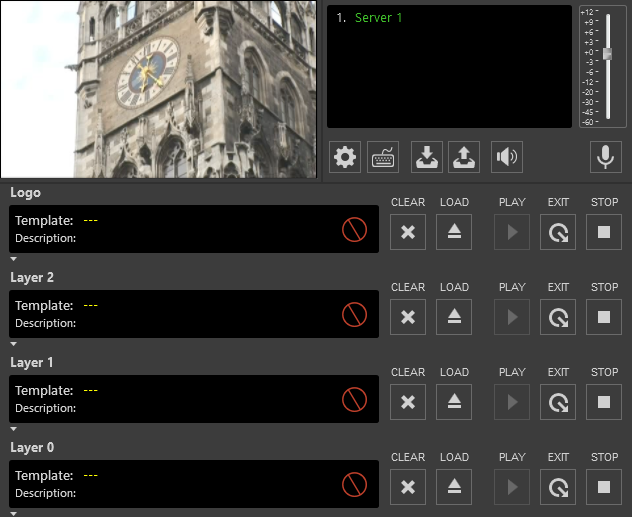
The Cinegy Title template will be sent to all configured Cinegy Playout engines and will be played on the layer from which it was sent via the Cinegy CG window.
Profiles
The application profiles, previously created via the "Save profile" button located on the main window, are displayed on this tab:

In this list, you can edit a profile’s name or description. To do so, double-click the corresponding field and enter the desired text, then press Enter to apply the changes.
To delete a profile, select it in the list and press the Delete key.
Voiceover
In the "Voiceover" tab, you can configure the voiceover audio output, which will be transmitted to the Cinegy Playout engines specified in the "General" tab:
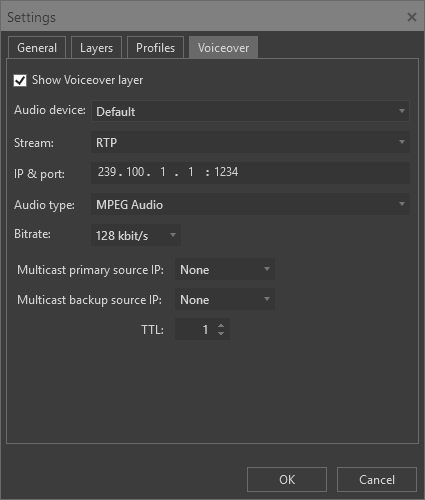
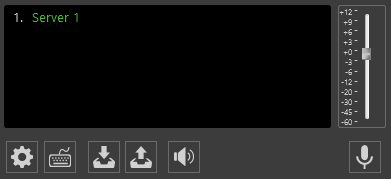
Select the "Show Voiceover layer" option for the audio recording controls to be displayed on the toolbar.
This will enable the following voiceover audio output parameters:
-
Audio device – choose the corresponding audio input device from the drop-down list.
-
Stream – define the stream protocol type: RTP, UDP, or SRT.
ImportantFor detailed information about URL formats, please refer to the article at the following link. -
IP & port – enter a destination multicast address and port, which will be used to stream audio output to the network via RTP/UDP.
-
Source IP – select the required network adapter from the list of available adapters on your machine. This adapter will be used for transmitting an SRT stream to the Cinegy Playout engine(s) defined in the settings.
NotePlease ensure that the Cinegy Playout engines used in this configuration have access to the network transmitting the SRT stream. -
Audio type – select the desired audio type from the drop-down list.
-
Bitrate – select the audio bitrate from the drop-down list for MPEG and AAC audio.
-
Multicast primary source IP – enter the IP address of the primary local network adapter that will be used for multicasting.
-
Multicast backup source IP – optionally enter the IP address of a secondary local network adapter that will be used for multicasting as well as the primary IP.
-
TTL – define the number of routers (hops) that multicast traffic is permitted to pass through before expiring on the network.
ImportantRefer to this documentation for more information on the TTL option.
Once the settings are configured, press the "OK" button for the changes to take effect.
To begin the voiceover transmission, press the  button in the main Cinegy CG window. Use the audio fader control to adjust the volume.
On first launch, or if no audio input device is available, the voiceover button is disabled and shown in pale red. If an audio input device becomes disconnected while running, the input signal will be muted, and the voiceover button will turn red to indicate the issue.