Automation
Reading time ~2 minutes
Cinegy Title Studio supports data-driven playlists. Instead of manually entering text you can link playlist items directly to external data sources such as XML, JSON, CSV, or Excel files. By mapping the file’s columns to the data fields in your template, Cinegy Title Studio automatically reads and displays the updated content.
This setup only needs to be configured once. After defining the data source and mapping rules, you can save the configuration as a reusable playlist item, ready to go on air whenever needed. For reliable automation, the referenced files must follow a predefined structure. While Cinegy Title Studio does not connect directly to online APIs, customers can provide updated local files and any changes in these files are reflected on air instantly.
Creating Automated Items
To configure automation for a playlist item, select the "Edit Item" command from the item’s context menu. The "Edit Playlist Item" dialog opens:
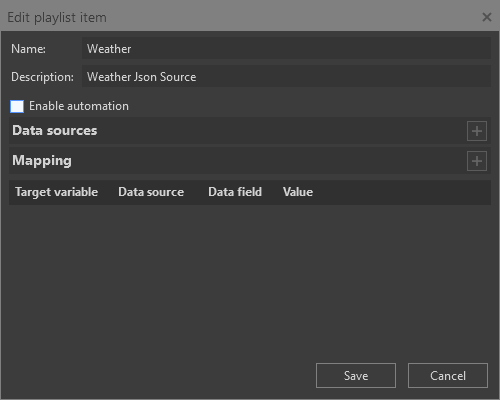
In the dialog, select the "Enable Automation" option. The "Data Sources" and "Mapping" sections then become available.
In the "Data Sources" section, click the  button to select a data source file using the standard file selection dialog. Multiple files can be added as data sources if required.

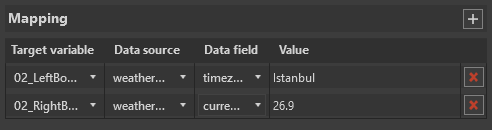
Next, map a template variable to the desired data value from the selected data source. In the "Mapping" section, click the  button to create a new mapping rule:
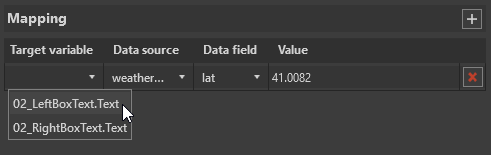
In the "Target Variable" column, select the variable from the list of variables available in the Cinegy Title template. Then choose the appropriate data source file in the corresponding column. In the "Data Field" and "Value" columns, select the required data element and its value.
Click "Save" to complete editing of the playlist item. The icon of the automated item will change in the playlist grid to indicate that automation is enabled.
The same data mapping functionality is available on the "Automation" tab within the Edit/Preview panel when the automated item is selected in the playlist.

On the "Data Control" tab, you can define how data values are updated: either manually (by pressing "Previous value" and "Next value" buttons) or automatically.
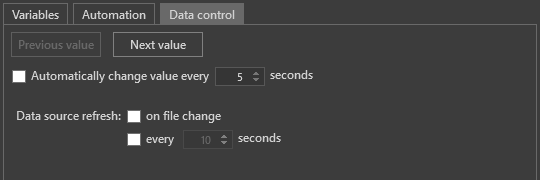
Enable the "Automatically change value every" option and define the number of seconds after which the next value will be automatically applied.