Playlists
Reading time ~10 minutes
Cinegy Studio playlists are called Rundowns. To review, edit and play Rundowns, please switch to layout editing mode and then add the Rundown panel by selecting the corresponding context menu option:
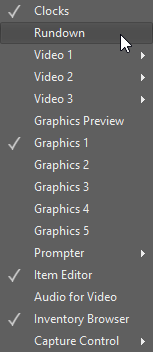
The Rundown playlist fills the full width and the remaining height of the layout panel, on which its display is enabled. If its content does not fit the screen, the scrollbar appears allowing user to navigate through the items.
The Rundown panel itself has several display options. Use the "Display" drop-down list to select the most suitable one:

-
Rundown only – only Rundown ready to be sent on air will take the whole area of the Rundown panel.
-
Horizontal timeline – a timeline with horizontal tracks for each device will appear below the Rundown playlist.
-
Vertical timeline – a timeline with vertical tracks for each device replace the Rundown playlist.
-
Media pool – the Media pool panel will appear below the Rundown playlist.
The Rundown panel can also be adjusted to display only certain devices. To do this, use the "Device" drop-down list:
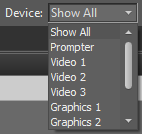
Only items assigned to the selected device will be displayed in the playlist; Stories having no items assigned to that device will be collapsed.
Rundown
The Rundown playlist is given in a table view, where each line contains an item within a collapsible block called Story.
|
Important
|
The Rundown panel toolbar varies depending on the configuration of the Rundown source in the Cinegy Studio configuration tool. Refer to the Configuration section for details on Cinegy Studio settings. |
To create a new Rundown, press the "Open" button on the Rundown panel main toolbar:

|
Note
|
Above is an example of opening a playlist when Cinegy Studio is configured to work in standalone mode. |
In the window that appears select the desired location and enter the playlist name.
To add a new Story, use the "Create" command from the "Story" main menu:

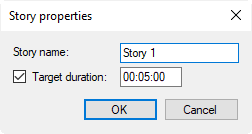
Enter the name of the newly created Story and hit Enter to apply. Selecting the "Properties" command from the "Story" main menu displays the following dialog:
|
Tip
|
Alternatively, the "Story properties" dialog can be launched via the corresponding command in the Story context menu. |
You can view or edit the Story name here, as well as set the target Story duration by checking the relevant option and defining the desired value in the field next to it. If defined, target duration will be taken into the consideration as higher priority value.
To add an item to the Story, use the "Insert" command from the "Item" main menu:

In the standard browsing window that appears navigate to the desired item(s) on your local machine and press "Open".
It is also possible to load an NCRList file into the Rundown panel by pressing the "Open" button on the top toolbar. Below is an example of a loaded Rundown:
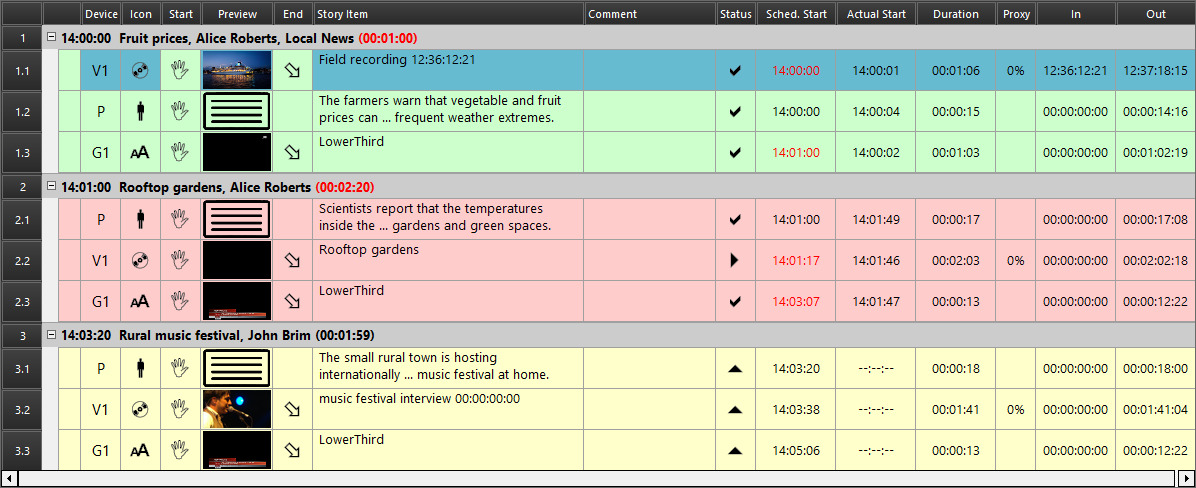
Each Story can be collapsed/expanded by pressing the  and
and  buttons, if necessary. All Story items are marked with the corresponding icon or thumbnail defining their type (video, Live Input item, script or Cinegy Title template).
Column Overview
Each row includes detailed information about every Rundown item. The leftmost column displays the line numbering. A quick overview of the columns available in the playlist is given below:
-
Device column – specify the symbolic representation of the device for playing items. Each device is represented in a dedicated column:
-
P – for presenter text sent to Cinegy Prompter;
-
G1…5 – for graphics;
-
V1…3, A, B – for video items.
-
-
Icon – displays the icon indicating the playlist item type:

Graphics item;
Video or dummy item;
Prompter item;
Live item.
-
Start – displays the icon indicating the item start trigger type.
-
Preview – shows the icon or thumbnail according to the item type:

Text of the presenter block;

The Cinegy Title template thumbnail;

The video thumbnail;

The Live Input item;
For Dummy items, the preview column is empty.
-
End – displays the icon indicating the item end trigger type.
-
Story Item – displays specific information depending on the component type:
-
Prompter item – the text of the Prompter block;
-
Video item – the name of the video clip or Sequence or the Live Input item description;
-
Graphics item – the Cinegy Title template name and the value of text variable(s), defined for the Cinegy Title template and available for export.
NoteCinegy Type templates are not supported in Cinegy Studio. If a rundown or media pool contains a Cinegy Type template, it will be highlighted with grey background and marked with the  sign in the "Status" column. Cinegy Type graphics item cannot be sent on air.
-
-
Comment – displays a comment on the corresponding item, if any.
-
Status – displays the status of each item in the Rundown.
-
Sched. Start – displays the scheduled start time for each item in: hours:minutes:seconds.
-
Actual Start – displays the actual time of the item launching in: hours:minutes:seconds.
ImportantActual start values are displayed only with the started counters. Refer to the On-Air Mode description for detailed information. -
Duration – displays the item duration in: hours:minutes:seconds.
-
Proxy – shows the status of the object local backup in %.
ImportantRefer to the Proxy article for detailed description of this feature. -
In/Out - In and Out Time code marker positions for Mark In and Mark Out timecode readings.
Adjusting the Table View
The width of the "Story item" and "Comment" columns can be adjusted by positioning the mouse pointer on the grid line between the columns and dragging the sizing tool left or right. The width of all other columns is fixed.
The lines height in the playlist can be modified by positioning the mouse pointer on the grid line between the fields and dragging the sizing tool up or down to adjust the line height.

If the text is long, only the beginning and the end with an ellipsis will be shown; thus, saving the space. To see the whole text of the block, place the cursor over the required block, and the infotip will show the complete text:

To reorder columns, select the required one and drag-and-drop it to the desired position. The arrows will prompt the position of the column being dragged:

To remove the display of any column, simply drag it down. Alternatively, right-click its caption and select the "Remove This Column" command:

The other way to enable/disable the columns display in the playlist table is to right-click the column caption and select the "Column Chooser" command:

The "Customization" window appears. If all the columns are enabled for display, it looks as follows:
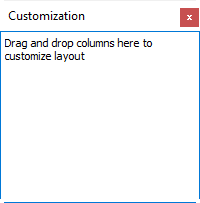
To hide a column, drag-and-drop it to the "Customization" window. The hidden columns look as follows:
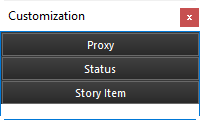
Drag-and-drop the columns to the desired position to bring them back to the playlist table.
Composing Rundown
|
Note
|
Rundowns can only be composed in Cinegy Studio operating in standalone mode. |
Rundown can be composed in several ways:
-
directly from the Cinegy Archive database or media storage using Inventory Browser;
-
insert the MCR Inventory items by using the "Insert…" command from the local playlist context menu and browsing for the MCR Inventory items previously created via the Cinegy Desktop application;
-
drag-and-drop of the items from the media pool;
-
append the saved local playlist to the currently edited rundown.
MCRitem
The MCRitem is the XML file that defines a separate playback element in the playlist with the set of metadata that describes the given item. It can represent a simple clip or a comprehensive Sequence with effects, pictures and voice-overs inside. The MCRitem also includes descriptive metadata (name, description, comment) and the data, defining the processing and display of the given item.
This allows you to use a prepared Sequence in the local playlist of Cinegy Studio without rendering the media file. The rendering will be performed on-the-fly.
To create an MCRitem in Cinegy Desktop, follow the steps:
-
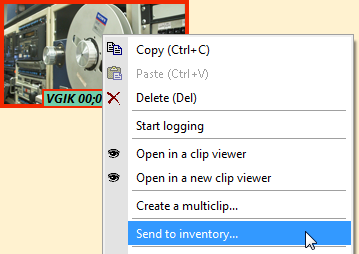
Select the desired Sequence, Cinegy Title template or clip from the Roll/ClipBin and choose the "Send to inventory…" command from the context menu:
-
The common "Save as" dialog box appears. Navigate to your dedicated inventory folder and enter a file name into the text field.
-
Press the "Save" button to create the ".MCRitem" file with the name you specified.
Use Inventory Browser in the inventory browser mode to add *.MCRitem(s) to a Cinegy Studio local playlist. Alternatively, you can simply drag-and-drop it from the folder where it is stored.
|
Important
|
See the Inventory Browser article for details on using Inventory Browser to compose playlists. |
Timeline
With the timeline display enabled on the Rundown panel, each device will be located on a separate track containing playlist items placed over time.
The Story name is given on the "Story" track on top of the timeline in horizontal view mode and on the left in vertical view mode.
|
Note
|
The timeline description further in this article represents the workflow in horizontal view mode. |
Objects can be added to the timeline via drag-and-drop from the Rundown or integrated browser panel. As soon as the object is added, its duration is automatically calculated. Adjacent Stories backgrounds are colored in darker and lighter gray colors for comfortable visual perception. The selected item is highlighted with blue.

Objects can be moved on the timeline via drag-and-drop to the desired position on the track.
Clicking a device track on the timeline hides all other devices in the Rundown table, making it convenient to view all elements assigned to this device:
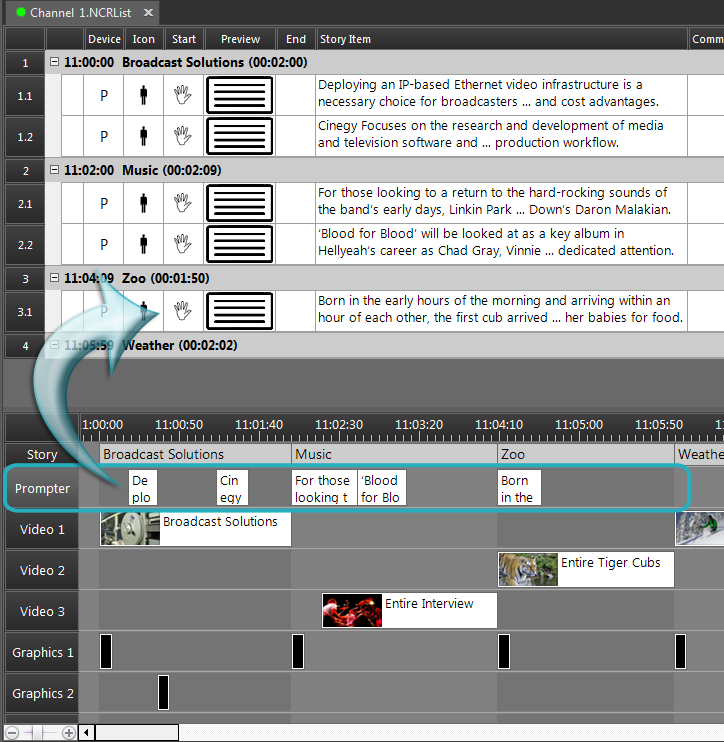
Click the "Story" timeline track to make all playlist items visible again.
|
Tip
|
An alternative way to use these functions is to select corresponding options in the "Select device" drop-down list on the Rundown main panel. |
Clicking an item on the timeline highlights this item in the Rundown playlist.
When moving objects on the timeline, hint will prompt on the position of the object being moved, as well as on the position of start and end points of other objects:
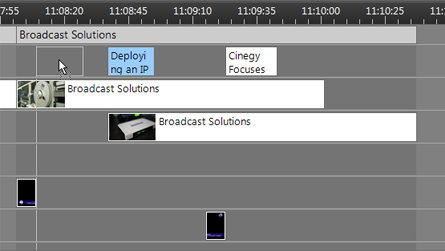
Media Pool
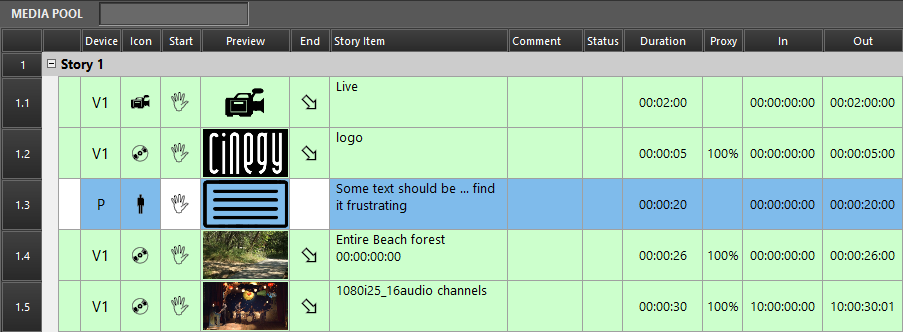
Cinegy Studio allows adding material to the Media Pool panel, which is used as a local playlist containing items that are not included in the rundown but might come in handy or in case if last-minute changes are required in the scheduled Rundown, for example, in the Cinegy Archive or MOS integration mode.
The Media Pool panel is used for managing local playlist, which may be necessary for making changes into the scheduled rundown:
|
Note
|
Please note that each specific NCRList cannot be open both on the Rundown and Media Pool panels simultaneously. |
Composing Local Playlist
The local playlist can be composed in several ways:
-
directly from the Cinegy Archive database or media storage using Inventory Browser;
-
drag-and-drop of the items from the loaded rundown playlist;
-
insert the MCR Inventory items by using the "Insert…" command from the local playlist context menu and browsing for the MCR Inventory items previously created via the Cinegy Desktop application;
-
append the saved local playlist to the currently edited local playlist.
Saving Local Playlist
The composed local playlist as well as Rundown can be saved for further use. To do this, right-click anywhere within the Media Pool panel, select the "Save a copy…" command and browse for the desired location.
The local playlist copy will be saved in the NCRList format.
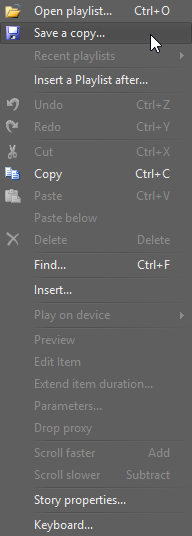
To load the previously created local playlist, use the "Open playlist…" command and select the desired playlist. The list of previously opened playlists can be accessed from the "Recent playlists" submenu.
You can also use the "Insert a Playlist after" command to append the playlist after the selected item in the local playlist.
Finding
The "Find" command is used to search for specified material within the playlist. To launch the "Find" panel, choose the "Find…" command from the "Edit" main menu or select the "Find…" command from the playlist context menu:
|
|
The "Edit" main menu |
The Rundown context menu |
|
Tip
|
Alternatively, use the Ctrl+F keyboard shortcut assigned by default. |
The following "Find" panel appears:

To start searching, enter your request via the keyboard and hit Enter. The first result will be highlighted in the playlist. Use the "Previous" and "Next" buttons to navigate through the search results.
The following window will appear, informing you when the search process is finished:
