Item Editor
Reading time ~11 minutes
To enable the Item Editor panel display on the layout, use the "Item Editor" command from the layout editing mode context menu:
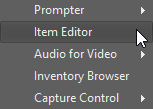
The Item Editor takes the full width of the layout panel. It has a fixed height and is docked either to top or to the bottom of the panel.

|
The "CUE" button marks the selected Story item as cued. |
|
Tip
|
The similar action is performed by the "CUE SEL" button on the clocks control panel. |
Timers and Triggers
Item Editor allows using triggers for the Rundown item start and end, previewing and editing playlist items, as well as adding live or dummy items and notes. The following table explains the available trigger types:
| Button | Icon | Trigger type and description | ||||||
|---|---|---|---|---|---|---|---|---|
|
|
The "Auto" trigger is used for the automatic start of the selected item(s) on completion of the previous item.
|
||||||
|
|
The selected item(s) will start when initiated manually. |
||||||
|
|
The item(s) will play in loop until you manually start the next item. The arrow icon indicates that the item is triggered to play once. |
||||||
|
|
The entire playlist items will play in a continuous loop. The curved down/up arrow icons indicate the first and the last playlist item in a loop sequence. |
|
Caution
|
The items of the entire playlist will play continuously in loop on condition that all of them have the automatic start trigger type. If the item in a loop sequence has manual start trigger type, it has to be started manually. |
|
Note
|
Only the manual start trigger is available for script items; only the manual and auto triggers are available for graphics items. |
The Item Editor contains buttons for previewing and editing the selected playlist item.
|
The "Duration" field displays the duration value of the item selected in the playlist and allows modifying it. If several items are selected, the total duration of these items is displayed. |
|
Note
|
The new duration value cannot be higher than the original one. |
|
The "Time to start" field displays the countdown until the start time of the item selected in the playlist. |
|
Note
|
This countdown is displayed only when the counters are started. |
Playlist Item Preview
|
Select a playlist item and use the "View" button to quickly launch Clip Viewer for previewing video items and the "CG Browser" for previewing graphics items. It is also possible to double-click items or choose the "Preview" command from their context menu. |
|
Note
|
This function is only available for video clips and Cinegy Title templates. |
|
Important
|
Enabling/disabling of double-click action for certain commands is regulated in the "Preferences" dialog. |
Previewing Video Clips
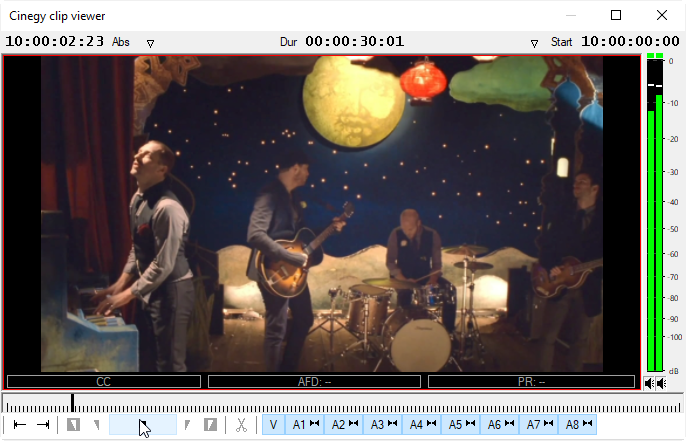
The Clip Viewer window appears for previewing video clips. Then press the "Play" button to play the clip in Clip Viewer.
|
Note
|
The items are viewed-only in this mode. |
Timecode
The timecodes are displayed on the top panel of the Clip Viewer window.
In the middle of the panel the current duration of the clip is displayed. The other two counters can be set up to show one of the following display modes:
| Display Mode | Function | ||
|---|---|---|---|
Absolute |
Timecode for every frame corresponding to the original material |
||
Duration |
Clip duration |
||
Start |
Start timecode |
||
In |
In timecode |
||
Out |
Out timecode |
||
End |
End timecode |
||
Elapsed |
Time passed from the In point represented as TC
|
||
Remaining |
Time left to the Out point represented as TC
|
||
None |
No display |
Using Timecode to Find a Frame
Any time during preview, you can enter a timecode value (using the numeric keypad on the right side of the keyboard) to navigate through a clip to a specific frame. In addition, you can cue forward and backward from the current position of the clip by a specified number of minutes, seconds and frames using positive or negative frame offset values.
-
To cue to a frame based on a known timecode, enter the timecode using the numeric keypad.
-
To cue forward from the current position, enter + and the offset amount using the numeric keypad.
-
To cue backward from the current position, enter – and the offset amount using the numeric keypad.
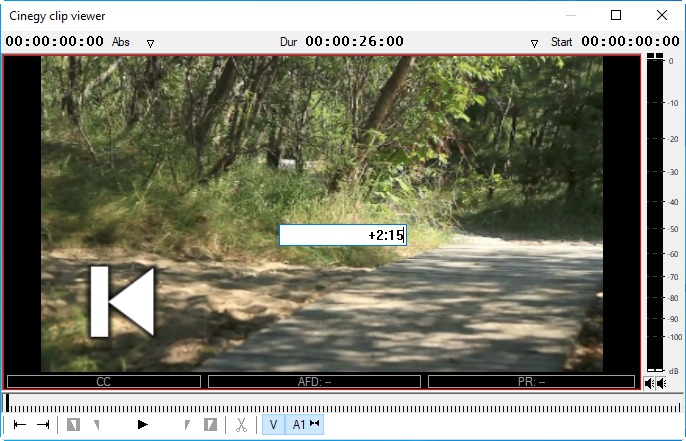
In the example above, the current viewing position will be moved forward to 2 seconds and 15 frames
Audio Preview
|
The VU meter is shown on the right of Clip Viewer. It shows peak and integrated audio levels in the dB scale as the master output for all the enabled audio channels mixed together. The zero dB level for the VU meter is defined in the Cinegy Studio configuration tool and is used in Clip Viewer when previewing video clips.
|
Previewing Graphics Items
The "CG Browser" window appears for previewing Cinegy Title templates:
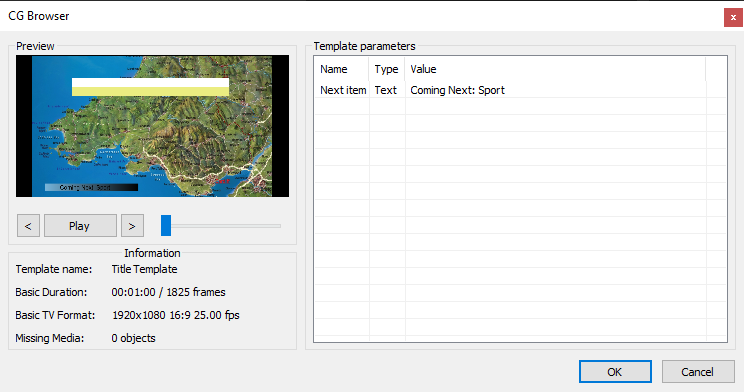
The template is played on the "Preview" section screen.
|
The "arrow" buttons jump to the first and last frame respectively. |
|
Press the "Play"/"Pause" button to toggle template playback mode. |
The "Information" section located below the preview screen displays the template name, duration, and TV format.
Template variables available for export are given in the "Template parameters" table next to the preview screen. The table consists of three columns with the template variable name, type and value data. Template variable values cannot be edited in this mode.
Editing Playlist Items
|
Press the "Edit" button for quick launching Clip Viewer for editing video items and the "CG Browser" for editing graphics items. |
|
Note
|
These functions are only available for video clips and Cinegy Title templates. |
Editing Clips in Clip Viewer
To edit the item, select it in the local playlist and choose the "Edit…" command from the context menu; the Clip Viewer window appears.
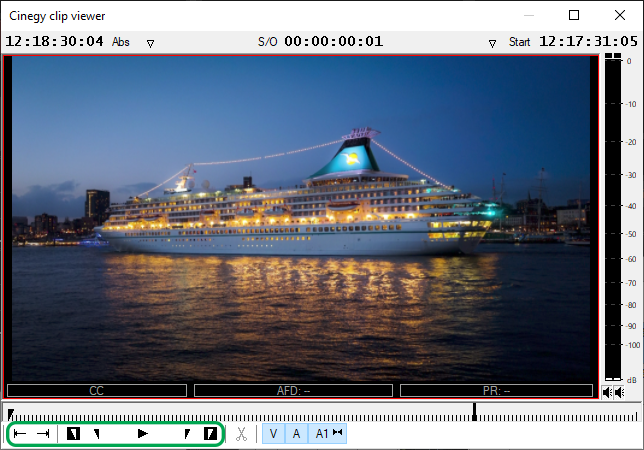
Use Clip Viewer to:
-
cut the clip;
-
set In and Out points;
-
clear In and Out points;
-
navigate to edit points.
|
Note
|
The In point represents the beginning of the In frame, and the Out point represents the end of the Out frame (or the beginning of the next frame). The duration of the item cannot be less than 0.5 seconds. |
You can also preview the clip before and after editing.
Cutting an Item
|
Press the "Razor" button to cut a clip at the current time slider position or hit the F key. |
|
Note
|
The In point represents the beginning of the In frame, and the Out point represents the end of the Out frame (or the beginning of the next frame). The item duration cannot be less than 0.5 seconds. |
Setting and Deleting In and Out Points
|
Press the "In" button or hit the I or E key to trim your clip from the left. |
|
To delete the In point, press the "Delete In" button (inversed In) or hit the D key. |
|
Press the "Out" button or hit the O or R key to trim your clip from the right. |
|
To delete the Out point, press the "Delete Out" button (inversed Out) or hit the F key. |
Moving to the Next or Previous Edit Point
You can use the "Jump to clip event" buttons to move from event to event. Events are: start, end of a clip, In and Out points.
|
Use the "Previous event" button to navigate between the edit events. You can also use the A key to jump to the previous clip event. |
|
Use the "Next event" button to jump to the next event. You can also use the S key to jump to the next clip event. |
Closing Clip Viewer
Press the "X" button or the Esc key to close Clip Viewer.
When closing Clip Viewer, the following error message appears if In and Out points are not set correctly. You should keep in mind that the new duration cannot be longer than original or less than 0.5 seconds.
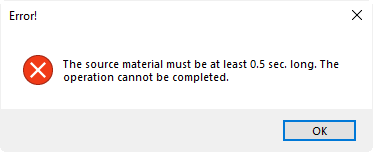
|
Tip
|
All changes made during editing can be undone and redone with the "Undo" and "Redo" commands from the right-click menu. |
Editing Graphics Items
To edit the item, select it in the local playlist and choose the "Edit Item" command from the context menu or use the "Edit" button. The "CG Browser" window appears for editing the variables available for export:
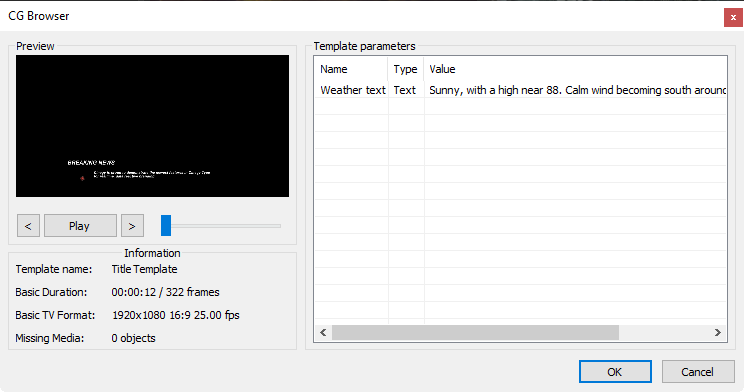
The template variables available for export are given in the "Template parameters" table. The fields in the "Value" column are editable in this mode. To change the values, double-click the "Value" field of the desired variable and use the keyboard to enter a new value. Press "OK" to save changes.
Live Item
|
Depending on your playback configuration, a live signal goes from the defined input device or from IP to output without being affected by Cinegy Studio. Press the "+Live" button to add a live item after the selected item. |
|
Important
|
Refer to the Cinegy Playout Manual for details about setting up input and output devices. |
By default, the live item duration is 2 minutes, but it can be changed in the "Preferences" dialog.
|
Note
|
The duration of an item cannot be less than 0.5 seconds. For live items the In point is always set to 00:00:00:00. |
Parameters
It is possible to edit the Live item source in the "Item parameters" dialog launched via the "Parameters" command from the "Item" main menu or the Live item context menu:
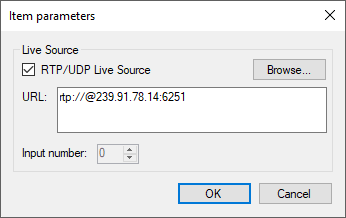
RTP/UDP/SRT Source Selection
Check the "RTP/UDP Live Source" option to use IP signal as the live feed for a live item playout. Define the RTP, UDP or SRT URL for live input stream either via the keyboard or drag-and-drop the source URL from the Cinegy Route Browser into the "URL" field.
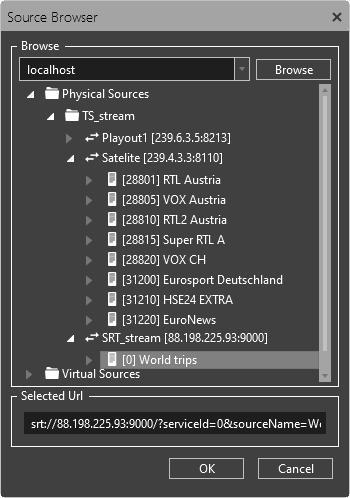
Alternatively, press the "Browse" button and select a video stream registered on the specified server by Cinegy Route Directory Service using the integrated Cinegy Route browser that appears:
|
Tip
|
Cinegy Route Directory Service can be installed on any dedicated PC and can be used by all playout stations. |
|
Note
|
Only streams marked as "Visible" for current user are displayed here. |
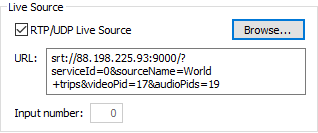
Select the required video stream and press "OK". It will be automatically converted to RTP/UDP/SRT URL:
Input Number
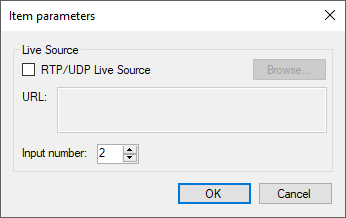
The input number defines a number of switchable inputs per channel in applicable video format.
|
Important
|
Several inputs in one channel can be configured through simulcast configuration. |
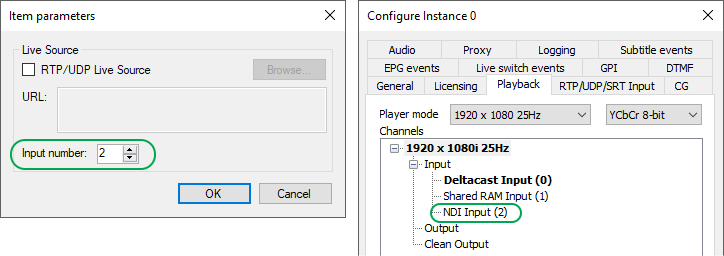
Here specify the number of the input device. The input number values start from 0; specifying 1 means that the input device signal is the second in the list, 2 means that the input device signal is the third in the list and so on:
|
Caution
|
Changing input number is not allowed during the broadcast. |
|
Important
|
RTP/UDP/SRT live input defined in the "Item properties" has priority over another input (SDI, NDI etc). |
Dummy Item
|
You can insert a dummy item into the playlist by pressing the "Dummy" button. |
This item is a reserved "empty" item with a fixed duration. It is used to reserve a fixed amount of time in the schedule, to be filled later with item(s) of corresponding duration.
A dummy item is not broadcast. The operator must fill it in with an appropriate clip(s) via the File Explorer or integrated browser before sending on air. If this item is not completely filled when the previous item in the playlist is on air, the dummy item is not marked as cued and is skipped automatically; the next actual playlist item is marked as cued and is broadcast instead.
By default, the dummy item duration is 2 minutes, but it can be changed in the "Preferences" dialog.
|
Note
|
The duration of an item cannot be less than 0.5 seconds. |
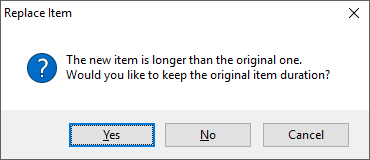
To fill in the dummy item, select the actual item in the integrated browser or File Explorer, keep the Ctrl key pressed and drag-and-drop the item into the selected dummy item’s position. If the actual item duration is longer, the inserted dummy item duration will be decreased by the value of the added item duration.
If the inserted item is shorter, the dummy item is cropped correspondingly and placed after it.
If the inserted item is longer, the following dialog appears:
Note Item
|
Press the "+Note" button to add a note to the playlist above the currently selected item. |
Adding a note does not affect the time scale. To edit a note, double-click it and enter the text. Hit Esc to cancel the operation.
Story Item
|
Press the "+Story" button to add a new Story to the playlist below the currently selected Story or item. |
New Stories are added with the default zero duration and default names "Story 1", "Story 2" and so on according to the order of their adding to the playlist.


