Secondary Events
Reading time ~14 minutes
The secondary events panel is located at the bottom of the application. It can be toggled using the "Secondary Events" command from the "View" main menu, and has a table view with the following columns:

-
Offset – defines the time offset from the item start/end (depending on the value defined in the "From" field);
NoteSpecify the offset value to be able to edit the "Device" and "Command" fields. -
From – defines whether offset is calculated from the beginning or from the end of the current item;
-
Absolute – defines the time when the event will be sent to the device (is set automatically depending on the offset value and the item start time);
NoteThe "Absolute" value is not editable. -
Name – defines the name of the secondary event;
-
Description – specifies the event description;
-
Device – defines the device that will receive the event;
-
Command – defines the command;
-
Option1…3 – defines the command options;
-
ID – defines the secondary event ID which is logged into the as-run log for every event raised.
Setting Offset
There are two ways to set the offset:
-
You can enter it manually into the offset field (in hours:minutes:seconds:frames). The offset value can be positive or negative value.
-
It can be calculated automatically. To do this, select the "Find the event offset…" context menu command.
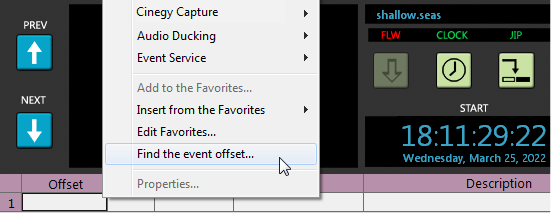
The "Cinegy clip viewer" window appears:

|
Find the desired frame and press the arrow button. The offset will be automatically calculated and recorded into the offset field of the secondary events table. To cancel the operation, hit the Esc key. |

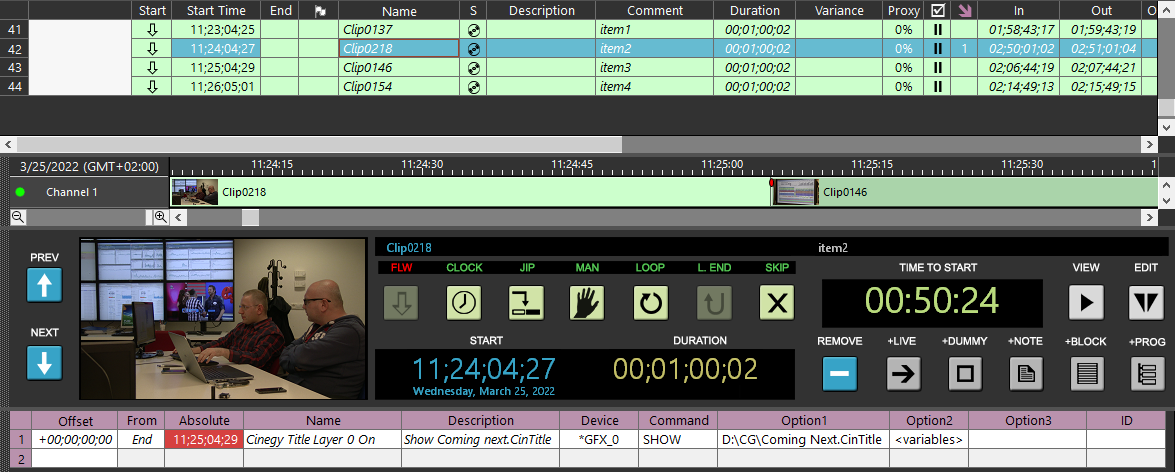
A secondary event with incorrectly specified offset time will not be fired. In this case, proper color indication is used for convenience. A secondary event will not be fired if positive offset time reaches the next playlist item. In this case, the "Absolute" field will be highlighted in red.
|
Note
|
Please note, a secondary event may also fail to fire at the end of the item with zero offset; similar color indication will be used in this case. It is recommended to fire the event at least several frames before the item end. |
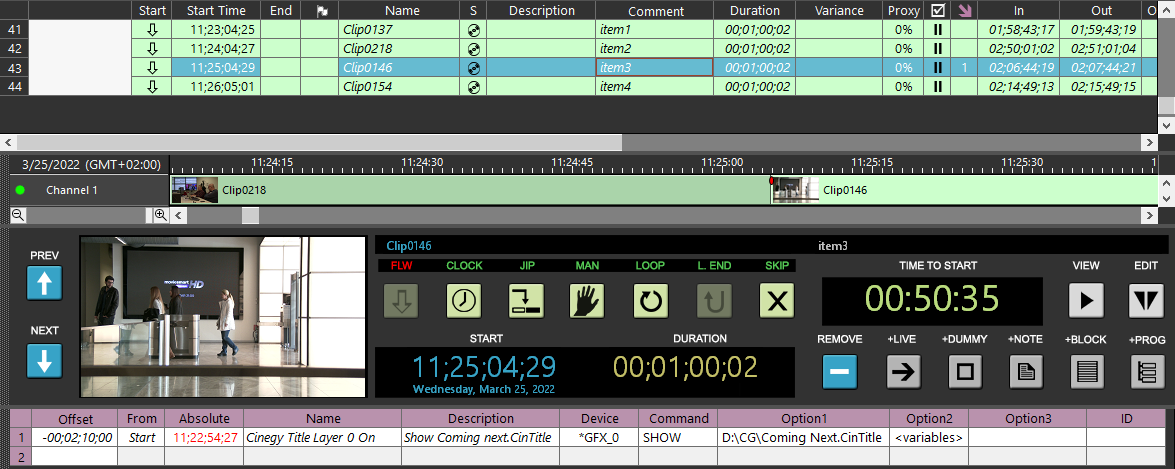
If a negative value is used for offset time and it is out of the previous item boundaries (for example, the timecode value is before the previous item Start), the time in the "Absolute" field will be displayed in red and the event will not be fired.
|
Note
|
In single/multi-channel mode, the "Offset" and "Absolute" values are read-only for the items being played back. |
Favorites
An event can be added to the "Favorites" list. This functionality allows creating the list of frequently used events (e.g. logotypes, branded CG templates, etc.) and apply them easily when necessary.
There are two Favorite events collections: "Common Favorites” and "Channel Favorites”. The "Common Favorites" are accessible in both playlist editor and multi-channel modes. Favorite events from "Channel Favorites” collection are accessible in their corresponding channel.
Common Favorites
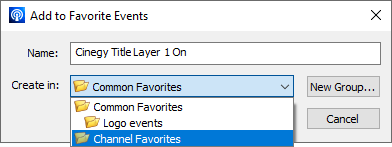
To add an event to the "Common Favorites" list in Cinegy Air Playlist Editor, select it in the secondary events panel and use the "Add to the Favorites…" command from the right-click menu. The following dialog appears:
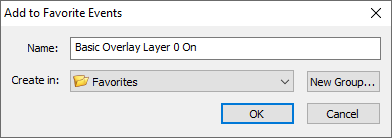
Specify a more meaningful name of the Favorite event or leave the default one. You can add an event to the root of Favorites or organize it into a separate group. To create a new group of events, press the "New Group" button:
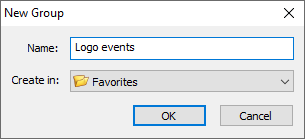
Enter the name of your custom group and specify the group where it will be located.
Having specified the name and the location of your Favorite event, press "OK". The event with its parameters will be added to the list of "Common Favorites" events.
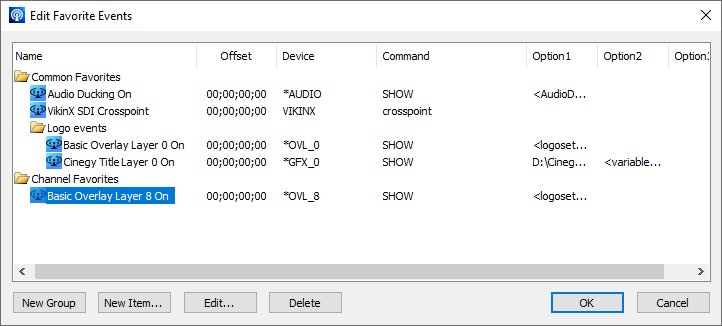
To edit and organize your saved Favorite events, use the "Edit Favorites…" context menu command. The following window will appear in Cinegy Air Playlist Editor:
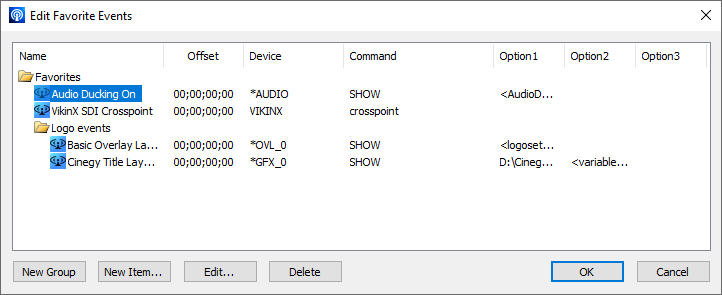
In this editor, you can edit and delete events as well as add new groups and events.
To add a new group here, select the new group location folder, press the "New Group" button and enter the group name.
You can organize elements by selecting them and dragging-and-dropping them to the desired position or folder.
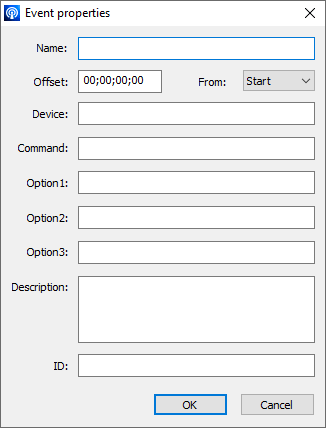
To add a new Favorite event, press the "New Item…" button and manually fill in all necessary fields for the secondary event in the following form:
Similarly, you can edit the existing Favorite event by pressing the "Edit…" button and changing the required field value:
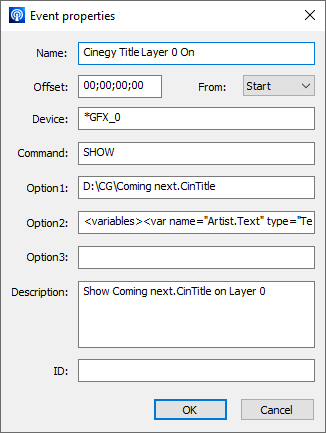
Having made all necessary changes, press "OK" to close the editor window and apply the changes.
|
Note
|
Favorite events created in Cinegy Air Playlist Editor will be available in multi-channel mode. |
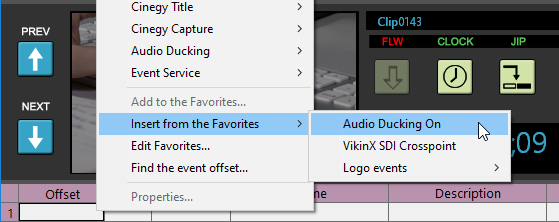
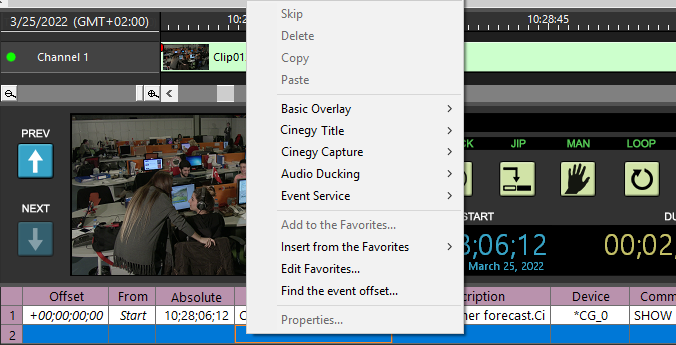
To insert a stored Favorite event into the events table, simply select the event you need from the right-click menu "Insert from the Favorites". The event will be added to the events table.
|
Note
|
The "Insert All" command is available within a group of Favorite events to insert all group items at once. |
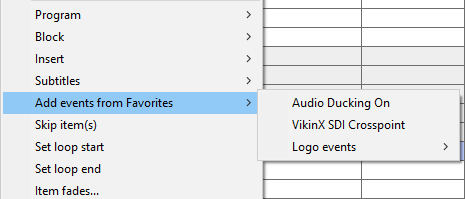
Secondary events can be also applied via the "Add events from Favorites" command from the playlist item right-click menu. This allows applying secondary events to multiple selected playlist items.
Several secondary events can be selected and applied to the item. To do this, choose the desired secondary events holding the Shift key and use the "Copy" context menu command. Navigate to the required playlist item and use the "Paste" command available from the context menu. This allows several secondary events to be applied for a single playlist item.
Channel Favorites
In multi-channel mode the channel Favorites are accessible.
The events added to this collection will be available only for the channel where they were created.
|
Note
|
The events added to the common Favorites in multi-channel mode will be available for all channels. |
The process of Favorite events managing is identical for playlist editor and multi-channel modes.
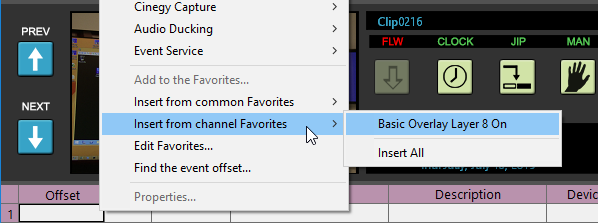
To add a stored Favorite event to the events table, select the event you need from the corresponding "Insert from common Favorites" or "Insert from channel Favorites" right-click menu. The event will be added to the events table.
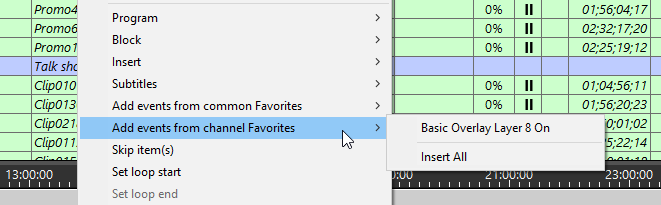
Also, you can add secondary event to the playlist item(s) via the corresponding "Add events from common Favorites" or "Add events from channel Favorites" command from the playlist item right-click menu:
Predefined Commands
The following group of context menu commands of the secondary events panel allows you to add and set up the secondary events parameters:
Logotype Managing
Cinegy Air allows you to add a logotype to one or several channels simultaneously, i.e. HD and UHD playouts may have their own logos. It can be done via the "Cinegy Basic Overlay Editor", as described below.
Show
Use the "Basic Overlay" > "Show…" command to show a logotype on the screen over the top of the currently broadcast item content. When you select the "Show…" command, the "Cinegy Basic Overlay Editor" dialog appears:
This dialog consists of two parts: "Edit Basic Overlay", where you can define the logo settings, and "Preview", where you can preview the selected logotype.
The "TV Format" list contains all video formats supported by the Cinegy system.
|
Note
|
You can assign different logos for each TV format separately. |
Use the "Align" pull-down list to specify the logo location on the screen.
If you need to use video instead of a static image as your logotype, you can define whether it will be played back in loop or not. To do so, click the cell of the corresponding TV format in the "Loop" column and tick off or remove the selection of the checkbox.
|
Note
|
By default, the loop playback is enabled. |
To specify the fade-in time of the logotype on the screen, set the time value in the "Fade" column by pressing the up/down arrow button or entering the desired value via the keyboard. The fade must be between 0.0 and 10.0 sec.
Click the cell of the corresponding TV format in the "File" column and press the "…" button to browse the folder where graphic files (with any of the following extensions: *.tga; *.bmp; *.tif; *.jpg; *.png; *.gif; *.psd) or video files (in any media file format supported by Cinegy) are stored.
Having selected the file for the logo and specified its parameters, press the "OK" button to apply the settings. The "Show" command will be added to the command table.
To change the parameters for the selected channel logotype, you can also use the "Properties…" command from the right-click menu.
An example with the Cinegy logo imprinted in the upper right corner is shown below.
Hide
To hide the logo, use the "Basic Overlay" > "Hide" command from the context menu. The corresponding command will be added to the secondary events panel.
Use "Hide" > "All Layers" command to hide graphics on all configured layers.
Cinegy Title
Cinegy Title is a software option for channel branding and live graphics. It is hardware independent and can run even in any virtual environment with no physical video board.
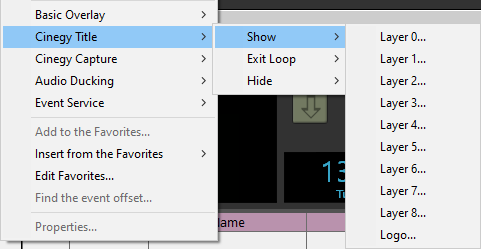
Show
Use this command to add CG templates, previously created via the Cinegy Title application.
|
Important
|
Refer to the Creating a New Title Scene article within the Cinegy Title Manual for detailed information on how to create CG templates. |
Select the layer for the CG scene. The "Logo" layer is a topmost layer; all other layers are displayed in a numerical order.
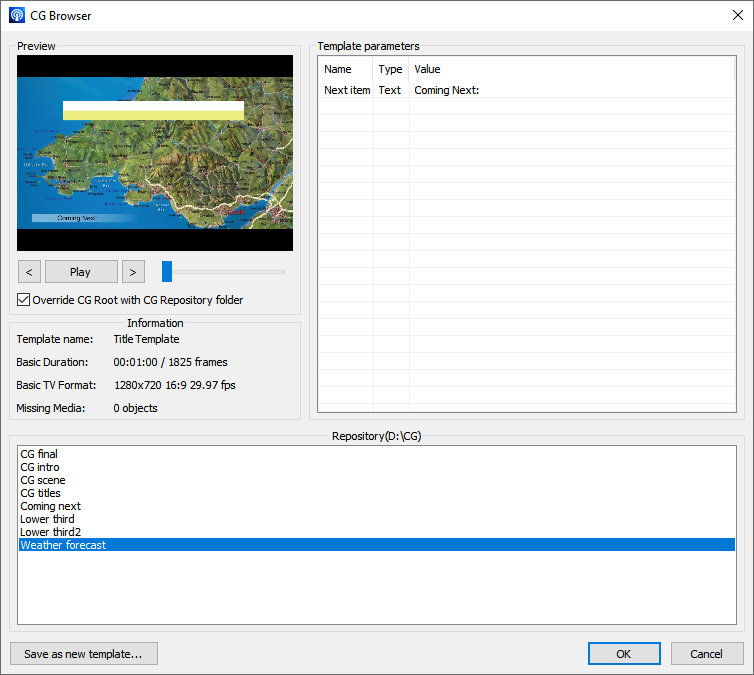
The "CG Browser" dialog will appear:
|
Important
|
Refer to the Cinegy Air Configurator article to learn how to select corresponding playout mode and set up the Cinegy Title repository directory. |
In the "Information" group, the basic CG template data, such as its name, duration and TV format are displayed. The number of missing media files (if any) is displayed in the "Missing Media" string.
The "Override CG Root with CG Repository folder" option is used for previewing templates with embedded media items that were moved between locations.
|
Important
|
For detailed information about CG repository, refer to the Cinegy CG Root Folder paragraph in the Cinegy Playout Manual. |
In the "Repository" field, you will see the list of available CG templates of the corresponding TV format. Choose the CG template you want to add; its preview will be displayed in the "Preview" window. You can view any frame of the template by dragging the time slider or using the playback buttons.
|
The "arrow" buttons jump to the first and last frame respectively. |
|
The "Play/Pause" button toggles playback mode. |


The "Template parameters" table shows CG template variables. You can edit the value of each variable by double-clicking in the "Value" field.
If you want to save a template with new parameters as a separate template, press the "Save as new template" button and specify the location for the new template.
Having set up all the necessary parameters, press "OK".
Exit Loop
The "Exit Loop" command is used to trigger the CG scene to leave the loop and play to its end.
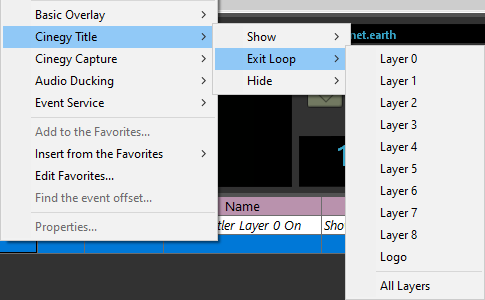
Use "Exit Loop" > "All Layers" command to force graphics on all configured layers to leave their loop playback.
Hide
Use this command to stop the specified CG scene layer display.
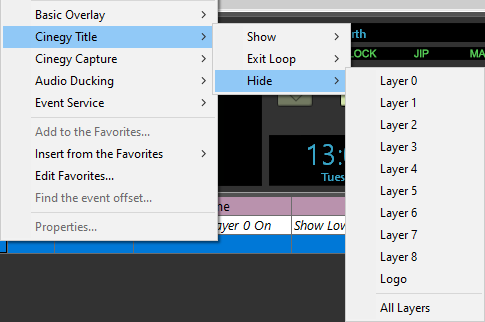

Use "Hide" > "All Layers" command to stop the Cinegy Title template display on all configured layers.
When adding an item or loading a playlist that contains a Cinegy Title template missing in its configured repository, the following notification will appear:
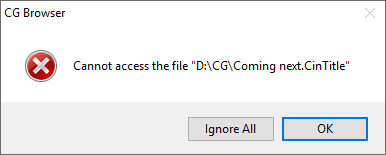
Press the "Ignore All" button to disable error messages about missing Cinegy Title templates during the current insertion operation.
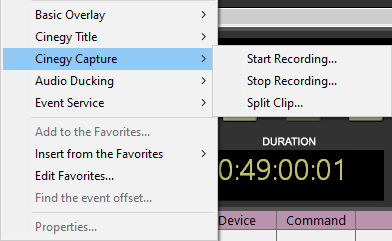
Cinegy Capture
The Cinegy Capture secondary event is used to control recording tasks.
|
Note
|
Please note that for recording tasks to be carried out, the Cinegy Capture engine service should be configured and started. Also, engine templates should be created for this Cinegy Capture engine. |
|
Important
|
Refer to the Cinegy Capture documentation for detailed description of setup and work with Cinegy Capture modules. |
The Cinegy Capture secondary event can be used to record the broadcast. For this, the Cinegy Air output should be set up and the Cinegy Capture service should be configured to receive this as an incoming stream. Then, using the secondary commands described below, you can control the recording session.
Start Recording
This command is used to start the recording session. Having selected this command, you will see the following dialog:
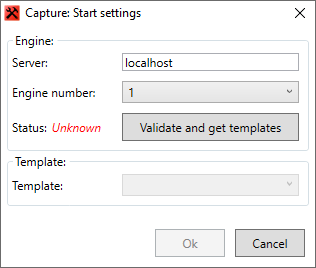
Here define the server name where the Cinegy Capture engine is launched, and specify the engine number that will be used for stream recording. After that press the "Validate and get templates" button:
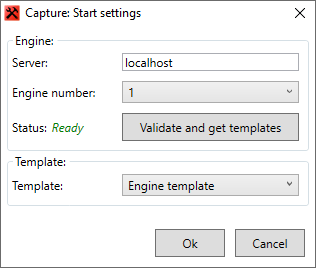
If connection with the Cinegy Capture engine is successfully validated (status changes to "Ready"), the list of templates becomes available. Select the corresponding template and press "Ok" to finish the secondary event creation.
Stop Recording
To stop the Cinegy Capture recording job, use the "Stop Recording…" command. The following dialog appears:
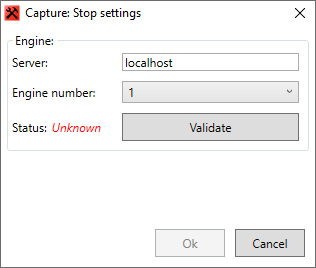
Specify the server name and the Cinegy Capture engine number, then press the "Validate" button to establish connection. When connection is successfully validated, press "Ok" button to finish creating the secondary event.
Split Clip
The "Split Clip…" command is used to force a new clip creation during the recording session at a time defined as a secondary event start.
Having selected this command, you will see the following dialog:
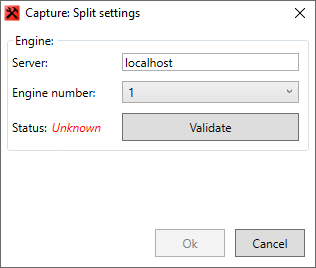
Specify the server name and the Cinegy Capture engine number, then press the "Validate" button to establish connection. When connection is successfully validated, press "Ok" button to finish creating the secondary event.
Audio Ducking
Use this command to enable/disable audio ducking (playback of audio file or audio from IP stream and configured inputs with defined volume level reduction of all other audio channels) as a secondary event.
First you need to specify the audio matrix source file that defines the ducking matrix to be applied. This can be done via the Cinegy Air Configurator.
|
Important
|
The "Audio Ducking" option is available only if a valid path for audio matrix presets is defined in the Cinegy Air Configurator. Please, refer to the Cinegy Air Configurator article to learn how to define the audio matrix presets location. |
The ducking matrices can be configured by editing the source XML file according to your needs.
|
Important
|
Refer to the Audio Profile Editor to get more information on creating and editing audio profiles. |
After specifying the audio matrix file the "Ducking" command will be available for adding as a secondary event.
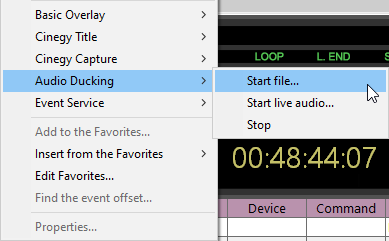
File-based Source
Select the "Audio Ducking" > "Start file…" context menu command:
A common "Open" dialog appears:
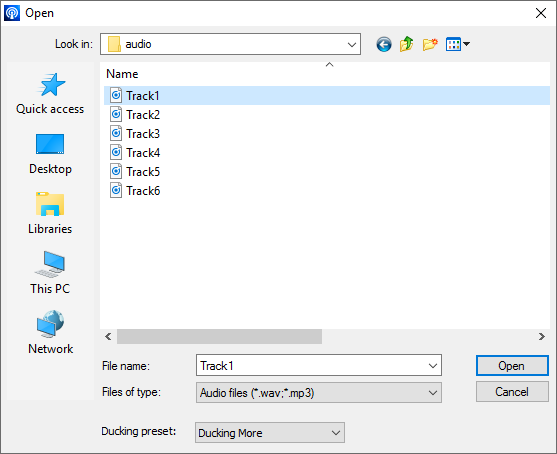
Here select a secondary audio file to be used for ducking, a required ducking preset from the corresponding pull-down list and press the "Open" button.
|
Note
|
The automatic half-a-second fade-in and fade-out of the main program audio are added before and after the ducking event correspondingly. |
The corresponding SHOW command will be added for the *AUDIO device on the secondary events panel.

To set up the audio ducking from IP stream, use the "Start live audio…" command; the following dialog box appears:
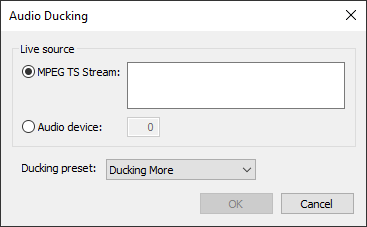
Here define the live source: MPEG TS stream or audio device.
MPEG TS Stream Source
If MPEG TS stream is used as a live source, specify the RTP stream address of the audio source:
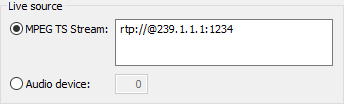
|
Note
|
Please note that illustration above shows a sample RTP address, so it should be changed to match your audio source material address. |
Audio Device Source
Choose the "Audio device" option and specify the device number for the previously configured input device:
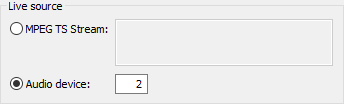
|
Important
|
For the audio input configuration instructions refer to the Audio Input paragraph in the Cinegy Playout Manual. |
In the "Ducking preset" drop-down list select the necessary pre-configured audio ducking preset.
Turning off Audio Ducking
To turn ducking off, use the "Audio Ducking" > "Stop" context menu command.
Event Service
The secondary events syntax is described in detail in the Secondary Events Syntax article within the Cinegy Event Manager Manual.
Handling Secondary Events in On-Air Item
It is possible to add, change or delete secondary events in the playlist items currently being broadcasted. To be able to do so, the "Edit on-air item secondary events" option should be enabled for the corresponding channel via the Cinegy Air Configurator.
|
Caution
|
The secondary event insertion, modification, and deletion in the on-air item cannot be undone. |
To add the secondary event to an on-air item, use any of the predefined commands described above or add the required one from the Favorites.
|
Note
|
It is also possible to copy secondary event from any playlist item and paste it into the on-air item. |
The new event will be added with "00:00:00:00" offset and since the event start time has already passed when it is created, its absolute start time is highlighted in red.

Change the offset to the desired value for the event to be fired during on-air item playback. The following warning message will appear:
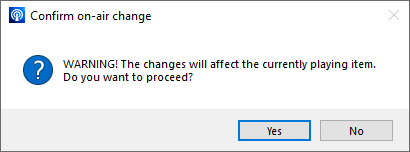
To confirm your decision to make changes to the item currently being broadcasted, press "Yes". The secondary event will be executed according to its new scheduled time.
However, if the new proposed start time of the event is 0.5 seconds away from its scheduled start time, this change will not be applied. The following message will be displayed:
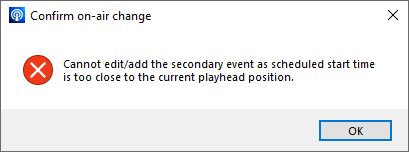
The same message will appear if the process of secondary event editing is finished in less than 0.5 seconds before the event start or already after the event start time has passed.
|
Caution
|
If the secondary event of an item has been executed, it cannot be further edited. |
HTTP Calls
Cinegy Air can natively generate HTTP calls to control other Cinegy Air instances or any third-party devices supporting REST protocol.
|
Note
|
Please note: sending HTTP command is supported by Cinegy Playout and does not require Cinegy Event Service. |
The syntax is as follows:
Device: *HTTP
Command: request method (GET/POST)
Op1: URL
Op2: request body (for POST)
Op3: optional HTTP headers, separated by /r/n. The last header should not have /r/n.
|
Important
|
Refer to the HTTP API documentation of the Cinegy products for details. |