Export Modes
Reading time ~8 minutes
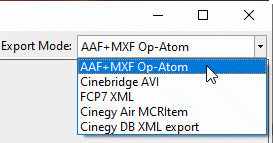
The Cinegy Archive Browser utility supports the following export modes:
AAF + MXF Op-Atom Export Settings
To configure the export parameters, choose the "AAF+MXF Op-Atom" mode from the "Export Mode" drop-down list:
and press the  button from the menu panel.
The following configuration dialog appears:
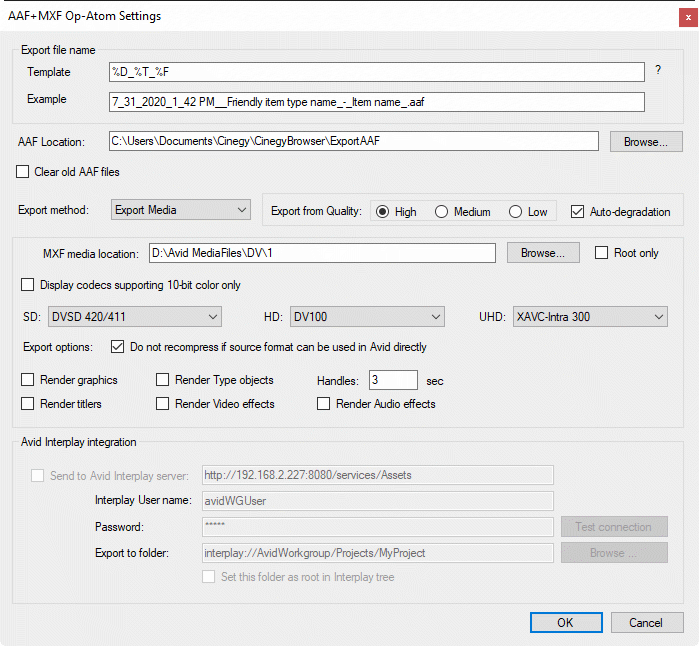
Here define the AAF + MXF Op-Atom export settings as described below.
Export File Name
Enter a file name macro to automate the exported media naming. The name template macros are:
| Macro | Meaning |
|---|---|
%D |
The export task creation date |
%T |
The export task creation time |
%O |
The export task owner |
%F |
The object name and type |
%N |
The object name |
%V |
The name of the video system |
The file name preview is displayed in the "Example" field.
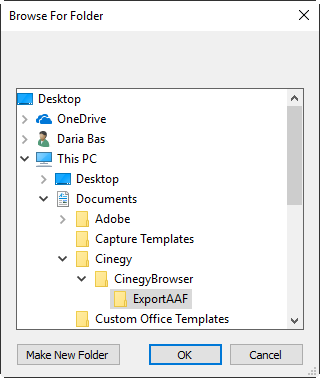
AAF Files Location

Press the "Browse" button to locate the folder where the AAF files are stored:
Select the "Clear old AAF files" checkbox to clear up the Avid media files folder from all currently existing AAF files before exporting.
|
Note
|
Please note, files other than AAF, as well as all contents of the subfolders, if any, will be preserved. |
Export Method

The following export methods can be configured here:
-
Composition only – the AAF file with information about Cinegy Archive object(s) is generated without the generation and exporting of MXF media files.
-
Link to Media – the AAF file with information about Cinegy Archive object(s) is generated with links to media files located on Cinegy Media Storage.
-
Export Media – the MXF files are generated in the defined Avid media files location and the AAF file with links to these newly created MXF files is created.
|
Note
|
If the "Link to media" option is used, the third-party NLE application should natively support formats of Cinegy Archive media files. |
|
Note
|
Please note that Avid Media Composer natively supports only MXF OP-Atom files. |
Export from Quality
Here, define the quality of source media used when exporting from the Cinegy Archive database. Set the radio button to "High" to use high quality, to "Medium" to use medium quality, or to "Low" to use low quality. Select the "Autodegradation" checkbox to enable switching to the next available lower quality.
Available Qualities
The typical available qualities are described below in this article.
High Quality
This is the full-quality version of all material. Cinegy Desktop provides selected users the possibility to view high-quality material. Selected users will use Cinegy Desktop to conform a Sequence to high-quality material. Auto-conforming generates new high and medium-quality material, which is registered to the Cinegy file server.
Medium Quality
This is typically used for work-in-progress material.
Low Quality
This is an optional quality level. It can be used to generate an additional stream for compatibility with legacy systems or other needs.
MXF Media Location

Press the "Browse" button to locate the folder where the Avid media files are stored:
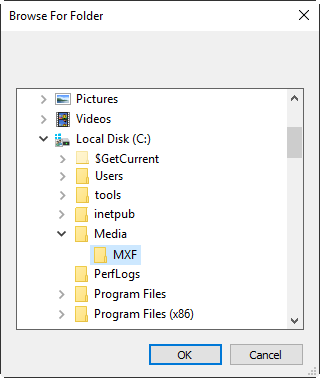
The MXF files that are generated for the Cinegy Archive objects being exported will be automatically recognized by Avid Media Composer according to the links written in the imported AAF files.
|
Note
|
The folder defined as a Media Directory for Avid Media Composer should be specified in the "MXF media location" field for automatic recognition of media files within Avid Media Composer. |
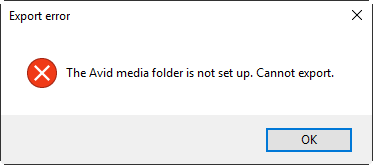
Please define the Avid media folder; otherwise, export cannot be performed and the following error message appears:
Use Only Root Folder
Use the "Root only" option to limit the creation of Avid media files folders to the specified Avid media folder only. Using this option will also speed up the multimedia export process, without the necessity to inspect every sub-folder for the presence of already exported media, especially if you have numerous subfolders containing a large amount of previously exported media.
Encoders Selection
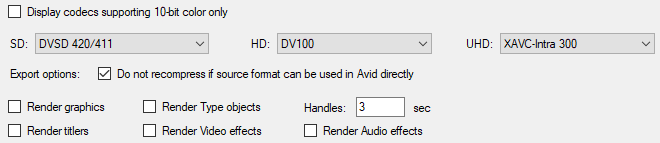
Choose the media formats separately for the files of standard and high definitions.
Export Options
-
Display codecs supporting 10-bit color only – allows the user to narrow the list of codecs only to ones with 10-bit color depth.
-
Do not recompress if source format can be used in Avid directly – enables skipping source media recompression if media files are already of the native MXF OP-Atom format.
-
Render graphics – enables the rendering of the graphics to separate files when exporting. Leave this option deselected to disable graphics rendering. In this case, the graphics will be replaced with fillers.
-
Render titlers – enables the rendering of titlers to separate files when exporting. Leave this option deselected to disable titler rendering. In this case, titles will be replaced with fillers.
-
Render Video effects – enables the rendering of video effects when exporting. Leave this option deselected to disable the rendering of video effects.
NoteIf the "Render Video effects" option is selected, the "Do not recompress if source format can be used in Avid directly" option becomes unavailable and the effects are rendered to the defined format. -
Render Audio effects – enables the rendering of audio effects when exporting. Leave this option deselected to disable the rendering of audio effects.
-
Handles – the export adds "handles" (if possible) of N second(s) on each boundary of the referenced material to allow trimming of clips.
Avid Interplay Integration
|
Note
|
To activate Avid Interplay integration functionality, please contact your Cinegy sales representative. |
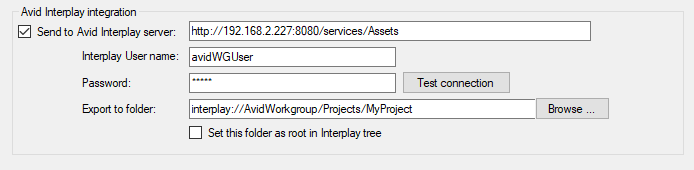
To send the media files to the Avid Interplay server, select the "Send to Avid Interplay server" checkbox and set up the following parameters:
-
Avid Interplay server – specifies the path to Avid Interplay Web-services;
-
Interplay User name – specifies the user’s name to connect to the Avid Interplay server;
-
Password – specifies the password to connect to the Avid Interplay server;
-
Test connection – press this button to verify that the connection to the Avid Interplay server is working;
NoteMake sure that the "Export to folder" path is set up correctly and that you have entered valid login information for a successful test. -
Export to folder – specifies the path to the folder to store the media files. The folder can be chosen by pressing the "Browse…" button.
-
Set this folder as root in Interplay tree – select this checkbox to set the specified export folder as a root folder in the Interplay tree.
|
Important
|
Refer to the Avid Interplay Integration paragraph to learn how to work with Avid Interplay folders. |
Cinebridge AVI Export
Cinebridge AVI export mode allows the user to create virtual AVI files that contain references to media files stored in the Cinegy Archive database, i.e., no actual export of video files takes place.
To create a virtual AVI file, drag and drop a Roll, clip, ClipBin, or Sequence from the Cinegy Archive Browser window to the desired folder on a disk or network share. This process is performed on-the-fly; virtually no storage space is required and no conversion time is lost.
|
Important
|
To work with virtual AVI files, you need to have a Cinegy Cinebridge decoder installed on your PC. Refer to the Cinegy Cinebridge manual for details. |
The created virtual AVI file can be played back by Windows Media Player or imported into other AVI-compatible third-party NLE applications that can render AVI files.
To configure the Cinebridge AVI export parameters, choose "Cinebridge AVI" from the "Export Mode" drop-down list and press the "Settings" button on the menu panel; the following configuration window appears:
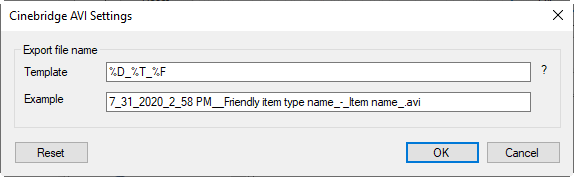
Configure the required parameters:
-
Template – specifies a file name template. You can use the file name macros to automate the exported media naming.
ImportantRefer to the Export File Name paragraph for the list of available file name macros. -
Example – displays the file name preview.
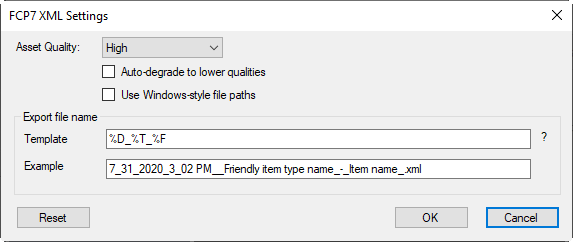
XML for Final Cut Pro 7 Export
The following settings are available for Final Cut 7 Export:
-
Asset Quality – links to the media quality defined in this field are written to the XML file;
-
Auto-degrade to lower qualities – if media quality defined in the "Asset Quality" field is not available during the XML file generation, the link to the next available media quality will be written to the XML file if this option is selected;
-
Use Windows-style file paths – defines whether the path to the clip will be written in the UNC format used by Windows applications, e.g.,
\\server name\share name\folder\. When this option is not selected, the path to the clip will be written in the Mac OS format, e.g.,file://localhost/Volumes/cinegymediafiles. -
Template – specifies a file name template. You can use the file name macros to automate the exported media naming.
ImportantRefer to the Export File Name paragraph for the list of available file name macros. -
Example – displays the file name preview.
Cinegy Air MCRItem Export
To configure the Cinegy Air MCRItem export parameters, choose "Cinegy Air MCRItem" from the "Export Mode" drop-down list and press the "Settings" button on the menu panel; the following configuration window appears:
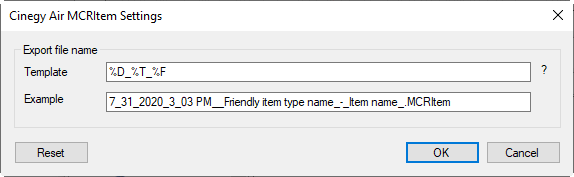
Configure the required parameters:
-
Template – specifies a file name template. You can use the file name macros to automate the exported media naming.
ImportantRefer to the Export File Name paragraph for the list of available file name macros. -
Example – displays the file name preview.
Cinegy Database XML Export
To configure the Cinegy database XML export parameters, choose "Cinegy DB XML Export" from the "Export Mode" drop-down list and press the "Settings" button on the menu panel; the following configuration window appears:
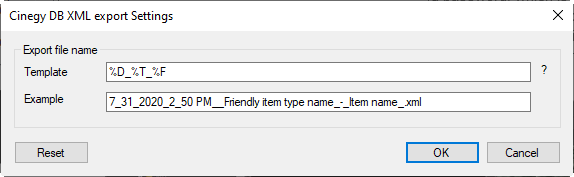
Configure the required parameters:
-
Template – specifies a file name template. You can use the file name macros to automate the exported media naming.
ImportantRefer to the Export File Name paragraph for the list of available file name macros. -
Example – displays the file name preview.
Press "OK" to confirm the parameters and exit the settings dialog. Pressing the "Reset" button restores the default settings.