Interface
Reading time ~3 minutes
The Effects Editor panel provides the user with a set of powerful tools for adding video effects to the clips. Adding effects can bring a special visual characteristic to the clip. You can edit and preview the clip in real time, without waiting for rendering. The strength and position of any applied effects are determined by the values you control.
The same video effect can be applied multiple times to the same clip with different settings.
Choose the "Effect Editor" command in the "Modules" > "Editing" menu. The "Effect Editor" window appears. Initially, the window contains no clip loaded for adding and editing effects, which is indicated by the corresponding sign:

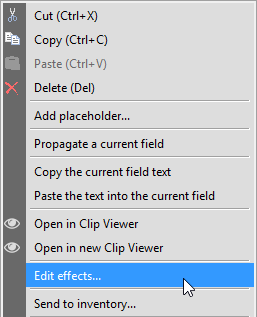
To load a clip from a ClipBin, use the "Edit effects" right-click menu command:
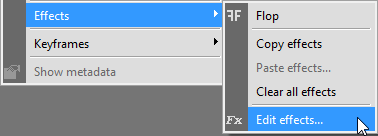
To edit effects in a clip from a Sequence, use the "Effects" > "Edit effects" right-click menu command:
|
Note
|
To be able to use this command, please make sure the Sequence is activated for editing. |
The same "Edit effects" right-click menu command is applicable for editing effects for the objects from a DocumentBin in a Sequence; by its means, the effects can be added to a video clip in a Sequence with Cinegy Titler templates.
The DocumentBin may also contain other document types. Supported formats enabled for editing effects for DocumentBin objects are listed in the table below:
| Supported File Formats | |
|---|---|
Image File Formats |
BMP, JPG, TIFF, TGA |
Video File Formats |
AVI, MOV, MXF, MP4, MPG/MPEG/M2V |
Alternatively, clips can be enabled for editing effects via drag-and-drop directly to the "Effect Editor" window.
Once a clip is selected for editing, its essence is loaded to Sequence Viewer, and the clip name appears on top of the "Effect Editor" window.
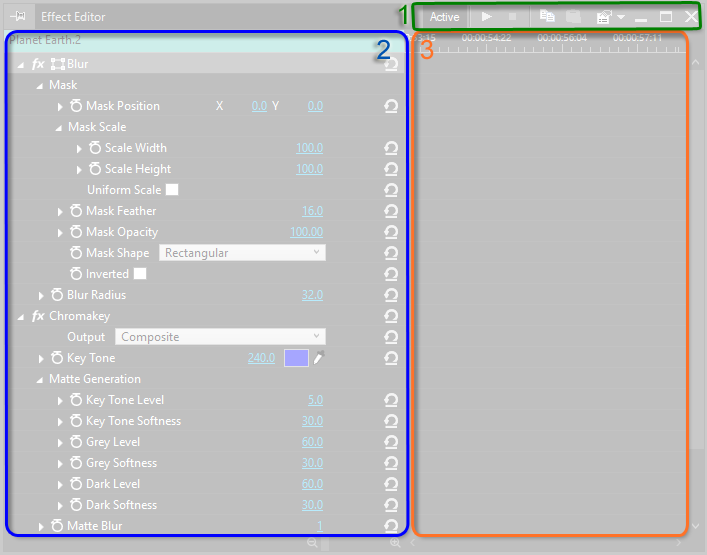
The interface consists of two main panels:
-
Toolbar ‒ controls for managing Effect Editor:

Press the "Active" button to activate the clip and start editing the effects.

Buttons for toggling media file playback in the viewer to preview the applied effects.

Buttons for copy-paste operations with keyframes.
NoteYou can use the key combinations Shift+Delete to cut, Ctrl+Insert to copy and Shift+Insert to paste selected keyframes. 
The Effect Editor menu.
-
Control panel ‒ provides means for adding effects and managing their parameters;
-
Timeline ‒ a visual representation of effect keyframes used for animation.
The width of panels is interdependently adjustable: increasing the width of one panel narrows down the other panel. To change the width of panels, hover the mouse pointer over the panels’ grid on top; it will turn into  . Drag the resizing tool right-left to change the width of panels:

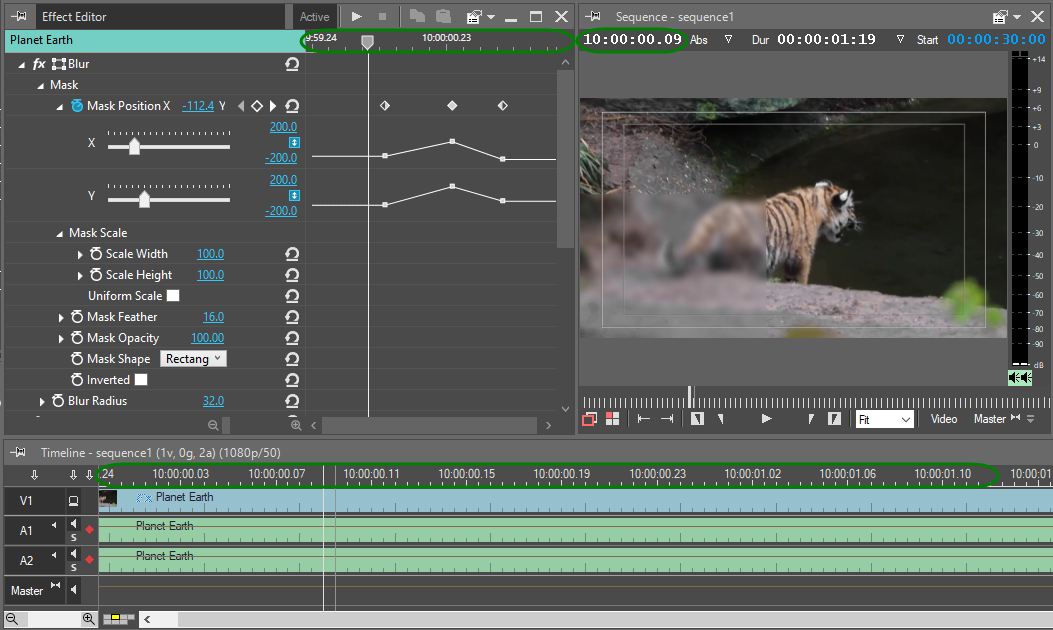
The timescale slider  on top of the timeline panel indicates the current playback position, which corresponds to the one in Clip Viewer (when editing effects in a clip from a ClipBin) or on Cinegy Desktop Timeline and in Sequence Viewer (when editing effects in clips from a Sequence). The change of playback position applies to all of them synchronously:
|
The timeline can be zoomed in and out via the scale control at the bottom. |
|
Initially, all controls for effects editing are locked; press the "Active" button to activate the clip and start editing the effects. |
Right-click the clip name and select the effect you want to add from the "Add" submenu:
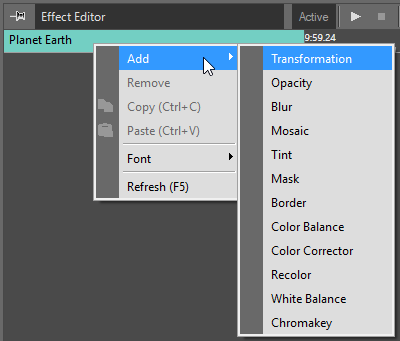
Parameters of all effects are configured individually in the corresponding effect settings sections that appear.
Pressing the  button next to an effect parameter resets its changes. To reset all parameters for an effect, press this button next to the effect title.

Effects and their parameters on the control panel are collapsible via the  buttons or double-click.
