Working with Effects
Reading time ~15 minutes
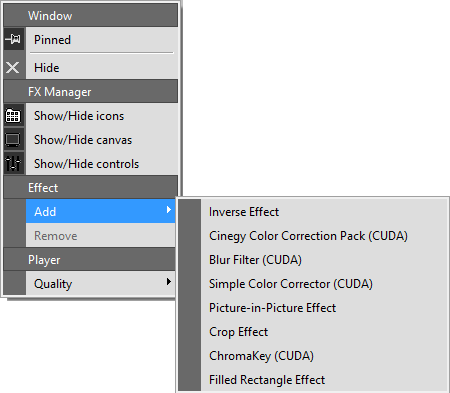
To add an effect to the currently inserted clip, select the desired effect from the effects list in the context "Effects" menu:
|
Note
|
The "Add" command is disabled if FX Manager is deactivated. Press the "Active" button to enable the FX Manager interface elements, so you can add the effects. |
The rendering of effects can be done by the Central processing unit (CPU) and Graphic processing unit (GPU). Depending on which of them is in use, some of the effects are unavailable or available partially. The following signs, which appear on the control panel when the clip is activated for editing, inform about which processing unit is used.
|
This sign signals that GPU is being used for rendering effects and the Compute Unified Device Architecture (CUDA) is enabled, all the effects are fully available. |
|
This sign signals that GPU is being used for rendering effects and the Compute Unified Device Architecture (CUDA) is disabled or not supported, the effects that require GPU are available partially. |
If the CPU is used for rendering effects, all the changes and calculations are performed according to CPU abilities.
Inverse Effect
The inverse effect inverts the color information of the clip.
|
When you add "Inverse Effect", the following icon appears on the effects panel. Click this icon to apply the inverse effect to the currently inserted clip: |
Before effect |
After effect |
|
|
You can apply the inverse effect individually to a defined area of the video frame, using the controls located on the control panel:
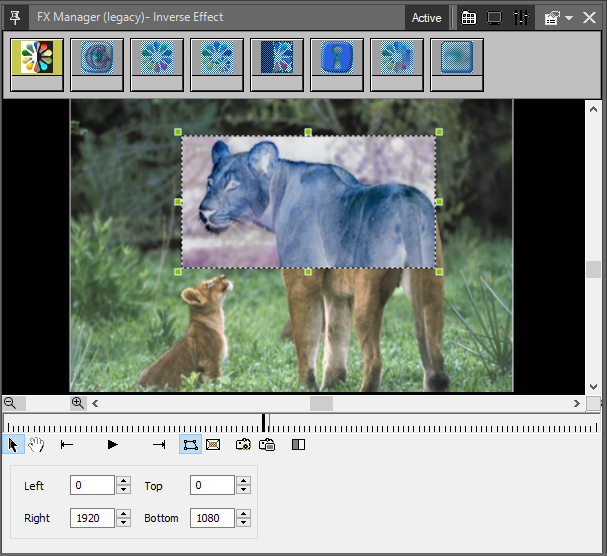
To adjust the segment for applying this effect, define the "Left", "Right", "Top" and "Bottom" parameters by pressing the  or
or  button.
The inverse effect can be applied to different video frame areas multiple times:
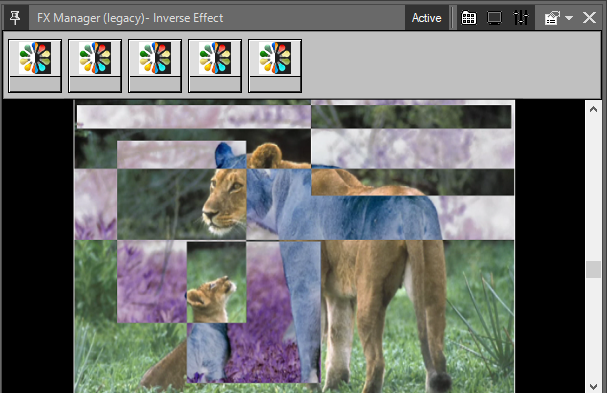
Cinegy Color Correction Pack
The Cinegy Color Correction Pack effect provides advanced tools for adjusting and enhancing the color of the clip.
|
When you add "Cinegy Color Correction Pack", the following icon appears on the effects panel. Click this icon to adjust the color characteristics of the loaded clip. |
The pack provides tools for setting color balance, matching colors, adjusting color characteristics, and replacing colors.
Color Balance
This group of values is used to reduce or strengthen the color intensity within the ranges of colors with the primary red, green and blue.
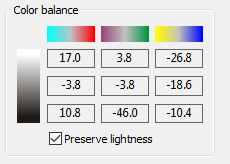
There are 3 scales on top: red to cyan, green to magenta, and blue to yellow. If you click the mouse on the values and drag to the right, the colors get closer to red, green, and blue, if you drag to the left, the colors become closer to cyan, magenta, and yellow correspondingly. According to the scale of black to white on the left, the values of the upper cells are used for lights, the middle cells are used for mid-tones, and the bottom cells – for shadows of the image. To set color balance you also can double-click the cell and enter the value via the keyboard. Alternatively, use the arrow up to add and the arrow down to subtract the values (pressing the button once equals one point). Hit "Enter" to save the changed value and exit the keyboard control mode.
Min. value is -100.0; max. value is 100.0.
Select the "Preserve lightness" checkbox to save the original lightness of the image.
Matcher
This tool is used for replacing the colors of the video clip with different ones and is useful for setting the lights and shadows of the image.
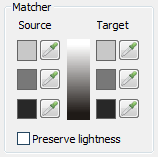
The cells from the "Source" column contain colors to be replaced; the ones from the "Target" column define the colors to be used instead. The grayscale indicates that the top cells match the tones for lights, the middle cells match the mid-tones, and the bottom cells are used to correct shadows.
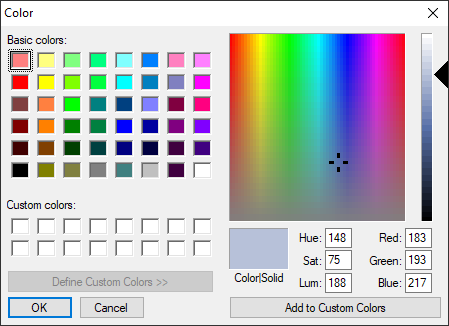
There are two ways to choose colors for matching. Click on the cell with color and select the desired color in the standard "Color" window that appears:
You also can use the color picker tool. Press the "Dropper" button and when the mouse cursor turns into a dropper you can click on any color on the monitor screen to pick it for matching. The cursor will change back to regular when you pick a color.
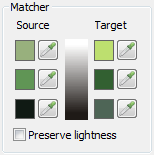
Select the "Preserve lightness" checkbox if you need to maintain the original lightness of the image.
Adjust Color
It is possible to adjust the contrast, brightness, gamma, hue, and saturation of the image.
The values in the column "Master" indicate the full-color signal and adjust the color for the whole image. Enter the values via keyboard or use the mouse to change them – drag to the right to make the values higher, drag to the left to reduce the values:
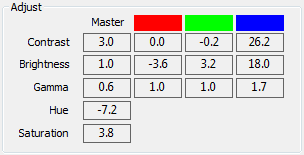
You can also adjust contrast, brightness, and gamma for RGB components separately in the cells of the corresponding columns.
-
Contrast – defines the difference in brightness between the light and dark areas;
-
Brightness – adjusts the brightness of the image by shifting the luminance value of every pixel by the value set in this control;
-
Gamma – corrects luminance and optimizes the perceptual performance of a limited number of bits in each RGB component or in the whole image; the default value of 1.0 represents no change to the image;
-
Hue – shifts the color of all the pixels in the clip on the HSB/HSV color wheel;
-
Saturation – specifies the intensity of the color; the 0.0 value represents no change to the image.
Min. value for contrast, brightness, and saturation is -100.0, max. is 100.0; the range of values for gamma is from 0.1 to 3.0; the value of the hue is adjustable from -180.0 to 180.0.
Recolor
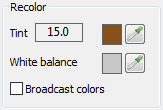
In this section, you can replace the colors of the clip by adding tint and setting the white color balance.
Tint
Click on the cell or use the color picker tool to choose the tint color. To define the amount of tint double click the cell and enter the value or simply drag the mouse. By default, this value equals 0.0 which means no tint is applied; the maximum value is 100.0.
White Balance
If the white balance of the image needs to be adjusted you can define the color that needs to be rendered as white in the "White balance" field by using a color picker or a standard dialog for choosing color. The color you choose becomes white and the other colors are adjusted to correct the whole image.
Select the "Broadcast colors" checkbox to display the red, green, and blue colors within the range of values from 16 to 235.
To mix the color changes with the original colors enter the relevant degree of mixing in the corresponding field or drag the mouse pointer:

The illustration of color correction using the Cinegy Color Correction Pack is given below:
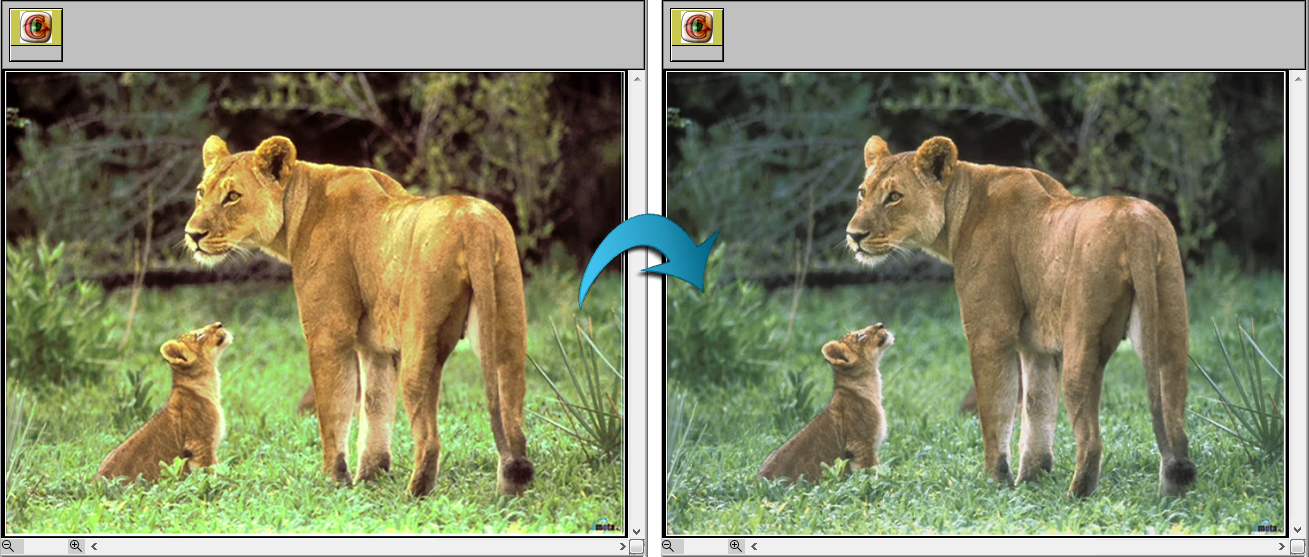
To undo a previous action press Ctrl+Z.
|
To reset the changes to their default values, press the "Reset" button. |
To remove the effect, select it and press the "Delete" key or choose the "Remove" command from the context menu.
Blur Filter
The Blur Filter effect provides the means to blur an image
|
When you add "Blur Filter", the following icon appears on the effects panel. Click this icon to adjust the sharpness of the loaded clip: |
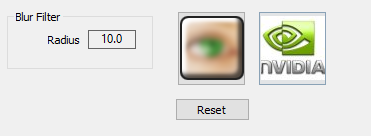
To define the blur radius, double-click the cell and enter the value or simply drag the mouse pointer left or right over the cell. The default value equals 5.0; the radius is adjustable between values 1.0 and 20.0.
Before effect |
After effect |
|
|
To undo a previous action, press Ctrl+Z.
|
To reset the changes to their default values, press the "Reset" button. |
To remove the effect, select it and press the "Delete" key or choose the "Remove" command from the context menu.
Simple Color Corrector
The color corrector provides you with most of the necessary tools for the color correction of the clip.
|
When you add "Simple Color Corrector", the following icon appears on the effects panel. Click this icon to enable the color corrector for the currently inserted clip. |
The simple color corrector provides two groups of color correction controls, the "HSL" (hue, saturation, luminance) group, and the "Limits" group.

HSL Tab
The following color controls are available in the HSL tab:
-
Saturation – specifies the intensity of the color. The 1.0 value represents no change to the image;
-
Hue – shifts the color of all the pixels in the clip around the color wheel;
-
Brightness – adjusts the brightness of the image by shifting the luminance value of every pixel by the value set in this control;
-
Contrast – defines the amount of contrast in the image.
Move the scroll of HSL controls to adjust the brightness, contrast, saturation, and hue parameters of the current clip. All introduced changes are displayed instantly in the preview.
Limits Tab
Here you can adjust black and white limits for the clip:

-
Clip Lo – defines the value for the black level in the clip. All pixels with an intensity level less than specified are set to the "Clip Lo" value. The default setting for this control is 16.
-
Clip Hi – defines the value for the white level in the clip. All pixels with an intensity level higher than specified are clipped to the "Clip Hi" value. The default setting for this control is 235.
The "Invert chroma" option inverts the chromaticity value of every pixel in the clip.
The "Invert luma" option reverses the brightness level of every pixel in the clip.
Once you render an effect, you can see the result directly in the preview:
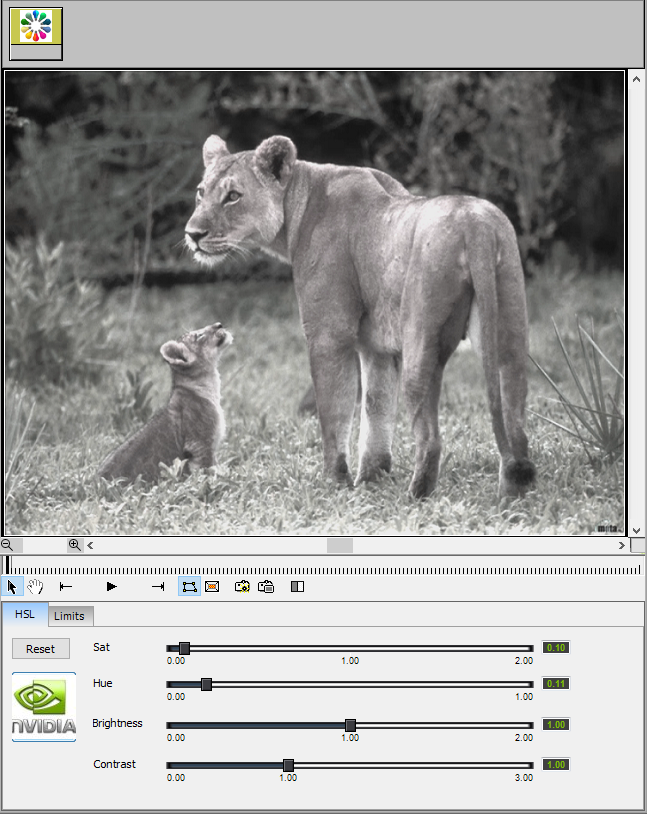
or view the modified clip in Timeline or in Sequence Viewer.
|
Press the "Reset" button to return to the default parameters for the current effect. |
Picture-in-Picture Effect
The picture-in-picture effect allows the user either to render one clip over another as overlaid video or insert it as the background. For this effect, you need to have Timeline with at least two video tracks overlapped. If you perform the picture-in-picture effect with just one clip, the video in the clip/track will be placed against a black background.
|
When you add "Picture-in-Picture Effect", the following icon appears on the effects panel. Click this icon to configure the behavior, size, position, and fading of the foreground video. |
The picture-in-picture effect provides a group of controls described below.
Main
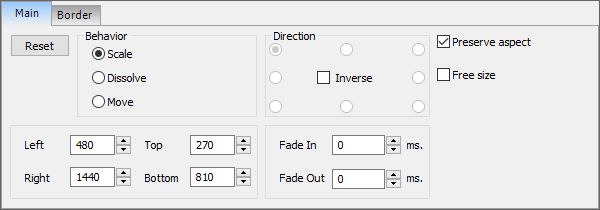
Behavior
|
Note
|
Before selecting the picture-in-picture effect behavior, define the Fade In/Out values as the time range of the effect. The "Fade In" value defines the time in seconds from the beginning of the clip; the "Fade Out" value defines the time in seconds left before the end of the clip. |
You can define the following behavior patterns of the foreground video:
-
Scale – when selecting the "Scale" behavior, the foreground video will be scaled according to the defined Fade In/Out values to a full screen.
Select the "Inverse" checkbox to enable video scaling backward – from full screen to the Fade In/Out values.
-
Dissolve – the "Dissolve" behavior enables the dissolve transition of the foreground video according to the defined Fade In/Out values to a black screen.
-
Move – when selecting the "Move" behavior, the foreground video will be moved on the preview screen from the location point selected in the direction group to the position defined by the bounding box. Select the "Inverse" checkbox to move the foreground video in the opposite direction – from the position defined by the bounding box to the location point selected in the direction group.
NoteThe "Direction" options are available only for the "Move" behavior.
Size and Aspect
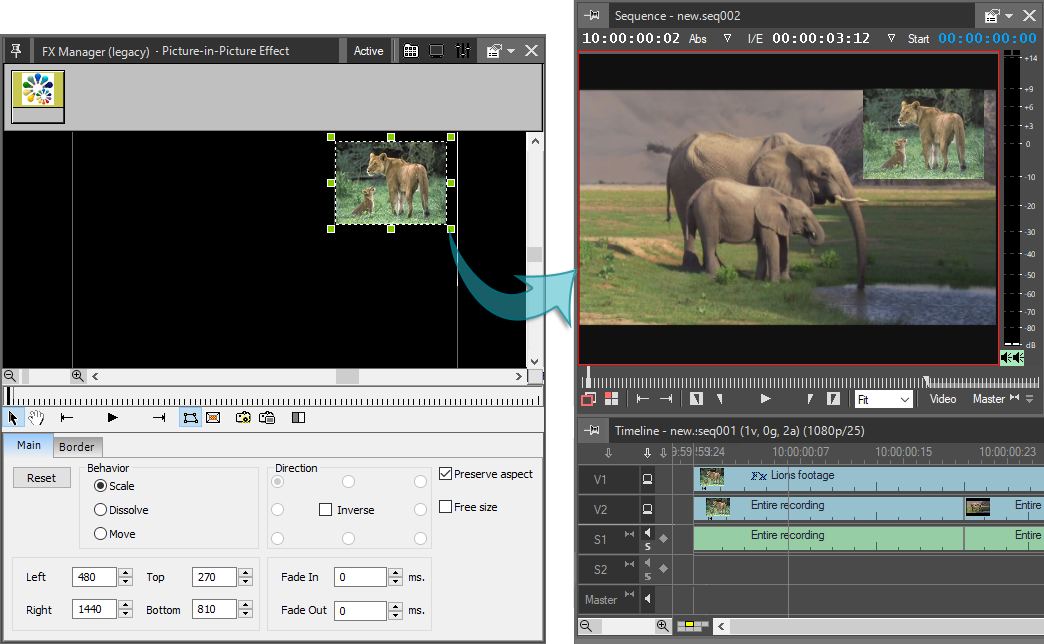
The "Left", "Right", "Top" and "Bottom" parameters define the size and position of the bounding box surrounding your picture-in-picture effect for the foreground video. To manipulate the effect, you can also use the handles of the bounding box.
Select the "Preserve aspect" checkbox to enable resizing of the superimposed video with the aspect ratio preserved; otherwise, the resized video will be distorted.
Select the "Free size" checkbox to enable moving the superimposed video out of the previewing area.
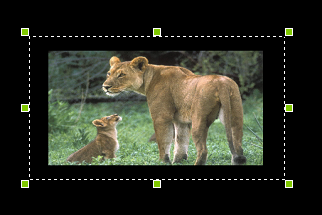
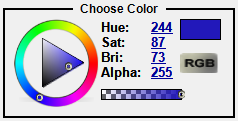
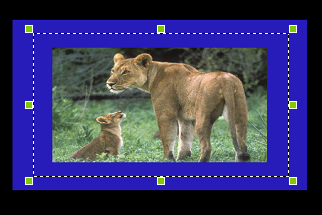
Border
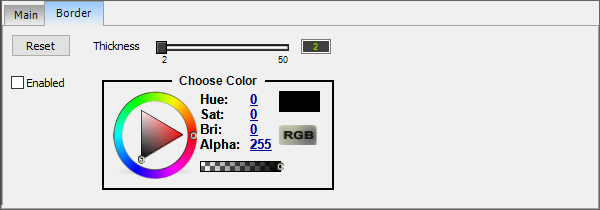
Enable the border parameters by selecting the "Enabled" checkbox.
The "Border" tab provides a group of controls for the foreground video border:
| Parameters | Sample |
|---|---|
|
|
|
|
|
To return to the default parameters, press the "Reset" button. |
|
Caution
|
For correct display of the picture-in-picture effect, make sure that all video tracks in the Sequence are of the same aspect ratio. |
Once you render an effect, you can view the result in Sequence Viewer:
Crop Effect
The crop effect allows the user to crop or trim a clip/picture/image according to the defined parameters.
|
When you add "Crop Effect", the following icon appears on the effects panel. Click this icon to define the size, position, and scaling parameters of the cropping. |
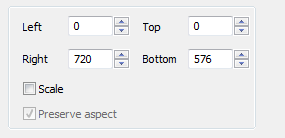
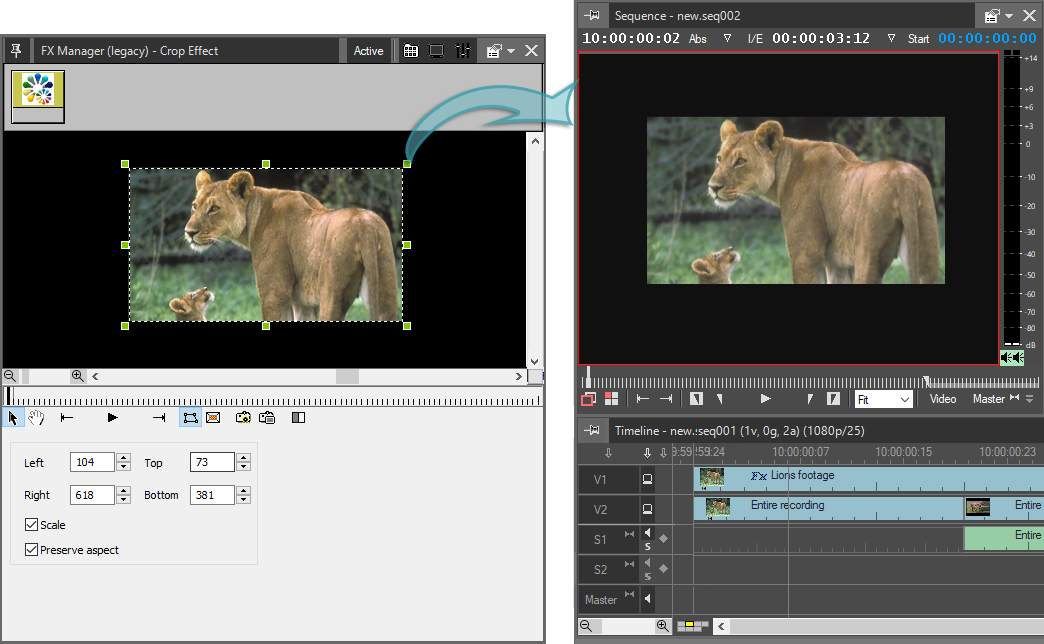
The "Left", "Right", "Top" and "Bottom" parameters define the size and position of the bounding box surrounding your crop effect for the clip. To manipulate the effect, you can also use the handles of the bounding box.
Select the "Scale" checkbox to expand the cropped clip to its original size and "Preserve aspect" to preserve its aspect ratio.
Once you render an effect, you can view the result in Sequence Viewer:
Chroma Key Effect
The Chroma Key effect allows you to set transparency for the background and reveal another image behind it. This effect is useful for replacing the background of the video with another video footage, for example for weather forecast broadcasts when the presenter is standing in front of the map.
|
When you add "ChromaKey", the following icon appears on the effects panel. Click this icon to set transparency and background color parameters for the currently inserted clip. |
Background Color
First, define the colors you need to make transparent by clicking on the cell and launching the standard "Color" window or using the color picker. If the background consists only of one color, select it in the "Lights" cell. If there are two color tones in the background, select the "Shadows" checkbox and select the necessary color in the cell.
The Tolerance value defines the number of pixels for the area of complete transparency.
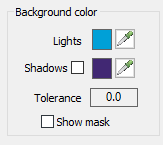
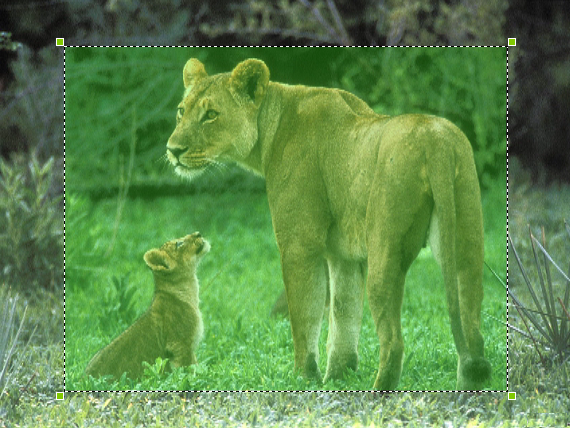
If the "Show mask" checkbox is selected, the transparency mask for the selected colors will be shown. The visible colors are displayed in white; the black color replaces transparent areas; the semitransparent pixels are shown in gray colors.
Mask processing
In this section define the transparency values:
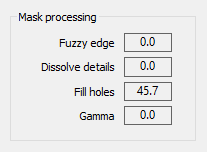
The "Fuzzy edge" value is used to define semitransparent areas. The zero value means that all the colors are completely visible, higher values add transparency thus smoothing down the border lines.
The "Dissolve details" value is used to dissolve the transition of the foreground video details according to the defined "Fade In/Out" values to a Chroma Key.
The "Fill holes" value is used to add solidity to regions of marginal transparency within Chroma Key. The zero value means that all margins are completely visible and solid, higher values smooth down the lines.
The "Gamma" value is used to correct luminance and optimize perceptual performance.
Adjust Color
In this section, you can deal with the colors, that are left visible after transparency settings have been applied.

The grey threshold value indicates the amount of grey color that replaces the semitransparent pixels; the higher the value, the more pixels will be replaced by grey color.
The edge de-saturation value is set to 100.0 by default which means that the semitransparent colors are grey according to the "Grey threshold" value. Reducing the value of this field makes these colors darker; the zero value turns them black.
In the given clip the mask of an image with transparency applied to the range of light and dark green colors looks as follows:

To undo a previous action, press Ctrl+Z.
|
To reset the changes to their default values, press the "Reset" button. |
To remove the effect, select it and hit the "Delete" key or choose the "Remove" command from the context menu.
Filled Rectangle Effect
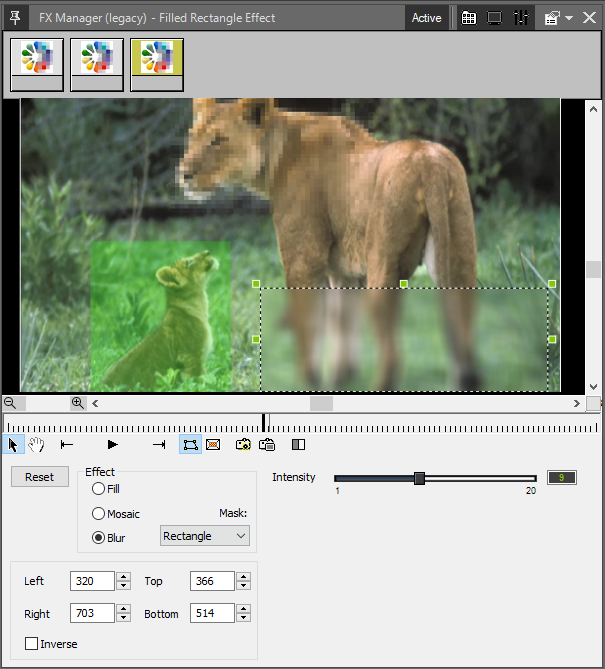
The filled rectangle effect allows the user to fill a defined marquee area of the clip with a definite color or overlay it with the mosaic or blur effect.
|
When you add "Filled Rectangle Effect", the following icon appears on the effects panel. Click this icon to define the size, shape, position, and color of the filling or configure the mosaic/blur effect. |
The filled rectangle effect provides a group of controls for each effect:
| Effect | Sample | Parameters |
|---|---|---|
Fill |
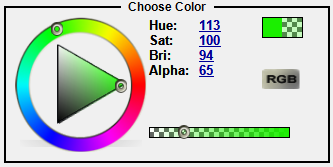
The fill effect is used to fill the specified overlapping rectangle with a defined color:
|
|
Mosaic |
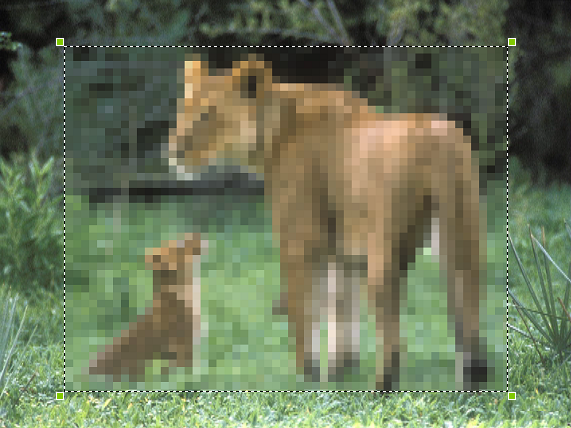
The mosaic effect is used to convert the selection into a mosaic pattern:
|
|
Blur |
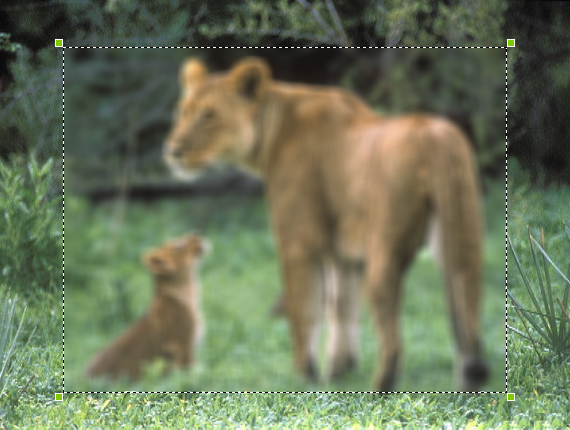
The blur effect is used to blur the selection:
|
|
The "Mask" parameter defines the shape of the effect area; it can be either "Rectangle" or "Ellipse".
The "Left", "Right", "Top" and "Bottom" parameters define the size and position of the effect area.
Select the "Inverse" checkbox to apply your filled rectangle effect to the area out of your selection:
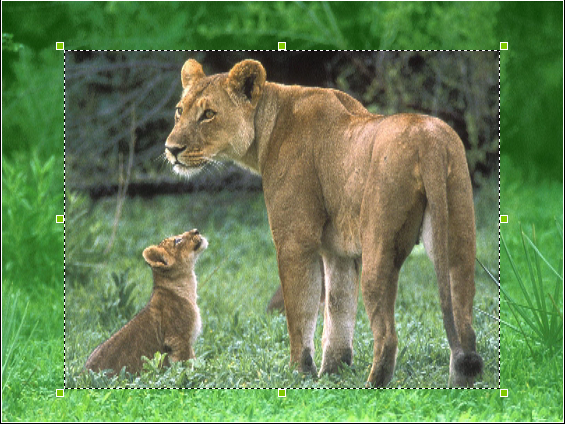
Press the "Reset" button to return to the default parameters for the filled rectangle effect.
Once you render an effect, you can see the result directly in the preview.


