Getting Started on Timeline
Reading time ~5 minutes
First, to familiarize yourself with Timeline, create a Sequence according to the following description.
Creating a Sequence from Timeline
To create a new Sequence:
-
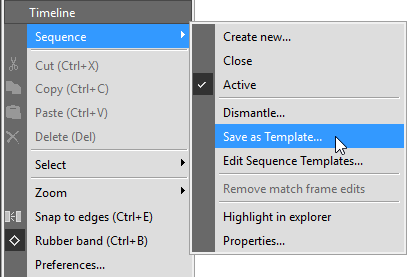
Right-click on Timeline and select the "Sequence" > "Create new" command.
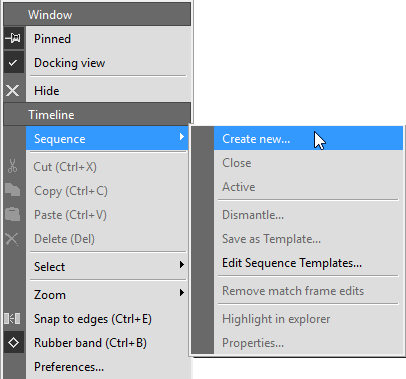
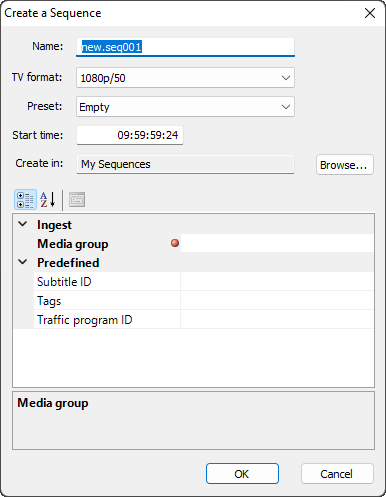
The following dialog box appears:
 Note
NoteThe "Create a Sequence" dialog view may be different depending on the set of metadata fields assigned to the Sequence. Please refer to the Node Metadata section in the Exploring the Database chapter above to learn more about node metadata. -
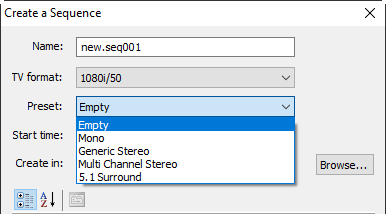
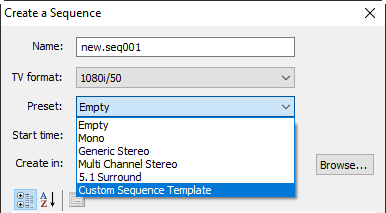
Enter the name of the new Sequence, choose the desired TV format and Timeline preset from the corresponding drop-down lists, and define its start time.
-
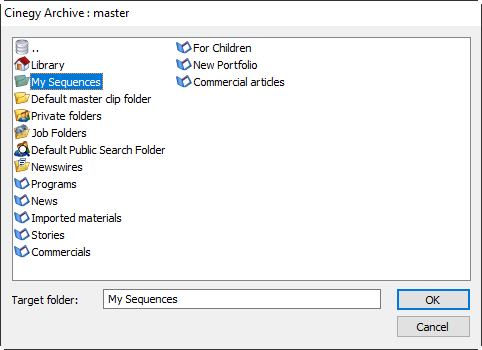
To select the desired location of your Sequence in the explorer tree, press the "Browse" button. The following dialog box appears allowing you to set up the destination folder:
-
Choose the destination folder and press "OK".
A new Sequence will be opened on Timeline, and you can start working on it.
|
Note
|
The newly created Sequence will automatically be highlighted in the explorer window. |
Timeline Presets
To make the Sequence creation process easier and faster, a set of predefined Timeline presets can be used.
The Timeline preset contains the specific audio tracks, output channels, and audio mapping settings. The most common scenarios are covered.
|
Note
|
For more information on audio mapping refer to the Output Audio Channels and Mapping section later in this manual. |
-
Mono Production. Four generic mono tracks and four mono output channels will be created on Timeline with one-to-one mapping. This scenario is suitable for the Avid integration when the incoming clips are mono, which then are exported to Avid.
-
Generic Stereo Production. Four generic stereo tracks and one stereo output are created; all the tracks will be mixed down to the stereo output.
-
Multi-Channel Stereo Production. The same, but four stereo output channels are created with one-to-one mapping.
-
5.1 Surround Production. One 5.1 Surround track and one 5.1 Surround output channel are created with the proper mapping.
Custom Sequence Templates
|
Important
|
You need to have appropriate rights to create and edit Sequence templates. Refer to the Permissions and Security section in the Cinegy Archive Manager Manual to learn how to assign rights to user roles. |
It is possible to create custom presets. For this create the Sequence with the desired configuration of audio tracks, output channels, and mapping rules and select the "Save as Template…" command from the "Sequence" submenu of the Timeline context menu:
In the following dialog, you will be asked to specify the name of your custom Sequence template:
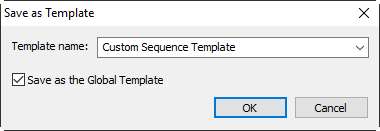
Select the "Save as the Global Template" checkbox to make the template available for all users. Otherwise, it will be created as a private Sequence Template available only for its creator.
The saved Sequence template will be added to the list of Timeline presets.
To be able to edit custom Sequence templates, select the "Edit Sequence Templates" command from the Timeline context menu:
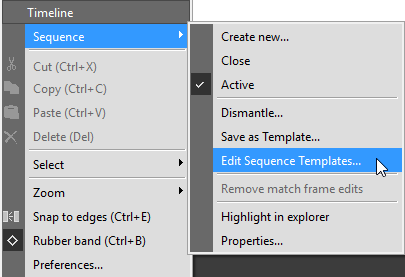
The following window opens:
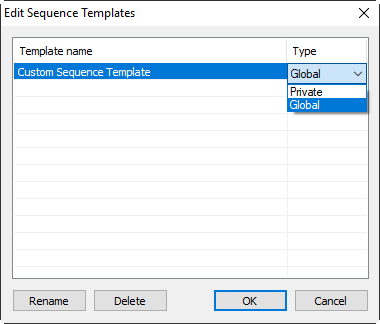
In this editor, you can rename Sequence templates, change their type (private/global) or delete them using the corresponding controls.
Creating a Sequence from the Explorer
You can create your Sequence in the Explorer window.
-
Right-click the folder where you would like to create the new Sequence.
-
Select the "New" > "New Sequence" command.
-
Enter the name of the new Sequence and choose the desired TV format and Timeline preset from the corresponding drop-down lists.
-
To select the desired location of your Sequence in the Cinegy Archive tree, press the "Browse" button and choose the destination folder.
Opening a Sequence from the Explorer Window
To open an existing Sequence, navigate to its location in the Explorer window and double-click the Sequence. It will be opened on Timeline and in Sequence Viewer.
Activate a Sequence
|
When opened from the explorer window, the Sequence is inactive. In this state, the "Active" button is depressed, and the mouse pointer is shaped as a large double-headed arrow. In this mode, you can only view the Sequence. |

|
Press the "Active" button or use the Ctrl+Enter keyboard shortcut to activate the Sequence. This will lock the Sequence for other users and enable the editing functions of Timeline. |

If the Sequence is already being edited by another user, the Timeline caption indicates which user is holding it. In this mode, you cannot activate the Sequence.
|
Note
|
It is recommended to use Cinegy Messenger to communicate with the holder of the Sequence if you want to get it released. |
Timeline Menu
|
Press this button to get the full list of available commands. You can also right-click in an empty space in the editing area to get the menu. All available commands are described in the Timeline section. |

Setting Sequence Properties
To set up the Sequence properties, choose the "Properties" command from the main Timeline menu. The following dialog box appears:
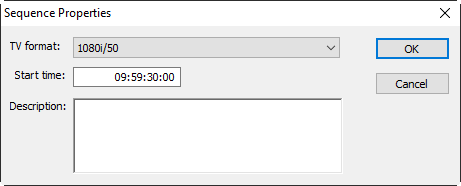
TV Format
You can only change the setting for an empty Sequence. When you insert the first clip, the TV format will be set automatically according to the clip properties.
Start Time
This field is used to change the start timecode of the Sequence. For example, if you want your program to start at 10:00:00:00 and you are using a 30-second lead, then you can set up the start timecode as 9:59:30:00.
Description
Enter any text to comment on your Sequence.
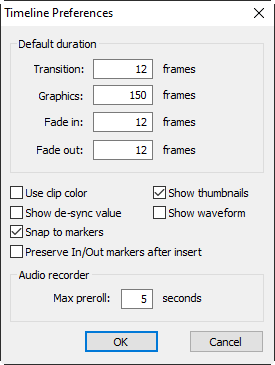
Timeline Preferences
To set the default durations for transitions and graphics, open the "Timeline Preferences" dialog by right-clicking Timeline or open the Timeline main menu and choose the "Preferences" command. Here you can also set the default values for fade in and fade out as well as the display of clip thumbnails, clip color, and de-sync value.
|
Note
|
One second of NTSC footage equals 30 frames; one second of PAL footage equals 25 frames. |
Sequence Viewer
Sequence Viewer always works together with Timeline.
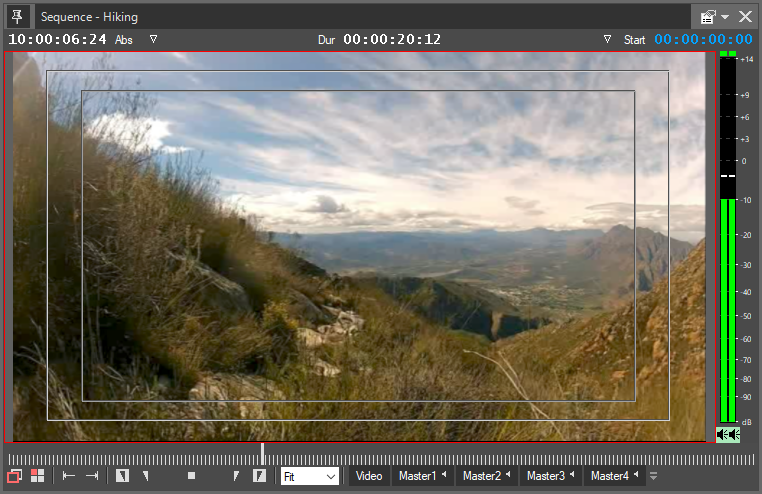
Sequence Viewer always displays the current project on Timeline; all the changes happen immediately and all the effects are rendered in real time.
|
Important
|
All the playback control details described in the Viewing Video Material section are fully applicable to Sequence Viewer. Please refer to that section for information about controlling the playback. |