Multiclip Objects
Reading time ~3 minutes
Concept
The multiclip functionality is a tool that enables simultaneous access to the essence from up to four cameras with synchronous real-time processing and preview. The operator can instantly switch between different footages (so-called angles) and thus select the most suitable angle to use. Using the multiclip functionality allows you to greatly reduce your media preparation time.
A multiclip is an object containing up to four source clips of the same TV format.
Creating Multiclip
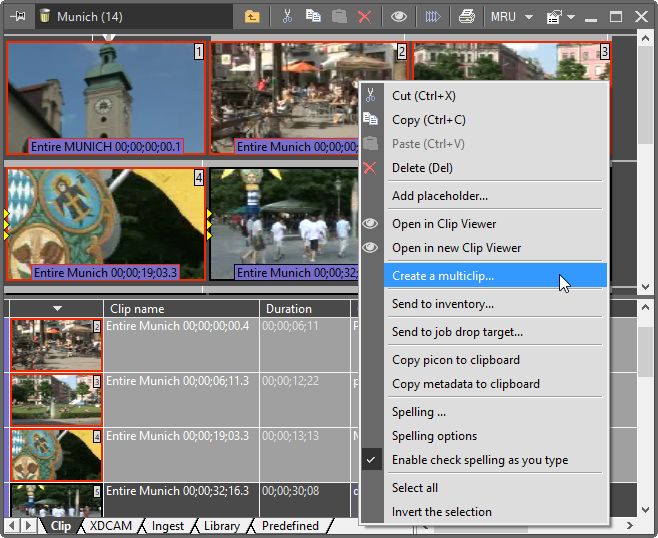
To create a multiclip, select up to four clips in the MOG or bin, then right-click the selection and choose the "Create a multiclip…" command from the menu:
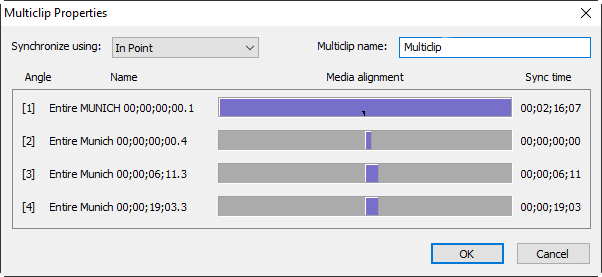
The following "Multiclip Properties" dialog box appears:
|
Note
|
When more than four clips are selected, only the first four will be included in the multiclip. |
Presetting
You can set up the parameters for a new multiclip in the "Multiclip Properties" dialog box.
Synchronize Option
To synchronize clips on the timeline, the following methods are available: "In Point" and "Timecode".

-
In Point – angles are aligned using the In point of each clip as sync time:
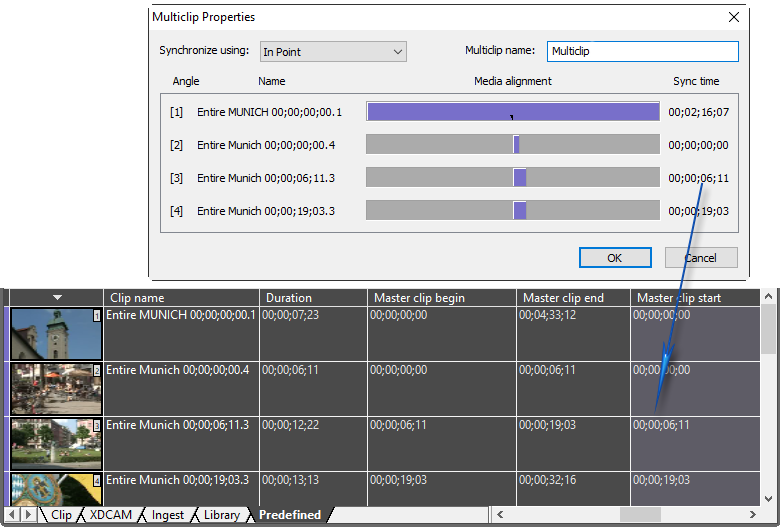
When the In point is not set, the start time of the corresponding master clip is used. This is shown in the picture above: the first two clips are synchronized by their In points and the other two clips use their start time as the point of synchronization.
NoteYou can only set the In point for a clip from within the ClipBin. -
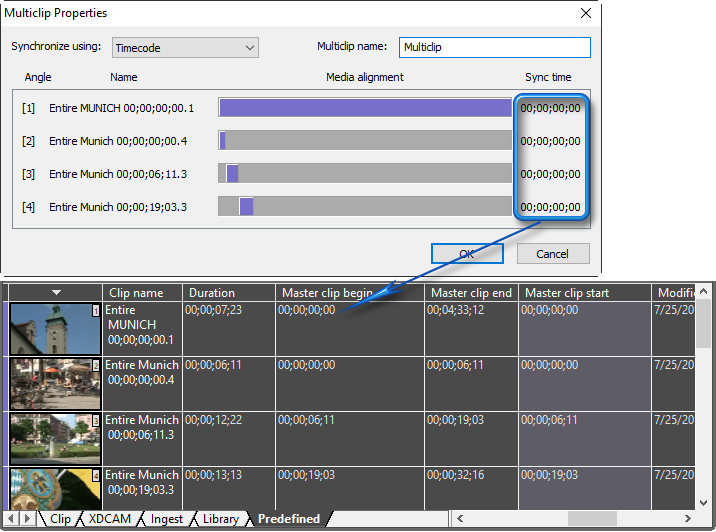
Timecode – angles are aligned by their timecodes.
When this synchronizing method is used, the "Sync time" for clips is related to the clip with the lowest start time of its master clip:
|
Caution
|
Please note, the synchronizing method cannot be changed after a multiclip has been created. |
Multiclip Name
Enter the name of your multiclip into the "Multiclip name" field.
Choosing the Location
When you have specified all the desired parameters, press the "OK" button to create the multiclip. The following dialog box appears:
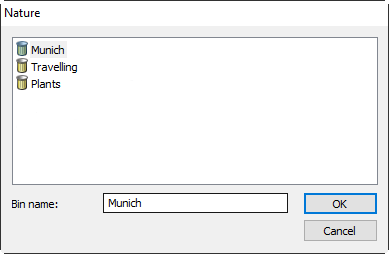
Choose the desired ClipBin and press the "OK" button. The newly created multiclip will appear in the defined ClipBin:
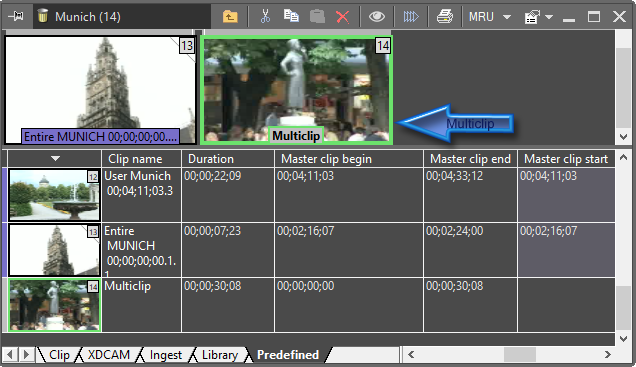
A multiclip object is shown with a thick light-green frame. When selected, a multiclip is highlighted with a thick red frame. The multiclip name is shown in bold against the dark-gray background.
|
Important
|
Refer to the Previewing a Multiclip paragraph to learn about multiclip viewing. |
Multiclip Content Modification
Any clip included in a multiclip can be substituted with another one via dragging and dropping from the ClipBin.
|
Note
|
All clips must be of the same TV format. |
To do this, open the multiclip in Clip Viewer and drag and drop another clip from the Roll or ClipBin to the desired clip position within your multiclip:
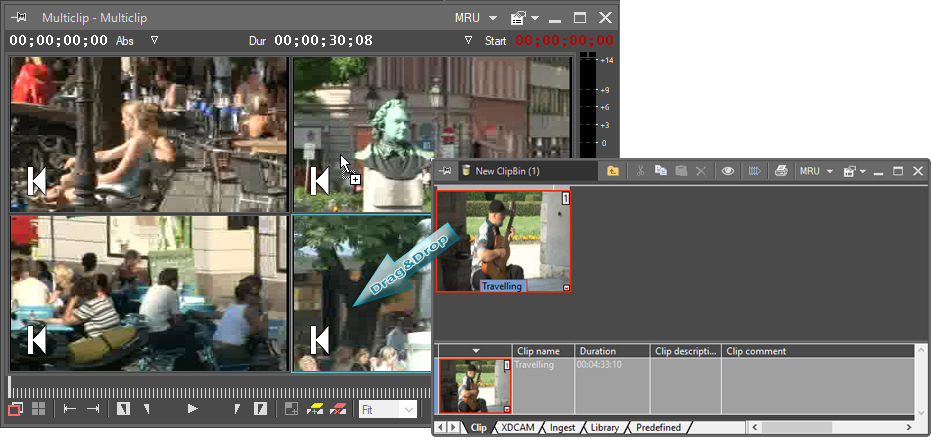
If your multiclip contains fewer than 4 clips, you can add a clip in the same TV format to the empty clip position. To do this, drag and drop a desired clip to the empty area within your multiclip. A new clip can also be added to the next empty location within the multiclip if any.
A new clip will be inserted into the multiclip according to the multiclip predefined synchronizing method.
|
Note
|
The clip with an active audio/video angle cannot be substituted. |
|
Important
|
Refer to the Handling Multiclips article to learn about multiclip active angles. |