Search Results
Reading time ~5 minutes
|
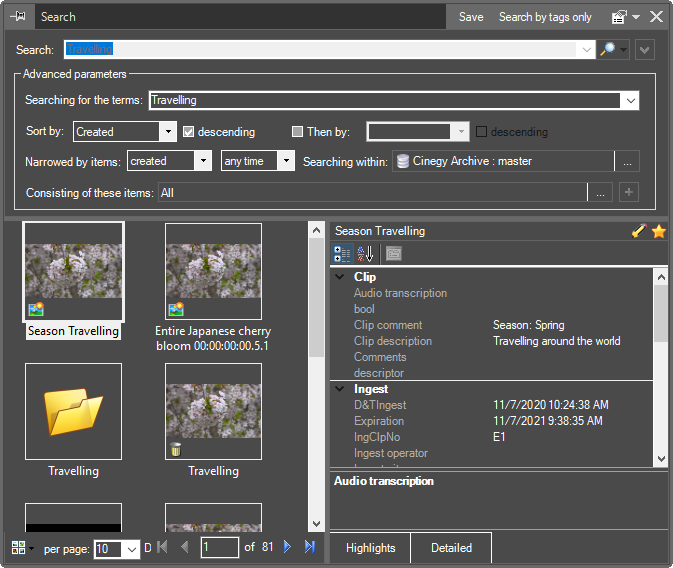
Press this button to start searching. The results will be displayed on the left-hand panel of the "Search" window as follows: |

Terminal object types are defined with the help of small matching picons that are displayed in the bottom left corner of search result entry previews. Since folders and news items have no preview, their icons are shown instead.
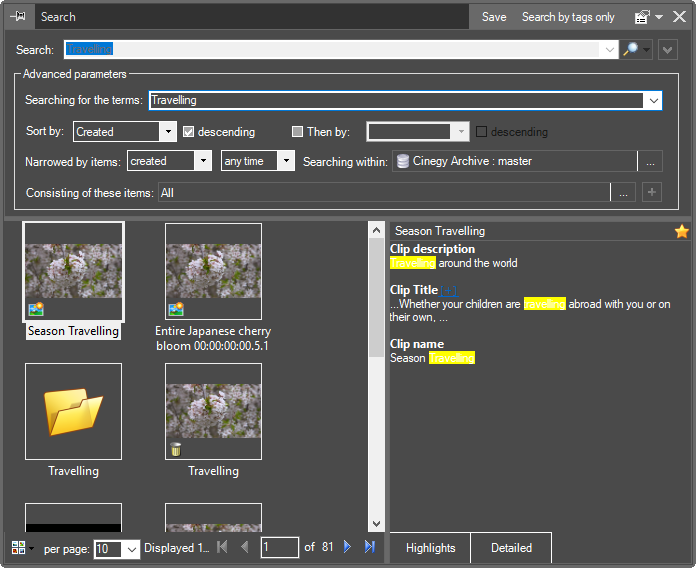
The right-hand panel of the window displays metadata for the selected object that can be represented in the "Highlights" or "Detailed" view.
|
When the "Highlights" button is pressed, the result includes the metadata field name for the selected object and its content with the search word highlighted in yellow. If the metadata field contains a long text, only several words before and after the search word are displayed by default. |

However, in case you need to see the full text of the metadata field, press  . The expanded text looks as follows:
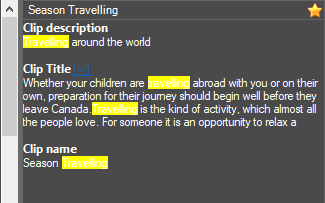
Press  to collapse the text back.
|
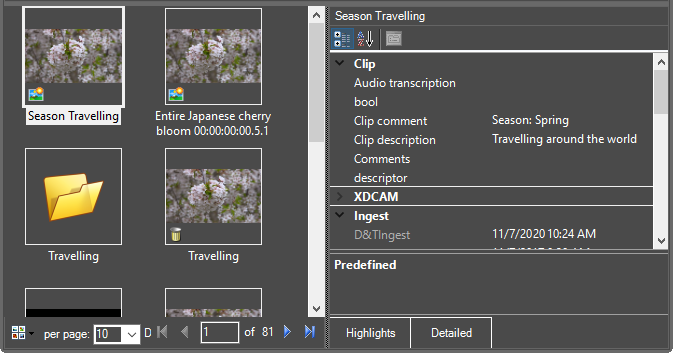
When the "Detailed" button is pressed, all metadata for the selected object is displayed. In this view, the metadata can be further edited, if needed. |

|
Note
|
The "Highlights" view is selected by default. |
The detailed view shows the complete set of available descriptors for the selected node type. It is possible to narrow the list of the displayed descriptors to the selected ones by using the search favorites metadata display feature. To go to the favorites view, on the "Highlights" view press the  button and specify the descriptors to be shown in this view. To do this, press the
  button.
The following dialog will appear allowing you to select the desired descriptor(s) or entire descriptor group(s):
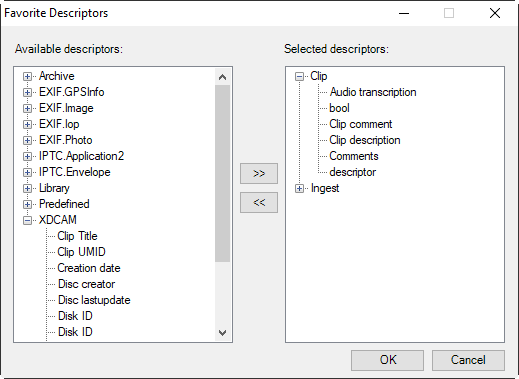
Use the arrow buttons to add or remove the descriptors from the "Selected descriptors" list.
Only the specified descriptor field(s) will be displayed in this view. If the metadata descriptor is not assigned to the selected node type, this descriptor field will not be displayed.
To return to the "Highlights" view, press the button one more time.
The read-only fields are shown as disabled and cannot be edited by the user. The found objects and their metadata can be managed (copied, moved, deleted, etc.) in the same way as in the bin interface. In the "Highlights" view, metadata text can be selected and copied using the right-click menu or standard Ctrl+A and Ctrl+C shortcuts respectively.
It is required to have the corresponding rights to view, move the objects in the search results window, and edit their metadata.
|
Important
|
Refer to the Permissions and Security section in the Cinegy Archive Manager Manual to learn how to assign rights to the user roles. |
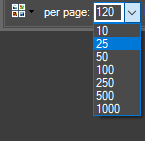
You can define several search results to be displayed per page by choosing the corresponding option from the pull-down list or entering the value from 10 to 2000 via the keyboard:
If the search comes up with more than one page of search results, use the  and
and  buttons to navigate through the previous and next result pages.
Use the  and
and  buttons to jump to the first and last result pages.
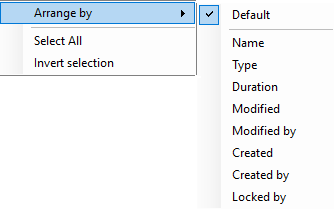
It is possible to rearrange the items found on your search request. To do this, use the required sorting parameter from the "Arrange by" right-click menu option on the search results panel:
In the search results window, you can manage the found items separately or in multiple selection lists. To select more than one object, left-click the desired ones in the search results window holding the Shift or Ctrl keys pressed.
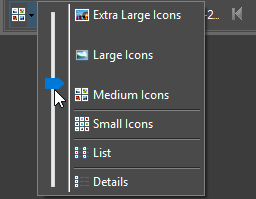
You can also manage the view display of your search results by pressing the "Change your view" button in the bottom left corner for the "Search" window and dragging the slider to the desired view value:
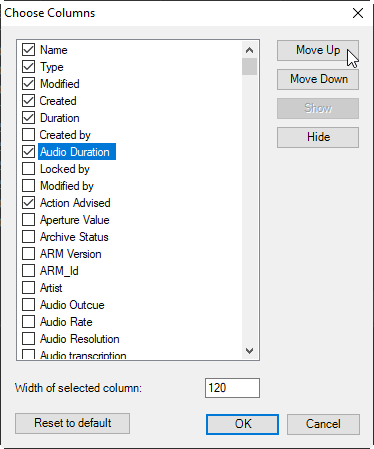
In the "Details" view of the Search window you can sort search results by clicking the appropriate column or customize the visible metadata fields using the "Order fields" right-click menu option on the search results panel:
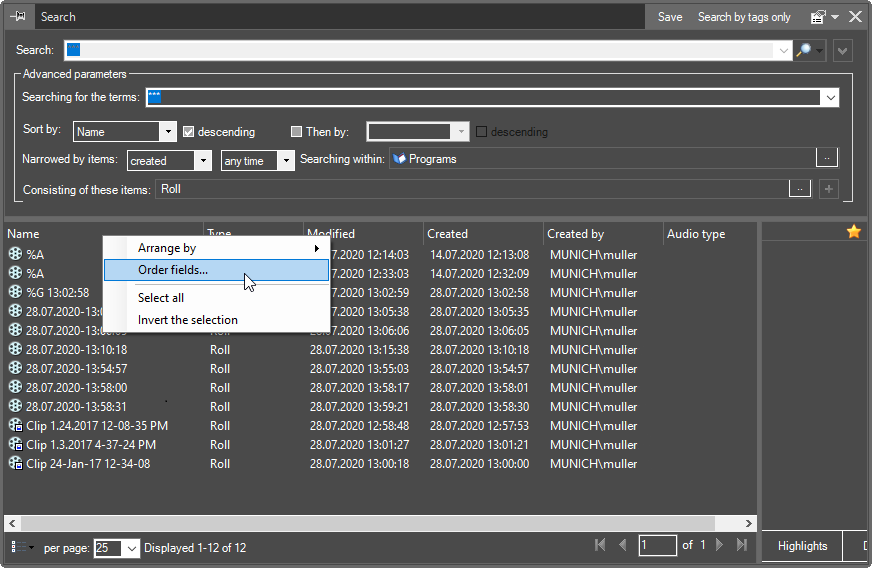
In the corresponding window, you can add, hide or re-order the available metadata fields.
|
Note
|
Results are retained when the "Search" plug-in window is closed. To start a new search, type in a new request. |
Handling Search Results
You can perform various actions with the items on the search results panel using the corresponding context menu commands.
|
Note
|
The set of context menu commands varies depending on the type and number of search result items selected. |
Besides common "Open", "Open in a new window", "Cut", "Copy", "Delete", "Rename" and "Show metadata" options, you can also use the "Highlight in Explorer" context menu command to open the corresponding folder in the explorer window or highlight your Sequence there.
You can also find parent containers for the search result items using the "Find Folder or Bin" command from the right-click menu of the desired item:
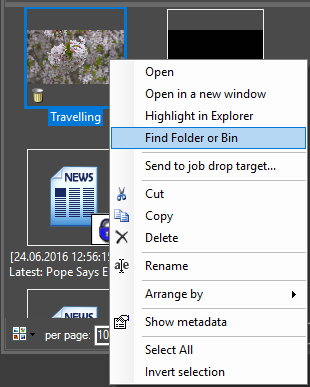
This command will open the parent folder or bin in a separate window.
The found items can be managed in the search results window separately or in multiple selection lists. To select more than one object, click the desired ones while holding the Shift or Ctrl keys down. To invert the selection, use the "Invert selection" context menu command. To select all your search result items, use the "Select All" context menu command or the Ctrl+A keyboard shortcut. To remove the selection, click anywhere within the search results panel.
Exporting Search Results to Inventory
Your search result entry (Sequence or clip from the Roll/ClipBin) can be saved as an MCR item, i.e., the XML file that defines a separate playback element in the playlist with the set of metadata that describes the given item. To do this, choose the "Send to inventory…" command from its context menu. In the common "Save as" dialog box navigate to your dedicated inventory folder and save the item under the desired entered name.
|
Important
|
To learn more about working with the MCRitems, refer to the Cinegy Air Manual. |
Sending Search Results to Job Drop Target
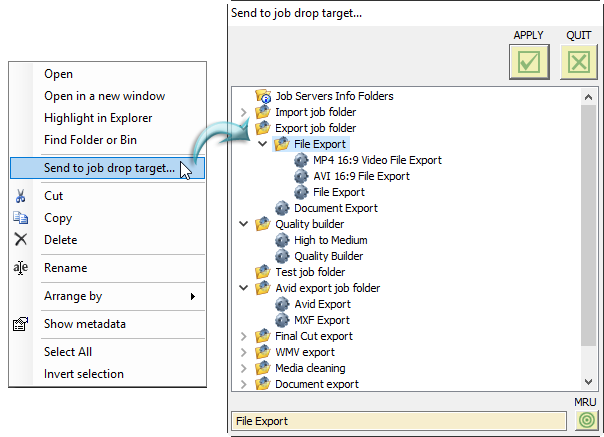
You can also send your search result item to a job drop target by choosing the corresponding context menu command and defining the desired job drop target in the "Send to job drop target…" dialog that appears:
|
Important
|
Refer to the Watch Folders Tab article in the Cinegy Convert Watch Service Manual to learn more about export tasks creation. |