Toggling Animation
Reading time ~2 minutes
Effect Editor supports making effects added to a clip animated with the help of keyframes. A keyframe is a frame in which a change of an effect parameter is defined. To create a simple animation, at least two keyframes are needed – one for the initial parameter value, and another one for the new value. The parameter values between two keyframes are interpolated, i.e., automatically calculated to be distributed along the span. By default, this distribution is an even span. For more elaborate animations you can add extra keyframes between the start and end keyframes.
Adding Keyframes
To add animation to an effect, move the timescale slider  to the position where the animation should start, and press the
  button. When pressed, the button turns into
  .
.
Once a keyframe is added, it will be graphically represented on the Effect Editor timeline:

|
It is possible to add multiple keyframes for the animation to take effect. Reposition the slider to a different location on the timeline and press the "Add/Remove Keyframe" button. |
|
The "Add/Remove Keyframe" button displayed in blue means that an existing keyframe is currently selected. |
|
Press the "Go to Previous Keyframe" button to select the previous keyframe on the timeline. |
|
Press the "Go to Next Keyframe" button to select the next keyframe on the timeline. |
|
Tip
|
You can use the key combinations Shift+Delete to cut, Ctrl+Insert to copy and Shift+Insert to paste the selected keyframe. |
Deleting Keyframes
There are several ways to delete keyframes on the timeline.
|
Select the required keyframe on the timeline and press the "Add/Remove Keyframe" button. |
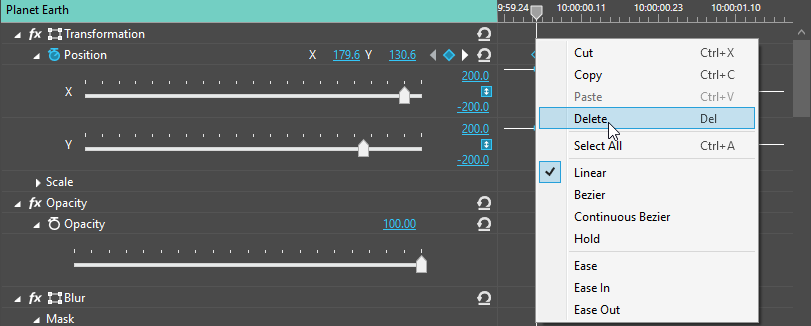
Alternatively, you can use the "Delete" command from the selected keyframe context menu:

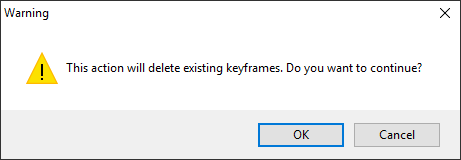
All keyframes for a certain effect parameter can be deleted simultaneously by pressing the  button. You will be asked to confirm the keyframes deletion in the following warning message:

Manipulating Keyframes on Timeline
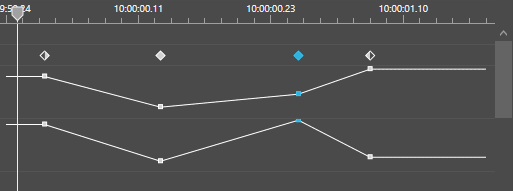
The added keyframes can be manipulated directly on the timeline. In the following table the use of the keyframes indication and coloring is explained:
| Indicator | Meaning |
|---|---|
|
The keyframe animation starts with |
|
The keyframe animation ends with |
|
The keyframe in the middle of the animation |
|
The selected keyframe |
|
Points indicating the keyframe position on the X and Y axes |

You can drag and drop the points on X and Y axes up and down directly on the timeline to change the keyframe position.


