Keyframes Transition
Reading time ~2 minutes
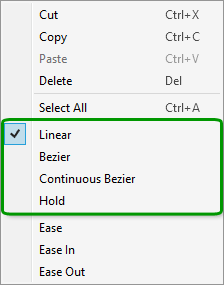
The keyframes interpolation can be changed and adjusted for more precise control over the rate of changes in your animations. You can choose either an interpolation type from a context menu or you can directly change one keyframe type to another by manually adjusting the keyframe or the handles.
The following interpolation methods are available in the keyframe context menu:

All keyframes are displayed on the Clip / Sequence Viewer window and can be managed with the mouse.
Below are the illustrations of all interpolation methods applied to and effect parameter given as graphics representation on the Effect Editor timeline and in Clip Viewer.
Linear
|
Linear is the basic interpolation method used in Effect Editor by default. It creates even transition from one keyframe to another. |

In the linear interpolation method, only the keyframes position is adjustable.
Bezier
|
Bezier interpolation method allows to manually adjust the shape of the motion graph with controls on both sides for modelling curves of a keyframe. |

Special handles appear on both sides of a keyframe with this method of interpolation applied. Each of them can be adjusted independently.

Continuous Bezier
|
This method enables smooth transition between keyframes, where changing the graph shape on one side of a keyframe changes the shape on the other side to create a smooth curve. |

Changing position of one of the handles will automatically move the other handle position so that they remain a continuous line, whereas their length can be changed individually.

Hold
|
The hold method creates sharp transition from one keyframe to another to allow the sudden effect changes in a project. |

For a keyframe with this method applied, the motion graph looks as a horizontal straight line from the previous keyframe coordinates abruptly shifted to a specified position. The right-hand handle allows you to adjust transition to the next keyframe.


