Controlling Playback
Reading time ~8 minutes
There are various ways to control video and audio playback in Cinegy Desktop.
Playback Control with Mouse
Play/Stop Button
|
The "Play" button in all the viewers toggles the playback mode. |
|
The "Stop" button suspends the playback of the material. |


Navigating through Material
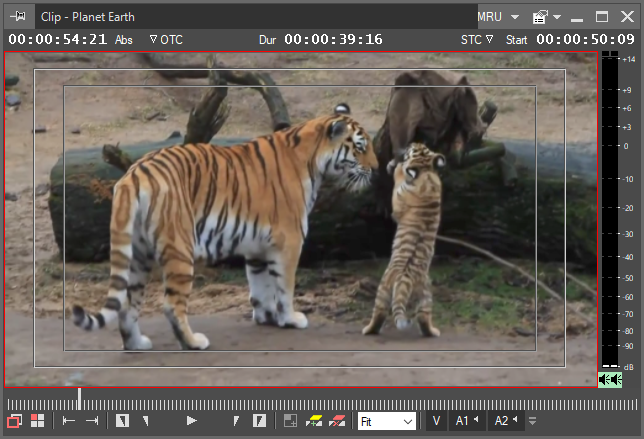
In all the viewers, there is a ruler at the bottom, which allows user to scroll to any desired location of a clip or Sequence.
It is possible to view any frame of the material by dragging the time slider.

Jumping to Events
You can use the "Jump to Event" buttons to move from event to event. Events are the beginning and the end of a clip and In and Out points. In Sequence Viewer, each clip is an event as well as the In and Out markers. Use:
|
the "Previous event" button to jump to the previous event (the shortcut is A). |
|
the "Next event" button to jump to the next event (the shortcut is S). |


Shuttling using Mouse in Viewer
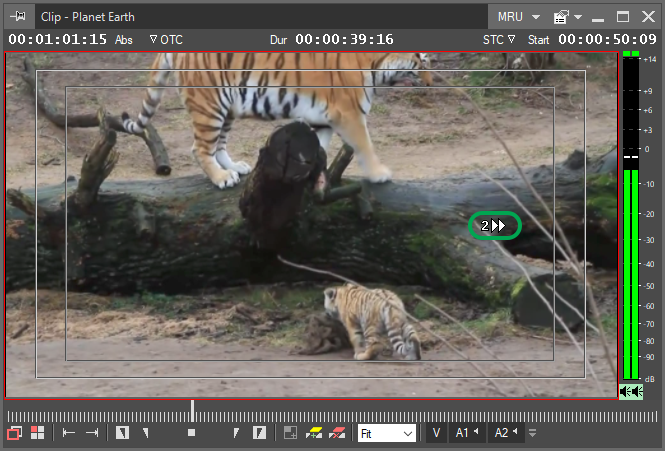
Drag horizontally in the frame window on the viewer to shuttle through your material with the mouse. The playback speed and direction depends on the direction and intensity of your drag.
-
Drag to the right to play forward.
-
Drag to the left to play backward.
The mouse pointer will show you the current speed and direction of the playback.
|
Fast forward at 200% speed |
Controlling Zoom in Viewer
Initially, the video material display size is set to fit the viewer window size. To use the divisible scales, press arrow down in the combobox on the bottom of the viewer:
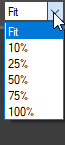
Choose the required zooming size in percent, with 100% being the original size, pixel by pixel, depending on the current interlacing options. To scale to half the original size, use 50% or hit Ctrl+2. Use the Ctrl+1 to reset to the original size.
|
Note
|
The same options are available in the "Zoom" submenu of the viewer context menu. |
It is also possible to set custom percentage by placing the pointer on the combobox field, entering the desired value via the keyboard, and hitting Enter.
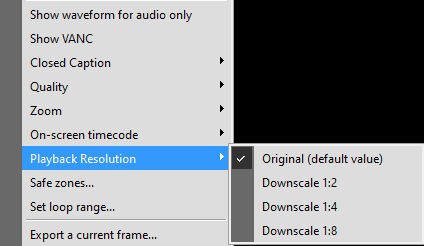
Playback Resolution
You can make playback speed better while decreasing the viewing quality by changing the playback resolution.
In the Clip / Sequence Viewer context menu, choose the "Playback Resolution" command and select one of the following values from the drop-down menu:
-
Original (default value) – preserves the original Clip / Sequence resolution.
-
Downscale 1:2 – downscales the resolution two times less than the original.
-
Downscale 1:4 – downscales the resolution four times less than the original.
-
Downscale 1:8 – downscales the resolution eight times less than the original.
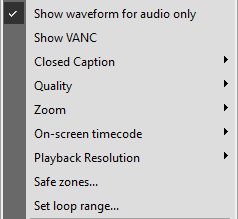
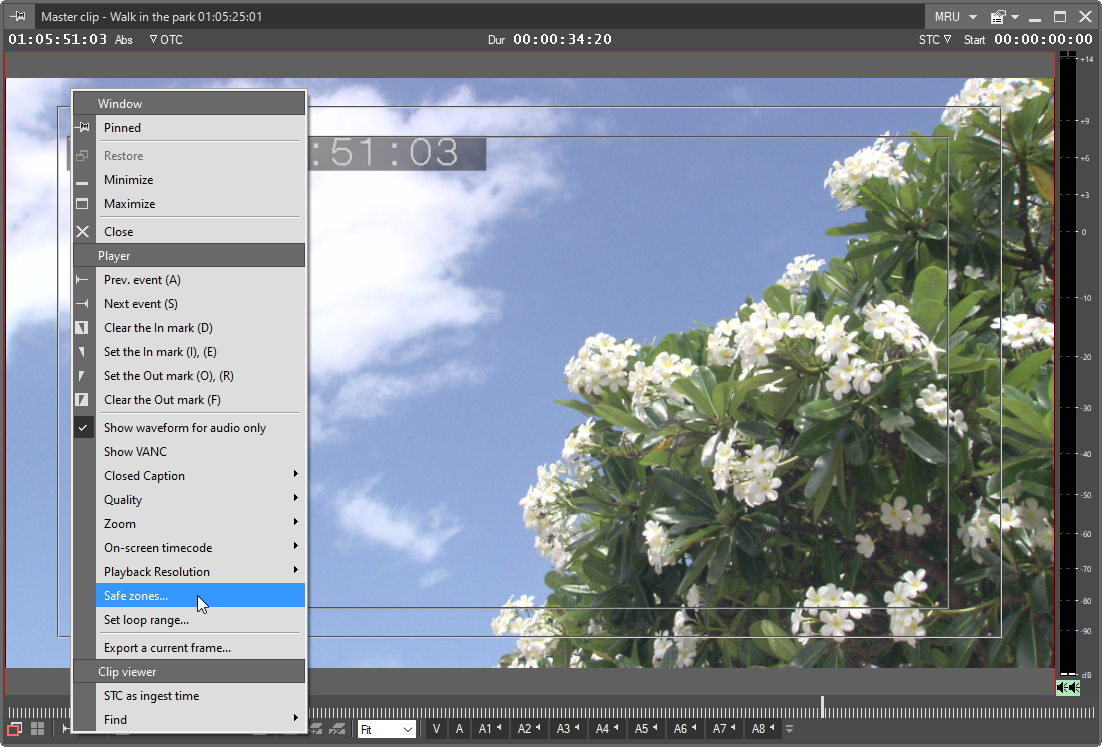
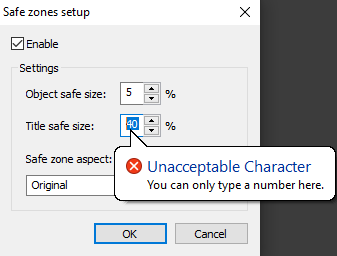
Safe Zones
A safe zone is an area of the television picture where objects placed inside it can be seen on most television screens. Once the settings for safe zones are chosen, the canvas displays the rectangular area with a red and two grey boxes. The red box is the margin of the frame, the grey ones are the object safe and title safe areas.
Call the clip/sequence viewer context menu and choose "Safe zones".
In the dialogue box that appears, configure the safe zones display. Tick the checkbox “Enable” to show the safe zones in the viewer.
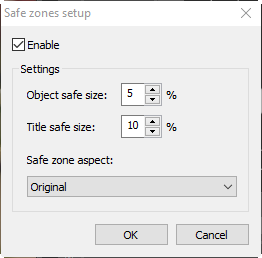
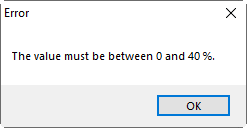
In the Settings section you can toggle the safe zones size of Object and Title in percent relative to the frame area. Increase or decrease the size of both zones in the range from 0% up to 40% by 5 % in one step or enter the necessary value manually. Attempting to set the numeric value exceeding the range will trigger the error message:
and if you try to enter non-numeric symbols:
Choose the necessary safe zone aspect:
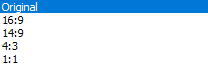
It is possible to manually enter the custom aspect ratio value for the safe area markers. Type in the value in the "Safe zone aspect" field and press "Enter" to apply it. The list of up to 10 custom aspect ratio values is saved in the "Safe zone aspect" drop-down list.
Audio VU Meter
|
The VU meter is shown on the right of Clip Viewer.
|


Using Keyboard
Your keyboard settings may vary depending on your setup.
Hit the Esc key to close Clip Viewer.
To switch to the full screen mode, hit the F12 key. All of the control keys and the jog-shuttle are available in full screen mode.
Hit the Esc key to return to the normal mode.
The following keys control the playback:
-
The Tab key plays the video in a loop.
-
The Space bar toggles the play/stop mode.
-
To loop play from In to Out, hit the 6 key.
-
To loop play according to the loop range, hit the 5 key.
-
To playback the video back and forth, "Ping-Pong", hit the ~ key.
Loop Range
The loop range defines the duration of the loop playback in seconds and is triggered by hitting the 5 key on the keyboard. To set up the loop range, right-click the viewer and select the "Set loop range…" command:
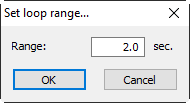
The loop range can be found in all viewers and can range from 0.5 seconds up to 15 seconds.
J-K-L Shuttle
It is possible to shuttle through the material by using the <J-K-L> keys on the keyboard. Use the following keys to shuttle at varying speeds:
-
Hit the L key to move forward through the footage at normal speed.
-
Hit the J key to move backward at normal speed.
-
Hit the K key to pause the shuttling.
-
To stop the shuttling, hit the Space bar.
-
Hit the K+L keys together to slow forward.
-
Hit the K+J keys together to slow backward.
-
Hit the L or J key several times to increase the speed according to the following table:
| Hit the J or L key | To play at speed | PAL rate | NTSC rate |
|---|---|---|---|
2 times |
2x normal speed |
50 fps |
54.94 fps |
3 times |
3x normal speed |
75 fps |
89.91 fps |
4 times |
5x normal speed |
125 fps |
149.85 fps |
5 times |
8x normal speed |
200 fps |
339.76 fps |
6 times |
12x normal speed |
300 fps |
359.64 fps |
7 times |
16x normal speed |
400 fps |
479.52 fps |
Home, End and Arrow Keys
In addition, you can use the following keys on your keyboard to navigate through clips and Sequences:
-
The Home key takes you to the beginning of a clip or a Sequence.
-
The End key takes you to the end of a clip or a Sequence.
-
The ← or 3 key moves one frame backward.
-
Pressing Alt+← or 1 moves 10 frames backward.
-
The → or 4 key moves one frame forward.
-
Pressing Alt+→ or 2 moves 10 frames forward.
Working with In and Out Points
You can use the following shortcuts to work on your In and Out points:
-
The I or E keys set up the In point.
-
The O or R keys set up the Out point.
-
The D key deletes the In point.
-
The F key deletes the Out point.
-
The G key deletes both In and Out points.
-
The 6 key loop plays from In to Out.
-
The Shift+A plays the first 5 seconds from In point.
-
The Shift+S plays the first 5 seconds before Out point.
Using Mouse
You can use the mouse wheel to scroll in any player, Sequence window or Timeline.
Using the Jog-Shuttle
|
Cinegy Desktop supports any jog-shuttle device, which can emulate the keyboard input. Refer to the documentation of your jog-shuttle device to find out how to configure the shortcuts. To program some special functions, Cinegy Desktop provides additional "hidden" shortcuts, which you can find in the following table:
|

Selecting Tracks for Playback
Use the track selectors in Clip Viewer to select the tracks you want to play. The track selector in Clip Viewer shows the video and audio channels available in the clip.
|
Depress the "Video" button to switch off the video track. Only audio is played. The keyboard shortcut is 8. |
|
Depress the "Audio" button to switch off all the audio tracks at once. Only video is played. Press this button to select all deselected channels after working with individual audio channels. |


If the clip contains a large number of the audio channels they are presented in the drop-down list:
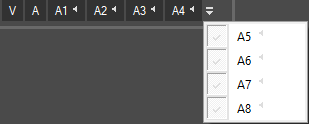
|
Deselect the corresponding "Audio n" button of the desired audio track to switch off its playback. Shift-click the desired audio track to enable playback of this particular audio channel only. All other available audio channels will be deselected. |

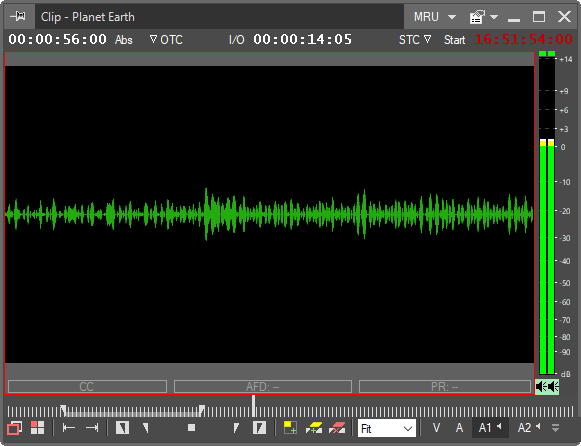
|
A1 only channel playback, the viewer shows the waveform of this audio channel |
|
Note
|
The waveform shows all the enabled channels mixed together. |
|
Depending on the audio channels type, the track selector will show the audio buttons of the corresponding type: Mono, Stereo or 5.1 Surround. |


Displaying the Waveform for the Audio Clips
The "Show waveform for audio only" option enables the waveform displaying for the audio clips. When the option is disabled, the black frames are shown instead. This option can be found in Clip Viewer main menu or in the right-click menu anywhere within the Clip Viewer window: