Handling Bins
Reading time ~5 minutes
Double-click the corresponding bin icon in the explorer window to open the required bin.
By default, the bin will be opened in place of the previously opened bin. To open the bin in a new window, you have to shift-double-click the icon. To close the bin, press the ![]() button in the window caption.
button in the window caption.
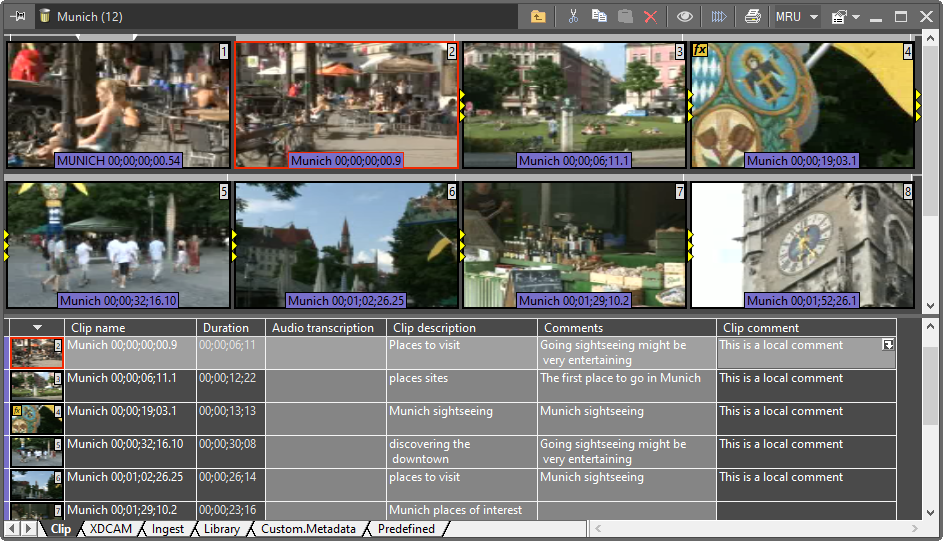
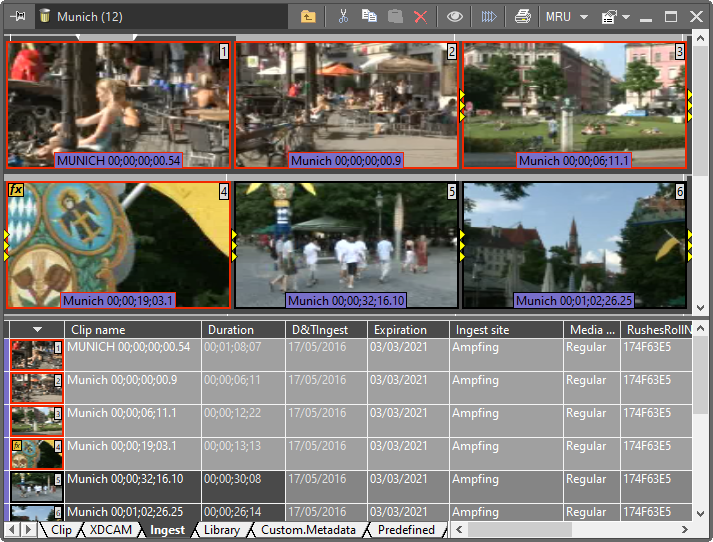
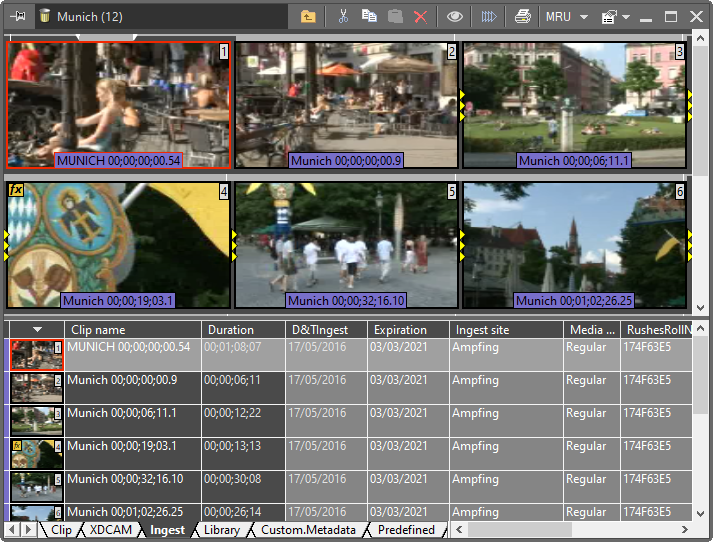
The bin interface consists of two main parts: the storyboard view (on top) and the table view (at the bottom):
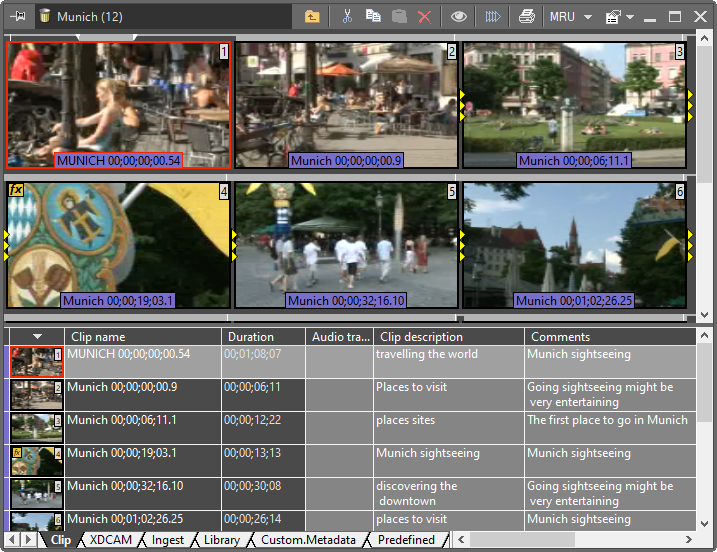
By dragging the splitter between the views and between the table columns you can easily customize the appearance of the bin interface.
You can also maximize your bin window with the ![]() button or by double-clicking its caption.
button or by double-clicking its caption.
Ordering the Fields
The fields and tabs view can be customized on a per-user basis using the "Order fields" dialog. You can show/hide and sort any group or field according to your needs. To show this dialog, use the "Order fields" command from the Roll or ClipBin context menu:
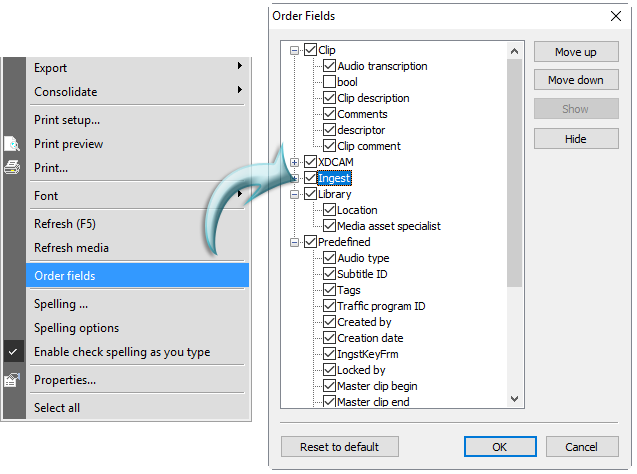
Here check the fields and tabs you wish to be displayed in the bin.
|
Use the "Move up" and "Move down" buttons to reorder the fields and/or tabs in the bin. |
|
Use the "Show" and "Hide" buttons to display or hide the fields and/or tabs in the bin. |


|
Press the "Reset to default" button to return to the default settings. |

The specific fields can be read-only for certain user roles.
|
Important
|
Refer to the Descriptors, Presets article of the Cinegy Archive Manager Manual for details about assigning read-only permission to user roles. |
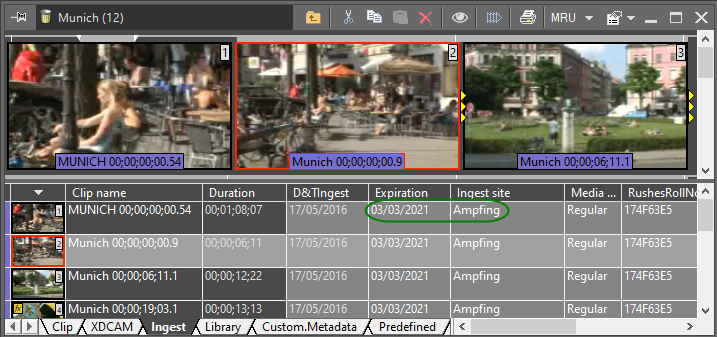
In the example below, the "Expiration" and "Ingest site" fields cannot be edited as they are read-only:
Selecting Items in the Bin
To select an item, you can click it with the mouse. A red frame appears around the selected item. You can move the selection to the near-by clips using the ← and → keys.
Multiple Selection
You can select multiple items in the bin to delete, copy or rearrange them. There are different ways to extend the selection:
-
Ctrl+ click an item to add it to the current selection (or remove if it is selected);
-
Shift+ click an item to select all the items between the last selected item and the clicked one;
-
press Ctrl+A to select the entire bin.
The selected items are highlighted with a red frame.
Sorting Items in ClipBins and Rolls
The items in the storyboard view always have the natural order. In ClipBins you can change the order of the clips by dragging the clips to the desired location. The master clips in the Rolls are always ordered as defined during the capture/import session.
The order in the table view can be customized by clicking in the column caption. This will re-sort the table by the selected column. To reverse the order, double-click the column caption again. To restore the natural order, double-click the caption of the first column.
Clip Aspect Ratio
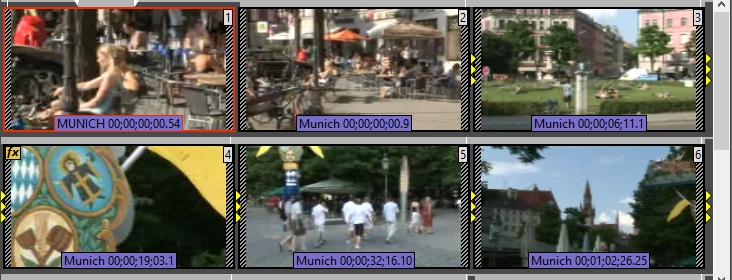
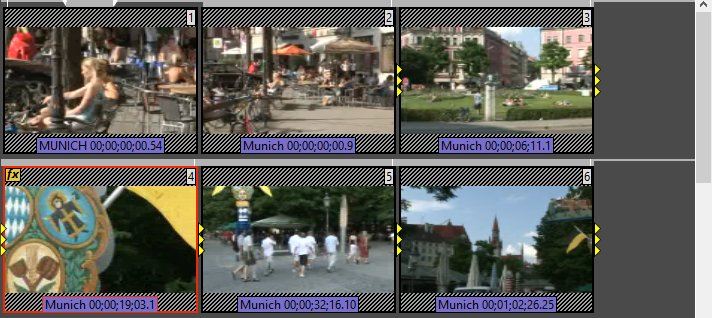
Every ClipBin has its default aspect ratio. This is used to display the clip thumbnails properly.
|
Here you can see 4:3 clips in a 16:9 bin |
|
Here you can see 16:9 clips in a 4:3 bin |
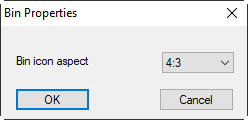
To set up the ClipBin aspect ratio:
-
Select the "Properties" command from the ClipBin main menu. The dialog box appears:
-
Choose the desired aspect ratio and press "OK".
|
Note
|
The set of aspects can vary depending on your database setup. |
Clip Numbering
The clip number can be displayed in the upper right hand corner of a clip in a ClipBin. This option can only be selected for the entire Cinegy Archive database in Cinegy Archive Manager. Please contact your local administrator if you wish to have the clip numbers displayed in your bins.
Printing Bin
This command allows you to print the content of the currently opened tab of the table view.
Print Setup
This command allows you to select the printer and its parameters. This command opens the standard Windows "Print Setup" dialog box. Select the printer and its settings, the paper size and layout.
Print Preview
This command shows the print preview of the selected tab of the bin. The following window appears:
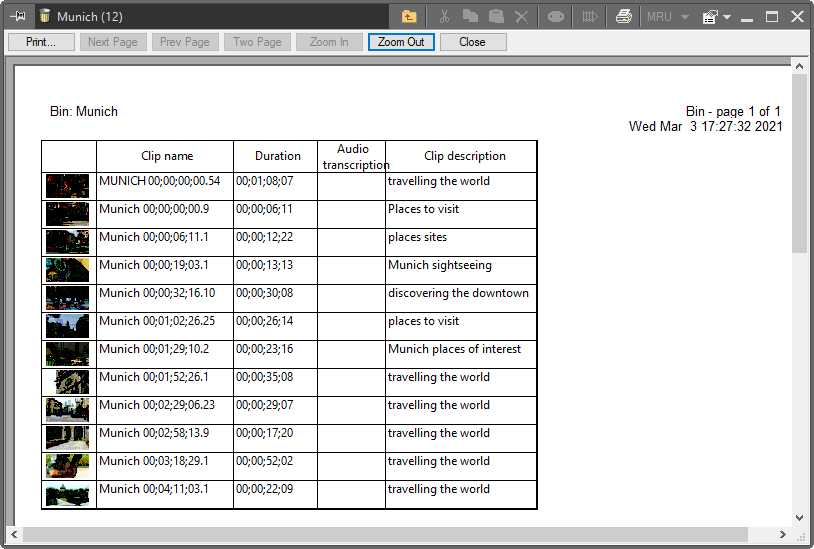
Use the buttons on top to access the print preview features:
|
Press the "Print" button to start printing the current preview. |
|
Use the "Next Page" and the "Prev Page" buttons to navigate the preview. |
|
Use the "Zoom In" and "Zoom Out" buttons to control the preview scale. |
|
Use the "One Page" or "Two Page" button to display one or two pages on the screen. |
|
Press the "Close" button to quit the mode. |


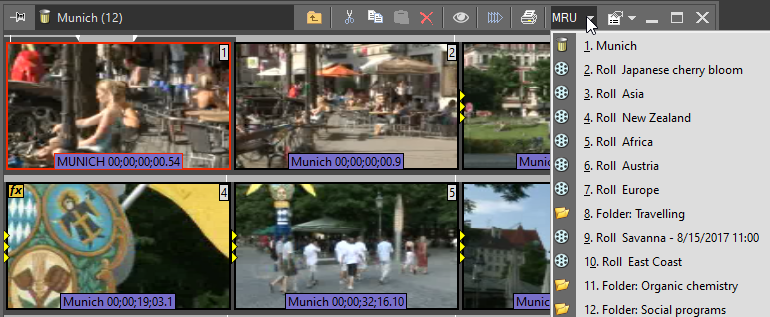
List of Most Recently Used (MRU)
This menu provides access to recently opened items. The icons in the list help identify the items type:
Exporting a Bin
There are different ways to export a bin. You can:
-
consolidate and export to tape;
-
consolidate and export to virtual VT;
-
export to file formats (like AVI, AAF, EDL, etc.).
|
Important
|
Refer to the Cinegy Outgest Manual to learn how to consolidate and export a bin. |
Collaborating in Bins
Cinegy Desktop is based on a client-server architecture. Any changes made to the database content are immediately stored on the Cinegy Archive server. If other clients have the same bin open on their machines, the change will immediately be reflected on their machines.
This structure enables user collaboration on the content of the bins and quick selection and logging of the incoming material, for as many concurrent users as are licensed to use the system.
|
Note
|
Collaboration is not possible in sequence mode of the bin. The bin is locked for exclusive use. |
Local Comments
Unlike the Roll, the ClipBin has a different background color (gray). This indicates the local character of this bin. The "Clip name" and the "Clip comment" columns are not a part of the MOG (Media Object Group), and the information is stored locally in this ClipBin rather than globally.