Mixes
Reading time ~8 minutes
Cinegy Desktop provides you with the means to create real-time transition effects in your Timeline project.
|
Caution
|
Please note that mixes are only available for the first video track. |
Adding a Mix
|
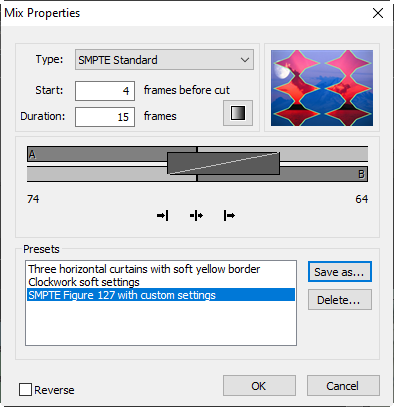
Position your time slider close to the edit where you want to create a mix. Press the "Add a mix" button; the following dialog box appears: |

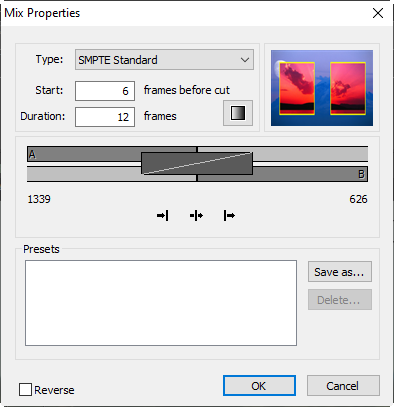
Type
You can select from three different mix types. To the right of the mix type, you will see a small preview of the mix currently selected.
"SMPTE Standard" type supports reversing the effect, meaning the same mix is performed in a reverse direction. To enable the reverse, tick off the "Reverse" checkbox located at the bottom of the dialog box.
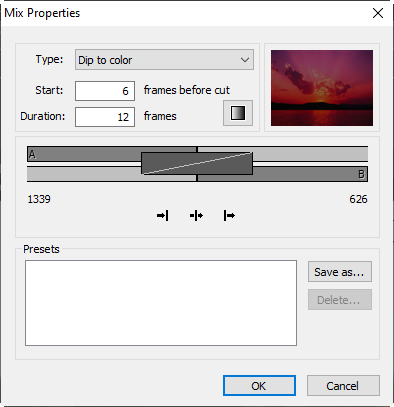
Dip to Color
This mix fades from one clip to a solid color and then fades from the solid color to the next clip.
|
You can select the color to be used for transition by pressing the "Settings" button. The following dialog box appears: |

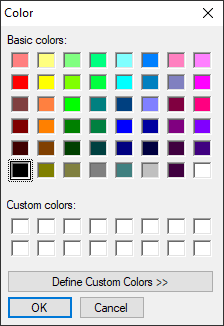
Select a color or define your own by pressing the "Define Custom Colors" button to extend the color palette.
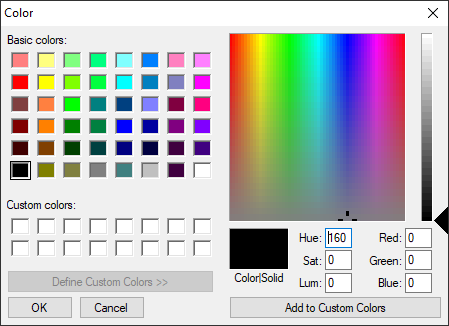
Define a new color by selecting the desired shade from the color range palette or enter the numeric values of the color. Once the desired color is picked, press the "Add to Custom Colors" button. The custom color is transferred to the "Custom colors" palette. Having selected a color, press the "OK" button to confirm your choice. The result of the color choice is shown in the small transition preview.
Dissolve
The dissolve transition does not have any additional options; a simple dissolve is created from one clip to the next defined by the edit chosen.
SMPTE Standard
These transitions are created based on the SMPTE standard. At present, you can select among the most common transitions used; new SMPTE transitions will be added in the future, so all the available transitions might not be described in this manual. In any case, it is recommended to try out the transitions and experiment with the settings to achieve the transition to suit your needs.
|
Press the "Settings" button. The following dialog box appears: |
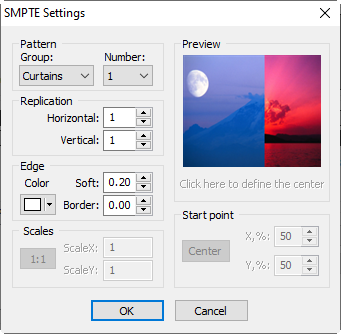
Here you will find a wide range of options to create a variety of transitions.
At present you can choose between three different patterns, each of these patterns also has different variations. The following transition groups are available from the "Pattern Group" drop-down list:
SMPTE – Curtains
At present, there are 34 variations of the "Curtains" transition and each of these can be adjusted to your needs, as it is explained below. Here is an overview of several "Curtains" transitions:
|
|
|
|
|
|
|
|
|


The numbers beneath each sketch correspond to those found in the "Number" drop-down list.
SMPTE – Figures
At present, there are 26 variations of the "Figures" transition and each of these can be adjusted to your needs, as it is explained below. Here is an overview of main "Figures" transitions:
|
|
|
|
|
|


The numbers beneath each sketch correspond to those found in the "Number" drop-down list.
SMPTE – Reamers
At present, there are 39 variations of the "Reamers" transitions and each of these can be adjusted to your needs, as it is explained below. Here is an overview of main "Reamers" transitions:
|
|
|
|
|
|


The numbers beneath each sketch correspond to those found in the "Number" drop-down list.
Once a pattern is selected, it is possible to make further adjustments in the following sections: Replication, Edge, Scales and Start point.
Replication
Here you can state how many instances of the pattern, horizontal and/or vertical, should be used. Here is an example based on the Figures pattern number 101, using two horizontal and two vertical instances of this pattern.
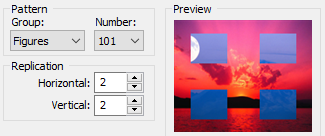
The result is shown instantly in the preview window.
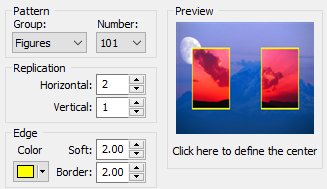
Edge
It is also possible to add a border to a transition pattern. You can define the border color by pressing the "Color" button (the default color is white). A color palette appears. Select a color or define your own by pressing the "More colors" button; the color palette is then extended and you can define your own custom color.
|
Important
|
Refer to the Dip to Color paragraph earlier to find out how to define custom colors. |
The colored border width is defined by the "Border" value. Increase the "Soft" value to create a softer edge to the border or decrease the value so that the edges become clearly defined.
Scales
The X and Y scales influence the size of the transition object:
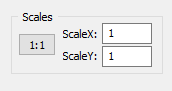
The "1:1" button sets the values back to the default settings of ScaleX = 1 and ScaleY = 1.
Start Point
Using the X and Y parameters, you can define the starting point of the transition, i.e. where the pattern should appear as soon as the transition begins.
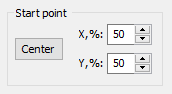
The "Center" button will bring back the pattern to the default position, x = 50 and y = 50.
You can also use the preview window to set a different center for your transition pattern. Simply click on the desired position in the preview and the x and y positions are automatically altered to the new values.
|
Note
|
The "Scales" and the "Start point" parameters are not available for the "Curtains" and "Reamers" patterns. |
Once you have adjusted all the settings to meet your needs, press the "OK" button to save your settings. The preview window in the "Mix properties" dialog will show the new settings.
Start and Duration Frames
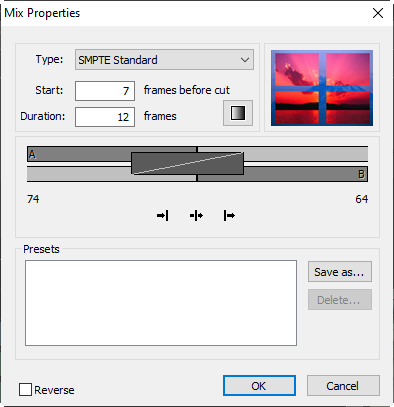
The default frame values shown in the dialog depend on the settings of the Timeline preferences and the material available for transition. The possible length and position of your mix depend on the amount of material available from the clips being mixed.
|
Important
|
Refer to the Timeline Preferences paragraph for more details. |
|
Note
|
One second of an NTSC footage normally equals 30 frames; one second of a PAL footage equals 25 frames. |
You can either enter the frame values into the text boxes for "Start" and "Duration" or drag the graphically represented mix with the mouse. The maximum number of frames available for mix is displayed. In this case, clip A offers 74 frames for the mix and clip B offers 64 frames.
Define the position of the cut by pressing one of the following buttons:
|
The "Ending at cut" button fades the video on the outgoing A-side to zero so that it ends at the cut point. |
|
The "Centered at cut" button creates a cross fade. |
|
The "Starting at cut" button creates a fade from the B-side and starts from the cut point. |


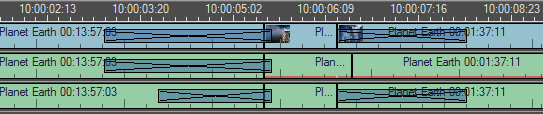
Once you have set up the mix properties, press the "OK" button; the video mix is created. If your cut includes audio tracks, an audio mix is also created in the form of an audio fade.
|
You can see two mixes in this project |
|
Note
|
If you apply a mix to just one clip, it will be mixed to black (as a mixed clip is always replaced by black video). Mixes can also be added to the edges of a clip. |
Mix Presets
Having defined all your settings, you can save them as a mix preset to make these settings available at any time. To do this, select the "Save as…" button. The following dialog box appears:
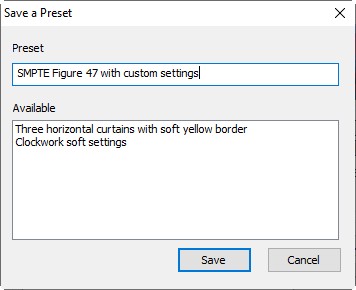
Enter a suitable name for your mix preset and press the "Save" button. The new preset will appear in the list:
To use a transition preset, simply select one from the list. The settings defined in this preset appear in the preview window so you can check them before applying the transition. To confirm your choice, press the "OK" button.
Editing a Mix
To change the length and the position of a mix,
-
drag the ends of the mix on Timeline in order to change its duration;
-
drag it as a whole to change the center of the mix.
Mix Properties
To edit a mix, you can also use the "Mix properties" dialog again:
-
Position the time slider close to the mix.
-
Press the "Add a mix" button.
Removing a Mix
|
To remove a mix, position the time slider on it and press the "Remove a mix" button. |
