Media Logger
Reading time ~9 minutes
Media Logger is an easy-to-use instrument for associating a Roll with a script in RTF or TXT file format.
Interface
|
Media Logger can be launched with the MediaLogger.exe file or the "Media Logger" shortcut on the desktop. The following "Media Logger" window appears: |

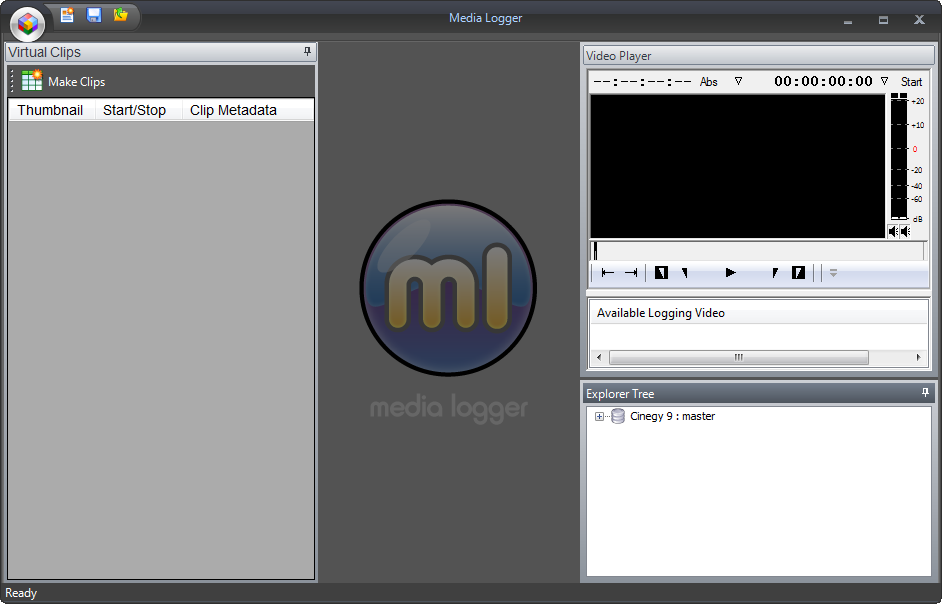
Media Logger interface consists of the following panels:
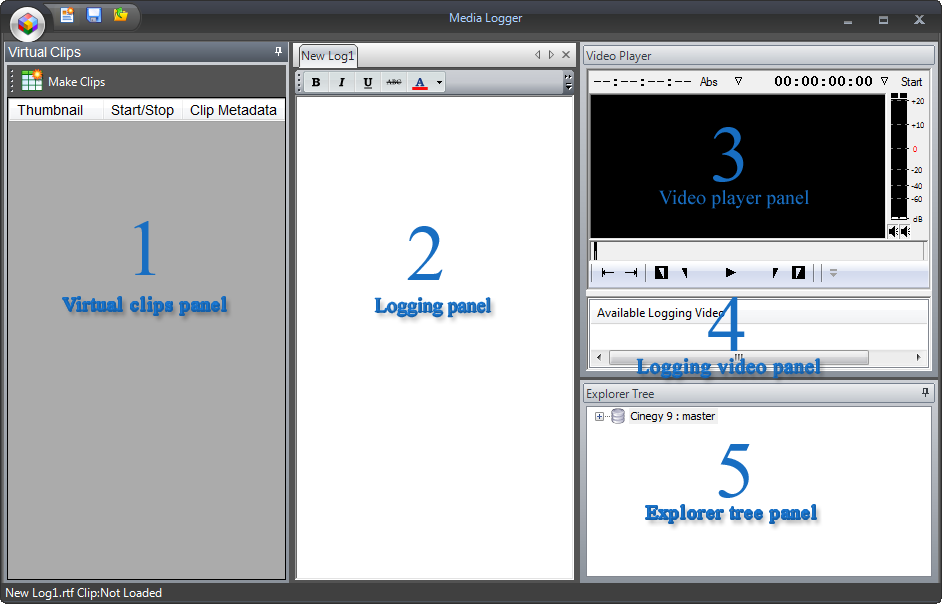
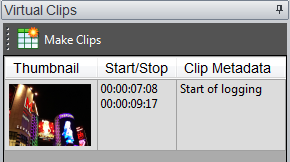
1 – The virtual clips panel displays the list of the virtual clips created according to the log file content.
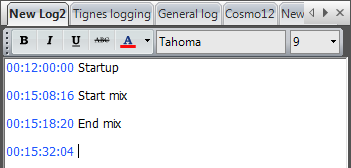
2 – The logging panel is used for viewing and editing the script files. Each script file is displayed in a separate tab.
3 – The video player panel provides a video player for viewing and handling the entire master clip.
4 – The logging video panel displays the entire master clips of the selected Roll.
5 – The explorer tree panel provides access to the Cinegy Archive where Rolls can be selected for logging. Media Logger supports working with multiple databases.
File Menu
|
Press this button located in the top left corner of the Media Logger window to get the "File" menu: |

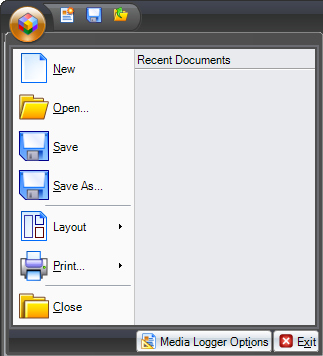
The commands available from the "File" menu are:
-
New – creates a new script.
-
Open – opens an existing script file.
-
Save – saves an active script file.
-
Save as – saves an existing script file with another name or in a different location.
-
Layout – defines the layout view ("Widescreen" 16:9 or "Normal" 4:3).
-
Print – previews or prints the current script file.
-
Close – closes the currently active script file.
In the "Recent Documents" field you can select the desired script file from the list of recently used scripts.
The "Media Logger Options" button opens the Media Logger setup menu.
Quick Access Toolbar

The quick access toolbar is located on the header of the Media Logger window and is used for quick access to the following functions:
|
This button creates a new script. |
|
This button saves an active script file. |
|
This button opens an existing script file. |


Working with Media Logger
Creating a Script File
Creating a New Script File
|
Click the "New" button in the file menu to create a new script file (the same command is available from the quick access toolbar). A new script will be created in the logging panel. |

Opening an Existing Script File
|
Click the "Open…" button in the file menu (the same command is available from the quick access toolbar). The "Open" dialog box appears: |

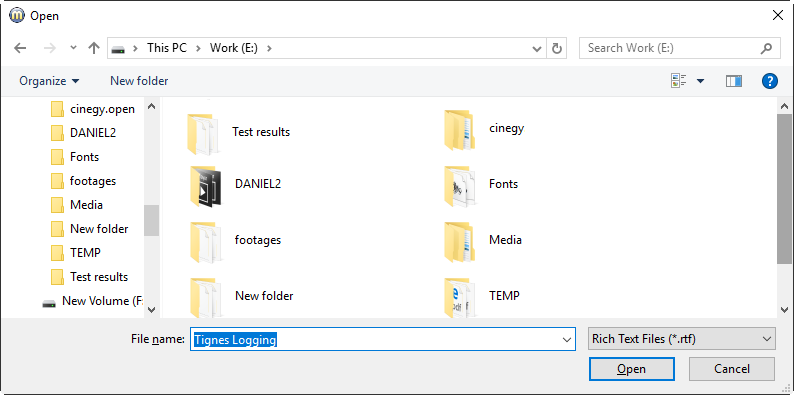
Browse for the desired location and select the file in *.rtf or *.txt file format.
The script file will be opened in the logging panel (2):

Media Logger allows the operator to use multiple script files simultaneously:
Click the caption of the desired script file to activate it or use the  buttons to navigate among script files.
Use the  button to close the currently selected script file.
Script File Formatting
You can change the formatting of the selected text in the script file using the controls from the script file toolbar:

|
The "Bold" control applies the bold formatting to the selected text. |
|
The "Italic" control applies the italic formatting to the selected text. |
|
The "Underline" control applies the underline formatting to the selected text. |
|
The "strikethrough" control applies the strikethrough formatting to the selected text. |
|
The "Font" box allows you to change the font of the selected text. |
|
The "Font size" box allows you to change the font size of the selected text. |


Selecting a Roll and Making Clips
To select the Roll, navigate through the explorer tree and double-click the desired one.
When a Roll is selected, the available logging video panel shows all the entire master clips available within that Roll:
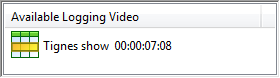
Click the entire master clip to associate the script file with it.
When video is successfully loaded, Media Logger parses the script file and recognizes the timecodes within the entire master clip. Any script timecode recognized as valid, will become a hyperlink and will be displayed as: 10:01:05:16.
Clicking the hyperlink will move the slider of the video player to the selected timecode. The timecode is editable in the script, however if the edit renders the timecode as invalid, the hyperlink indication will be removed. Similarly, if the timecode is outside the bounds of the entire (prior to the start of the entire or after the end of the entire), the timecode is no longer displayed as a hyperlink and appears as plain text.
You can type a timecode manually or use the shortcut Ctrl+T to insert the timecode of the current slider position in the video player. The virtual clip will be created according to the specified timecode and will immediately appear in the virtual clips panel:
|
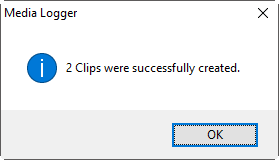
To create clips in the Roll, press the "Make Clips" button. You will be informed about the number of newly created clips with the following message: |

If a user attempts to make a clip(s) from the same timecode(s) with an already existing master clip(s), the following warning dialog box appears:
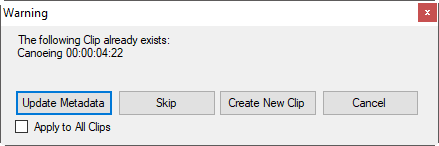
Press the "Update Metadata" button to update an existing master clip.
Press the "Skip" button to ignore the creation of the master clip.
Press the "Create New Clip" to create a new master clip instead of updating an existing one.
Press the "Cancel" to cancel the operation.
Select the "Apply to All Clips" checkbox to apply the chosen option to all clips.
Adding Metadata to Virtual Clips
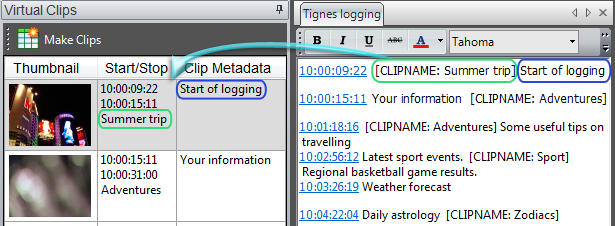
You can add metadata to a virtual clip by typing the relevant information after its timecode. This metadata immediately appears in the "Clip Metadata" field of the corresponding virtual clip.
Use the Ctrl+N shortcut to add a name tag to a virtual clip entering the desired name within the CLIPNAME tag in square brackets. The entered virtual clip name immediately appears in the "Start/Stop" field of the corresponding virtual clip:
|
Note
|
Please note that a CLIPNAME tag can be added anywhere in metadata after the timecode value. |
Handling the Video Player
The video player is used for viewing the entire of the Roll and specifying the In and Out timecodes for creating virtual clips.
You can drag the borders of the video player panel to scale the size of the preview display.
The video player will continue playing when the focus is on the text entry window. This enables the user to enter metadata in the text logger without having to stop the playback.
There are various ways to control video and audio playback in the video player.
Playback Control Using the Mouse
Play/Stop Button
|
The "Play" button starts/stops the playback of the Roll. |


Navigating through the Material
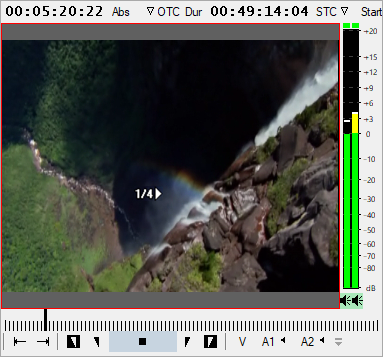
There is a ruler below the frame in the player which allows you to navigate to any desired location of an entire. You can view any frame of the material by dragging the time slider:

Jumping to Events
You can use the "Jump to Event" buttons to move from event to event. Events are the beginning and the end of a Roll and the In and Out points.
|
Use the "Previous Event" button to jump to the previous event (the shortcut is A). |
|
Use the "Next Event" button to jump to the next event (the shortcut is S). |


Shuttling Using the Mouse in the Video Player
Drag horizontally in the frame window on the viewer to shuttle through your material with the mouse. The playback speed and direction depends on the direction and intensity of your drag.
-
Drag to the right to play forward.
-
Drag to the left to play backward.
The mouse pointer will show you the current speed and direction of the playback.
|
Slow forward at 25% speed |
You can use the mouse wheel to scroll frames in the video player.
Playback Control Using the Keyboard
Play/Stop Using the Keyboard
The following keys control the playback:
-
To toggle the play/stop mode, press the Space bar (or use the Ctrl+Space shortcut when focused on the "Logging" panel).
-
To loop play from In to Out, press the 6 key.
J-K-L Shuttle
You can shuttle through your material by using the <J-K-L> keys on the keyboard. Use the following keys to shuttle at varying speeds:
-
Press the L key (or Ctrl+L shortcut when focused on the "Logging" panel) to move forward through the footage at normal speed.
-
Press the J key (or Ctrl+J shortcut when focused on the "Logging" panel) to move backward at normal speed.
-
Press the K key to pause the shuttling.
-
Press the Space bar to stop the shuttling.
-
Press the K+L keys together for slow forward.
-
Press the <K+J> keys together for slow backward.
-
Press the L or J key several times to increase the speed according to the following table:
| Press the J or L key | To play at speed | PAL rate | NTSC rate |
|---|---|---|---|
2 times |
2x normal speed |
50 fps |
54.94 fps |
3 times |
3x normal speed |
75 fps |
89.91 fps |
4 times |
5x normal speed |
125 fps |
149.85 fps |
5 times |
8x normal speed |
200 fps |
339.76 fps |
6 times |
12x normal speed |
300 fps |
359.64 fps |
7 times |
16x normal speed |
400 fps |
479.52 fps |
Home, End and Arrow Keys
In addition, you can use the following keys on your keyboard to navigate through the entire Roll:
-
The Home key takes you to the beginning of a Roll.
-
The End key takes you to the end of a Roll.
-
The Left Arrow or 3 key moves one frame backward.
-
Pressing Alt+Left Arrow or 1 moves 10 frames backward.
-
The Right Arrow or 4 key moves one frame forward.
-
Pressing Alt+Rght Arrow or 2 moves 10 frames forward.
Working with In and Out points
You can use the following shortcuts to work on your In and Out points:
-
The I or E keys set up the In point.
-
The O or R keys set up the Out point.
-
The D key deletes the In point.
-
The F key deletes the Out point.
-
The G key deletes both In and Out points.
-
The 6 key loop plays from In to Out.
Audio VU Meter
|
The VU meter is shown on the right of Clip Viewer. |


Closing Media Logger
When logging is completed, you can save the script file with the "Save" button.
|
To close Media Logger, press the "Close" button on the window’s header. |
