Cinegy Messenger
Reading time ~4 minutes
The Cinegy Messenger tool allows you to exchange text messages between the Cinegy Desktop users as well as with any standalone user connected to the corresponding message server.
|
Important
|
To use the Cinegy Messenger tool, its IP address and port should be specified in Cinegy Archive Manager. Otherwise this plug-in will not be available in Cinegy Desktop. See the Cinegy Messenger paragraph in the Cinegy Archive Manager Manual for more information. |
|
Important
|
The Cinegy Messenger tool requires installation of a real-time collaboration Open Source server. To learn more about the server installation and setup, please refer to the Openfire Server article. |
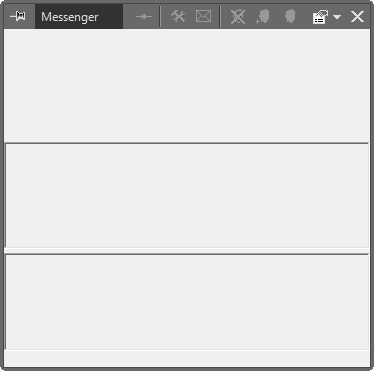
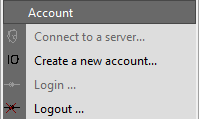
Starting the Messenger
Choose the "Messenger" command from the "Main" category of the "Modules" drop-down list.
The following window appears:
You have to select an appropriate Openfire server in order to use the Cinegy Messenger.
Selecting the Message Server
First the administrator must define the Openfire server in Cinegy Archive, before the Cinegy Archive user can establish a proper connection.
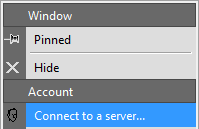
If the user loses the connection, open the "Messenger" menu and select a "Connect to a server" command.
|
Important
|
Refer to the Global Settings article in the Cinegy Archive Manager Manual for more information. |
Creating a New Account
You have to register as a user at the selected Openfire server. Choose the "Create a new account" command from the "Messenger" menu. The following dialog box appears:
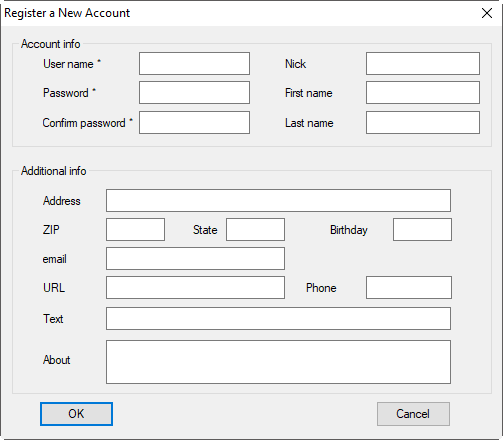
The fields marked with an asterisk are mandatory. Fill in the form and press the "OK" button to complete registering the account.
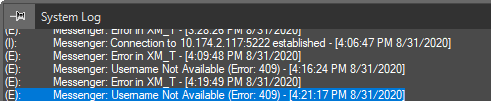
If you failed to create a new account, the corresponding error message will be displayed in the "System Log" window:
Once successfully registered, the following message appears:
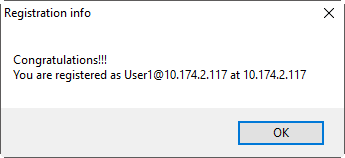
In the future, use this account to work with the Cinegy Messenger.
Logging in
Choose the "Login…" command in order to log in to the server. The following dialog box appears:
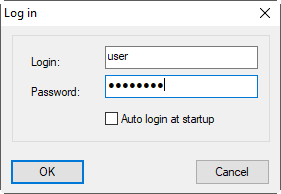
Enter your username and your password.
Adding and Deleting a Contact
In order to start a conversation with another user, you have to add the user’s name and details to your contact list.
|
Choose the "Add a contact" command; the following dialog box appears: |

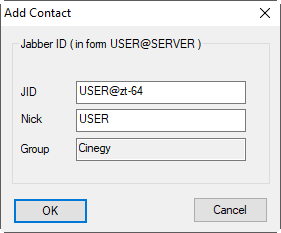
Enter the user’s info, press "OK". Now you can start conversing with the user.
|
To delete a contact, press the "Delete a contact" command. You will be asked if you really want to remove the contact. Press "Yes" to complete the deletion. |

Sending a Message
The upper panel of the Cinegy Messenger contains the list of your contacts:
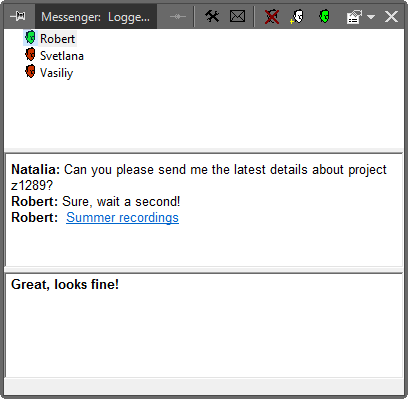
Any contacts who are online will have a green icon, and the contacts not online will have a red icon. Your contacts with unknown status will appear in gray. If you have an incoming message from a contact, the corresponding icon will blink.
Select a contact in the upper panel. The two lower panels will switch to the conversation with your selected contact.
Enter your message in the bottom message panel. Use the following keys to control the messages:
-
Enter to send a message;
-
Shift+Enter to start a new line.
Your conversation will appear in the middle conversation panel.
You can switch to a conversation with another contact that is online at any time simply by selecting the corresponding icon in the upper panel.
Filtering out Offline Contacts
|
Press the "Show only active users" button in order to filter out the contacts that are not currently online. Release the button to see all the online contacts. |

Logging out
Choose the "Logout" command from the Cinegy Messenger menu to end the session.
Inserting Cinegy Objects in Message
In order to send a link to a Cinegy Archive object (bin, clip, Sequence, etc.), simply drag the object into the Cinegy Messenger window and drop it in the appropriate place in the message. The link will be displayed as the blue underlined name of the object.
To open the received link, click it on the conversation panel.
|
Note
|
The recipient must be connected to the same Cinegy Archive database as you in order to get access to the objects you send. The recipient must also have the required rights to access any objects you send. |
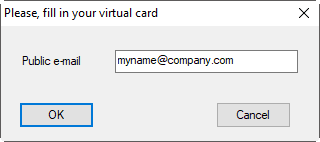
Set up Email
|
Press the "Options" button to set up your email address. When another user selects your icon and presses the "Send an email" button, the email will be sent to the address you set up here. |

Send Email
|
Press the "Send an email" button to launch your email client. The email address of the user you have selected will be automatically placed in the "To:" bar. |
