Timeline Interface
Reading time ~4 minutes

Toolbar
A quick overview of the toolbar:

| Button | Action |
|---|---|
|
Press the "Active" button to activate the Sequence. This will lock the Sequence for other users and enable the editing functions of Timeline. The keyboard shortcut is Ctrl+Enter. |
|
Press the "Save" button to save all the changes made to the Sequence. All saved modifications are visible only for the current user. To enable the saved modifications for other users, release this Sequence via the "Active" button. The keyboard shortcut is Ctrl+S. |
|
Press the "Cut" button to relocate the selected object within the same Timeline. The keyboard shortcut is Ctrl+X. |
|
Select an object on Timeline, press the "Copy" button to copy it and press "Paste" to insert the object to the position of the Timeline slider. The keyboard shortcuts are standard: Ctrl+C and Ctrl+V. |
|
To remove an object, select it and press the "Delete" button or hit the Delete key. |
|
Select "Snap to Edge" for easier positioning of objects, so that they automatically align with other Timeline objects. The keyboard shortcut is Ctrl+E. |
|
|
|
Position the Timeline slider near the edit and press the "Add a mix" button to place a mix. The keyboard shortcut is \. |
|
Position the Timeline slider over the mix you want to remove and press the "Remove an effect" button. The keyboard shortcut is Ctrl+\. |
|
The "Edit effects…" command opens the FX Manager window. It is enabled only when a video track is selected. |
|
The "Add an edit" command allows you to cut a clip at the current time slider position. You can also use the P shortcut to add a new edit. If the clip has linked audio, it will be cut too. |
|
To remove a segment and close the gap, mark the segment with the In and Out points in Sequence Viewer and press the "Extract" button. The keyboard shortcut is X. |
|
To remove a segment and leave the gap, mark the segment with the In and Out points in Sequence Viewer and press the "Lift" button. The keyboard shortcut is Z. |
|
Move the Timeline slider to the position you want to place the marker and press the "Add a marker" button. The keyboard shortcut is H. |
|
To remove a marker, place the Timeline slider over the marker and press the "Delete a marker" button. The keyboard shortcut is Ctrl+H. |
|
The "Previous event" button is used to jump to the previous event – the beginning and the end of an object or a marker. The shortcut is A. |
|
The "Next event" button is used to jump to the next event – the beginning and the end of an object or a marker. The shortcut is S. |
|
This function will remove the existing In point. The keyboard shortcut is D. |
|
This function will set the In point and this will be shown in the time bar of Timeline and in Sequence Viewer. The keyboard shortcut is I or E. |
|
This function will set the Out point and this will be shown in the time bar of Timeline and in Sequence Viewer. The keyboard shortcuts is O or R. |
|
This function will remove the existing Out point. The keyboard shortcut is F. |
|
The MRU menu gives access to the previously opened Sequences. The keyboard shortcut is Alt+Insert. |
|
The Timeline menu gives access to features like "Consolidate", "Export", audio recorder and many more. |
|
Close Timeline. |


Track Selector
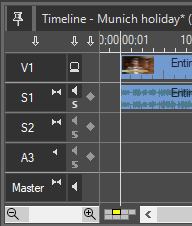
While working with multiple tracks, you can use the track selector to assist in performing the following actions:
-
Select
-
Manipulate
-
Delete
-
Lock
-
Monitor
|
The arrow buttons at the top of each column allow you to reset the status of all the buttons in the column. |

Keyframe Column
The "Keyframe" column is used to set different keyframes.
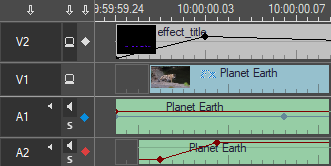
The black diamond represents opacity in video tracks. The red diamond represents audio volume in audio tracks and the blue diamond represents the pan/balance value also in audio tracks.
|
The arrow button at the top of the "Keyframe" column sets and clears all the keyframes at the current time slider position. |
|
Note
|
The rubber band line can be edited only when clip mode is enabled in Audio Mixer. |
|
Important
|
Refer to the Working with Audio section for more information about working with keyframes. |
Editing Area
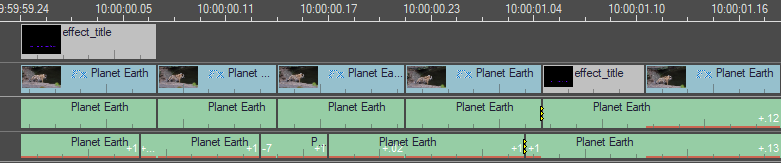
The editing area displays the corresponding clips of the Sequence in the respective video and/or audio track.