Creating Voice-Over
Reading time ~5 minutes
The voice-over feature allows you to record a stereo signal directly to Timeline. This saves the extra steps of recording and digitizing the narration and inserting it into the project.
You can access the voice-over feature from the Timeline main menu with the "Audio recorder…" command. The "Audio recorder" window appears:
The voice-over is recorded and new audio clips are immediately created in your bin.
|
Note
|
The audio is recorded as Wave Stereo 16 bit 48kHz to the High quality only. |
The recorded audio clip is also saved to the daily Roll inside the default folder assigned as a default voice-over Bin. A daily Roll, containing the current date in its name, is automatically created every day when you start the Cinegy Desktop application for the first time:

You can select a different directory via Cinegy Archive Manager.
|
Important
|
Refer to the Default Folders, Bins paragraph in the Cinegy Archive Manager Manual for details on defining the default voice-over Bin. |
|
Note
|
Please note that user starting Cinegy Desktop for the first time on the current date should have the corresponding "Modify" rights for the folder assigned as default voice-over Bin. |
Input
|
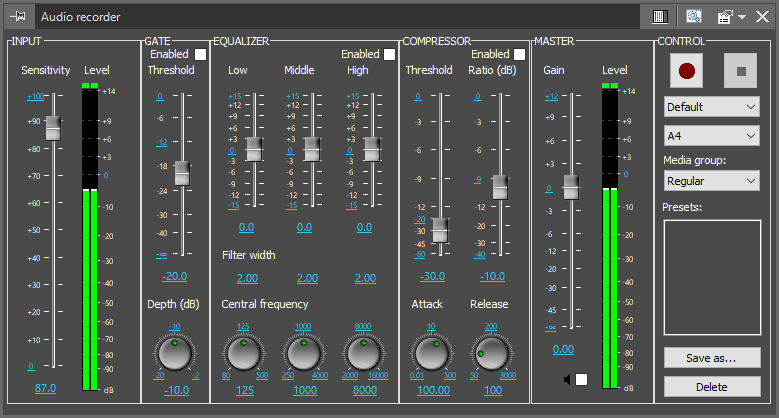
The input sensitivity level directly controls the selected audio board input. The level indicator shows the actual input level. Sensitivity:
You can use the slider to regulate the sensitivity level or enter a desired value into the numeric text field.
|
Gate
|
To eliminate noise during a pause in audio recording, set the threshold level to the desired input signal level. Input signal below this level will then be processed. The depth of the "Gate" setting can be adjusted by clicking on the "Depth" adjustment knob. While keeping the left mouse button pressed, move the mouse left or right; the current value is shown as a decimal below the adjustment knob. The minimum, maximum and middle values can be set simply by clicking on the desired value displayed around the adjustment knob. If you wish to ignore the "Gate" settings during voice-over recording, deselect the corresponding checkbox and the recorder will bypass these settings |

Equalizer
|
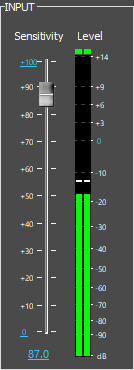
The equalizer is set up in three parts, letting you adjust the "Low", "Middle" and "High" frequencies. Every frequency band has the following parameters:
If you wish to ignore the equalizer settings during voice-over recording, deselect the checkbox and the recorder will bypass these settings. |
Compressor
|
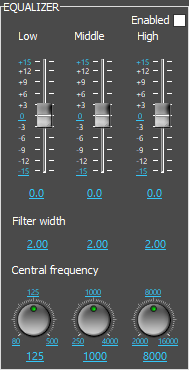
The compressor device allows you to narrow the dynamic range of the voice to automatically provide linear volume to the voice recording.
If you wish to ignore the compressor settings during voice-over recording, deselect the checkbox and the recorder will bypass these settings. |
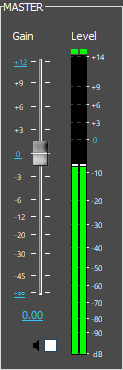
Master
|
Here you can adjust the amplification of the output signal, in dB. The level meter shows the level of the actual output signal.
|
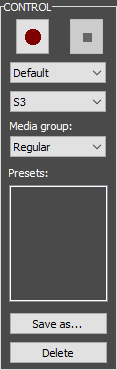
Control
|
|
|
Note
|
If both In and Out points are set, the voice-over will be inserted into the project at the In point; when the time reaches the Out point, the recording will stop automatically. The voice-over object is always colored in light brown. |
|
Press the "Record" button to start the recording. |


|
Press the "Stop" button to stop the recording. |

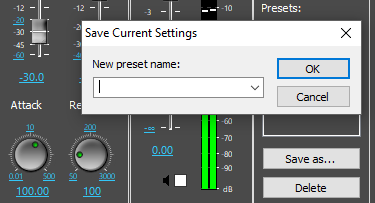
Audio Recorder Presets
You can save your current settings as audio processing presets. To do this, simply press the "Save as…" button and then enter a name for your new preset.
|
Note
|
If you have unchecked one or more checkboxes regarding the "Gate", "Equalizer" and "Compressor" settings, this is also saved in your audio recorder preset. |
Press the "Delete" button to delete a currently selected preset.
Recommended Audio Hardware Setup
We recommend using the following hardware components:
-
Microphone
-
Audio mix device
-
Sound card
-
Headphones
The minimum hardware requirements are:
-
Headphones with microphone or separate microphone
-
Sound card