Panasonic P2 Media Import
Reading time ~3 minutes
The "Panasonic P2 media" plug-in provides user with the ability to import the P2 card’s video and audio content together with the associated metadata to the Cinegy Archive database through the common import process.
|
Tip
|
Configuration of "Panasonic P2 media" is similar to the "Audio CD" tool configuration. |
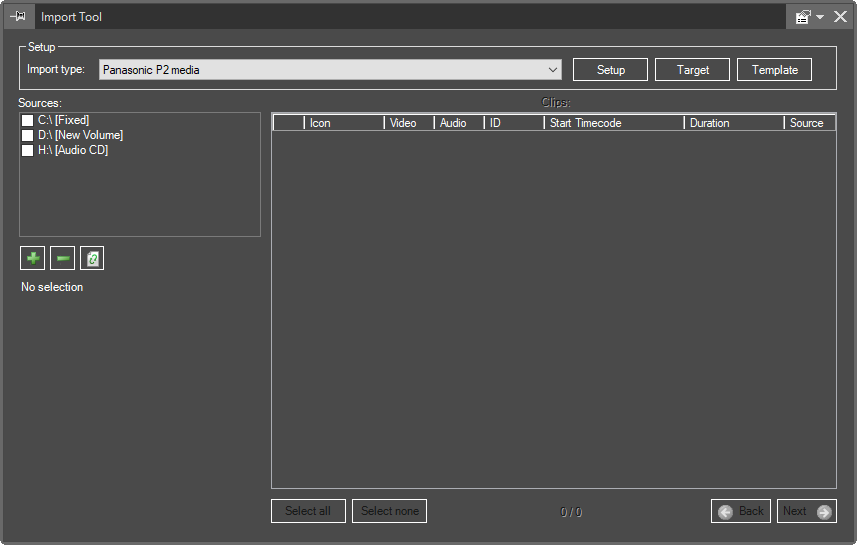
P2 Import

|
The "Sources" field displays the list of your system drives. If you need to add or remove a virtual P2 card source (for example, a network shared storage with the P2 card content), press the corresponding button. The following dialog box appears: |
|
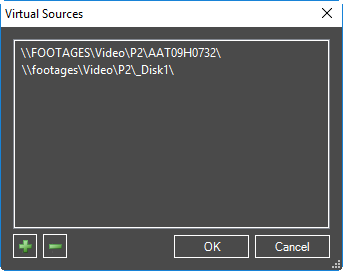
Use the  and
and  buttons to compose a list of virtual sources.
Press "OK" to add your virtual sources to the "Sources" list.
|
The "Refresh" button forces the "Sources" list to refresh. |
In the "Sources" field, select the required P2 source or sources you want to load. If the P2 source is not selected, its content will not be used. The P2 cards' content will be loaded from the specified P2 sources automatically:
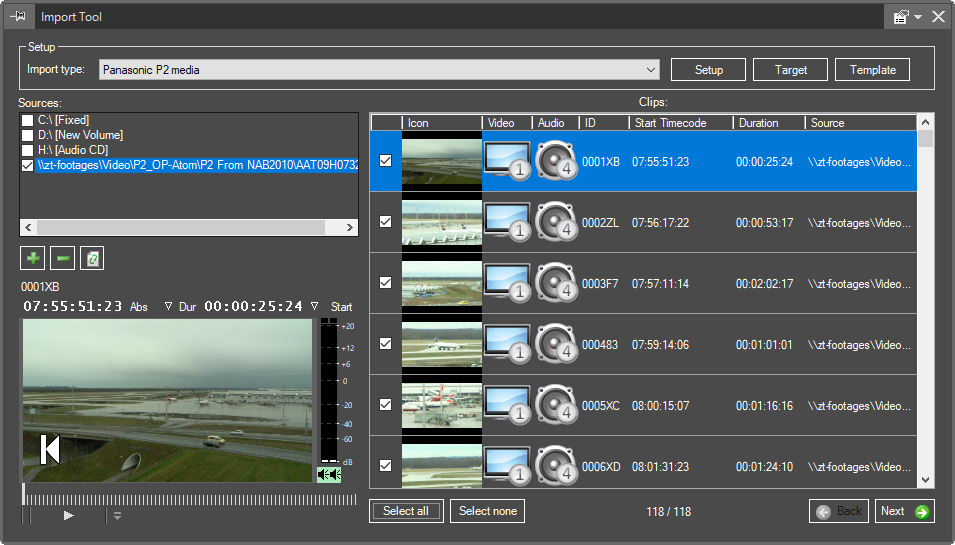
The icons in the "Video" and "Audio" columns inform user about the presence or absence of audio and video content for each P2 clip. The red circle on the icon means the audio and/or video is not available. If audio or video is missing, the corresponding P2 source will not be available for the import:
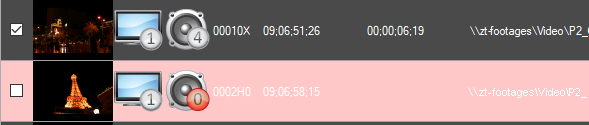
The number on the icons in the "Audio" and "Video" columns displays the number of tracks available in the corresponding P2 clip.
In the bottom left corner there is a clip viewer that allows you to preview the clip highlighted in the list.
|
Select the P2 clips you want to import or use the "Select all" button to select all the clips. |
|
Press the "Select none" button to discard your selection. |
|
Press the "Next" button to proceed with the P2 import for the selected clip(s): |
|


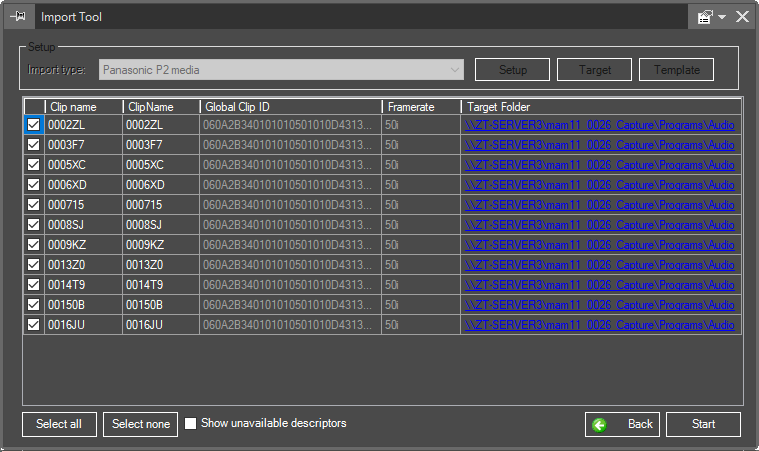
The metadata fields assigned in Cinegy Archive Manager with read-only permission are highlighted with the gray background and cannot be changed. Other metadata fields can be edited according to your needs directly in the "Import Tool" dialog.
|
Important
|
Refer to the Metadata Descriptors Management paragraph for details about the importing process. |
Here select the P2 clips to be imported and edit their metadata, if needed. The destination folder can be reassigned individually for each clip in the rightmost "Target Folder" field.
|
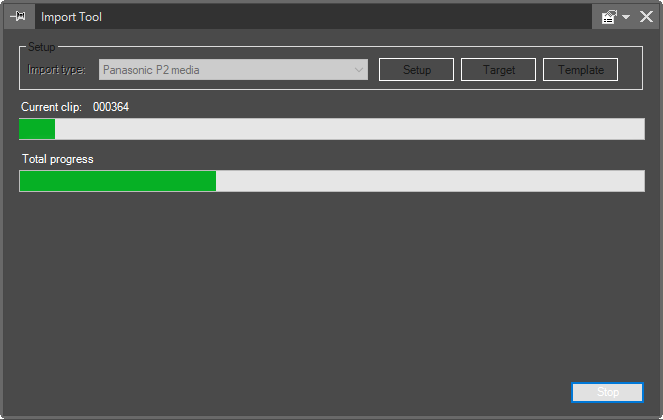
Press the "Start" button to start the import of the selected clip(s). The import progress for each P2 clip will be indicated with the following progress bar: |
|

|
Press "Stop" to stop the P2 import process. You will be asked to confirm your decision: |
|

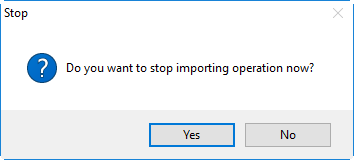
Press "No" to compete the current clip importing and then stop the operation. To continue the importing process, press "Yes".
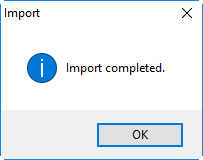
Once the P2 import is successfully completed, the following message appears informing you about the amount of clips that were successfully imported:
|
Note
|
You can start using the media material which is still being imported. |
Once the import process is completed, the Roll containing all the P2 clips imported as master clip(s) together with the associated metadata is created in the defined folder:

|
Note
|
When more than one destination folder for the imported media is defined, the Rolls will be correspondingly created in the selected folders. |